Thursday, November 29, 2018

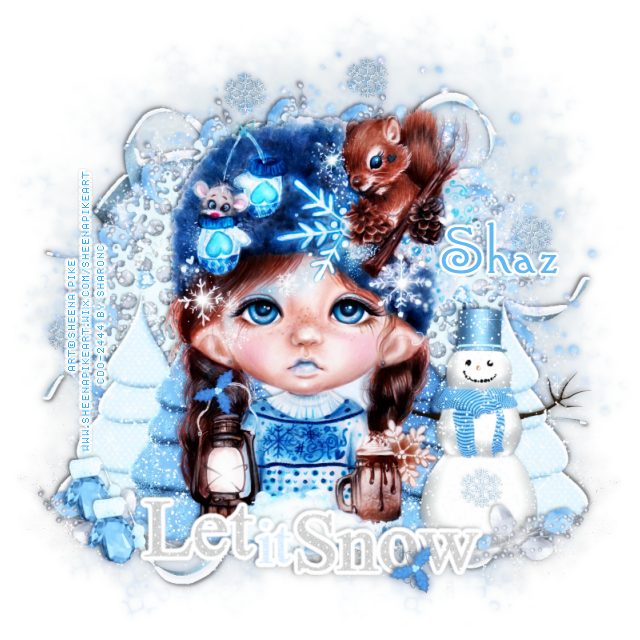
FTU Let it Snow


This tut was written Nov 29th, 2018 for those with a basic knowledge of psp.
I am using the awesome artwork of Sheena Pike
The tube is "14-1"
You need a license to use this tube, do not use without a license.
You can find this his art at CDO store now  HERE

I used PSPX...but any of them should work.
FTU kit Let it Snow by Designs by Vaybs  HERE
Check out the rest of the blog HERE
WSL_Mask 535  HERE
Filters
Mura Meister Copies-Encircle
EyeCandy 4000-Gradient Glow
xero-Soft Mood

Font of choice,  I used Connie

Drop shadow is usually V-2 H-2 Black, 50, 5, use what you prefer.
Let's get started
*Remember to add your drop shadow as you go along*

Open a new image 800 x 800
Select all, add a new layer, paste paper 6 into selections, apply your mask, delete,
merge group.
Paste element 35 on the mask, give it a blue color for the drop shadow.

Resize element 4 to 45%, apply Mura Meister Copies-Encircle, first number 
on 18, paste.
Resize element 42 to 45%, apply Mura Meister Copies-Encircle, first number
on 14, paste above the first circle.
Take your free hand tool, draw around the frame, paste paper 6, invert,
delete, move below the two frames, select none.

Paste your tube on top of the frame in the center.

Paste element 11 on the mask layer at the top, duplicate, flip, mirror, adjust at 
the bottom.
Being on the top layer now, paste element 25 at the bottom, resize larger to 105%.
Add a fat white gradient glow with EyeCandy 4000-Gradient glow, width on 3.

Resize element 45 to 65%, paste on the right below the tube layer, erase the
circle part at the bottom so it blends in better.

Resize element 4 to 35%, free rotate to the right at 20 degrees, paste at the
lower right below the wordart, above the snowman, duplicate, mirror.
Resize element 26 to 65%, paste on the lower left behind the tube, duplicate,
mirror, adjust behind the snowman.

Resize element 2 to 45%, paste at the lower left being on the top layer,
duplicate, move down a little from the other one.

Resize element 63 to 20%, paste at the bottom on the wordart where 
you like, duplicate, move up on the lantern handle.
Paste element 3 below the tube layer on one side, duplicate, mirror.
Resize element 13 to 15%, add noise at 75%, paste on the snowman, duplicate
a few more times and place where you like.

Add any other elements that you would like, make it your own.
Always readjust your elements how you like them before you merge your tag.

Once merged, duplicate, go to Adjust, Blur, Gaussian blur, number on 4,
change the blend mode to Soft Light, apply xero filter-Soft Mood, 
merge down.

Once happy with your tag, close off any background used, 
crop your tag to make sure no shadows or anything on the edges, merge visible, 
resize.  Now add your copyright and name.

That's it
Hope you enjoyed doing my tut.


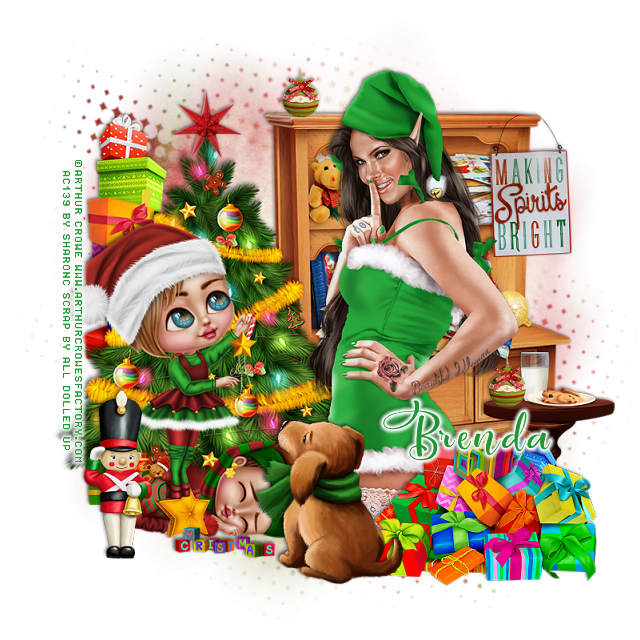
PTU Shhhhh Elves in Playland


This tut was written Nov 29th, 2018 for those with a basic knowledge of psp.
I am using the awesome artwork of Arthur Crowe
The tube is called "Noelle"
You need a license to use this tube, do not use without a license.
You can find this tube at his store  HERE

I used PSPX...but any of them should work.
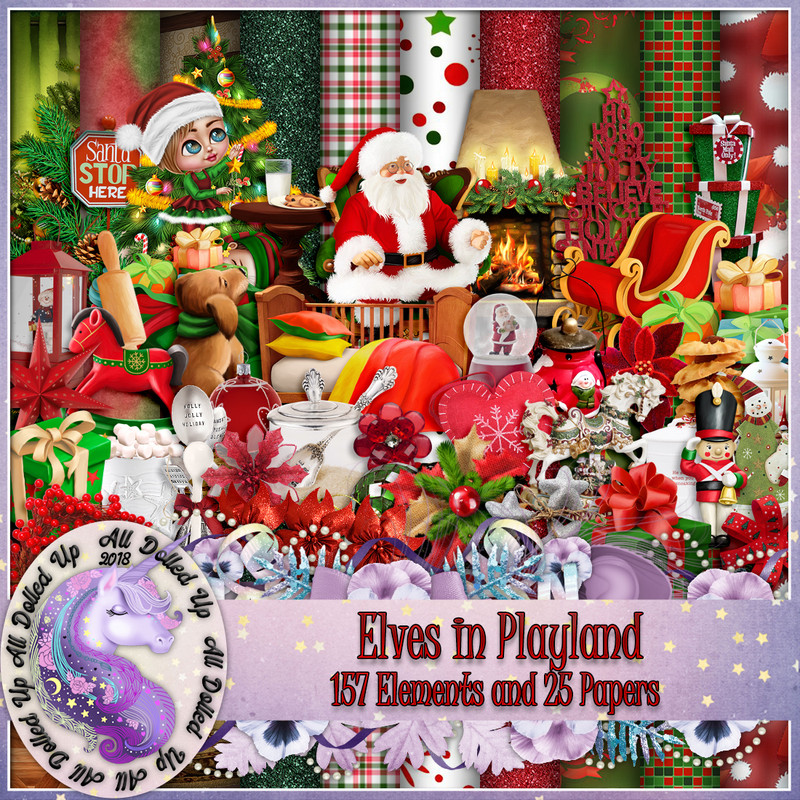
PTU kit Elves in Playland by All Dolled Up  HERE HERE, HERE or HERE
See what kind of mischief the elves can get into with these 157 elements and 25 papers. Whether it's wrapping gifts or decorating the tree fun can be by all. 
Dragonfly Mask 30  HERE
Check out the rest of the blog HERE

Font of choice,  I used Pacific Again

Drop shadow is usually V-2 H-2 Black, 50, 5, use what you prefer.
Let's get started
*Remember to add your drop shadow as you go along*

Open a new image 800 x 800
 Paste paper 3, apply your mask, delete, merge group.

Resize your tube to 65%, paste on the right.

Resize element 59 to 95%, paste on the right behind the tube.
Resize element 155 to 90%, paste on the left above the desk element.
Resize element 53 to 50%, paste at the lower right above the tube.
Resize element 86 to 35%, mirror, paste at the bottom being on the top layer.

Resize element 5 to 35%, paste at the lower left.

Resize element 54 to 30%, paste on the right on the desk, erase a little of the 
wire so it looks like it is hanging on the edge.
Resize element 97 to 40%, paste on the right below the packages.

Resize element 55 to 10%, paste on the table with the milk and cookies, duplicate,
move on top of the cabinet.

Resize element 22 to 15%, paste on top of the tree.
Resize element 65 to 85%, paste on the left on the mask layer behind the tree.

Add any other elements that you would like, make it your own.

Once happy, close off any background you had.
 Crop your tag to get rid of any stray edges, merge visible.
Resize, sharpen, add your Copyright and name.

That's it
Hope you enjoyed doing my tut.


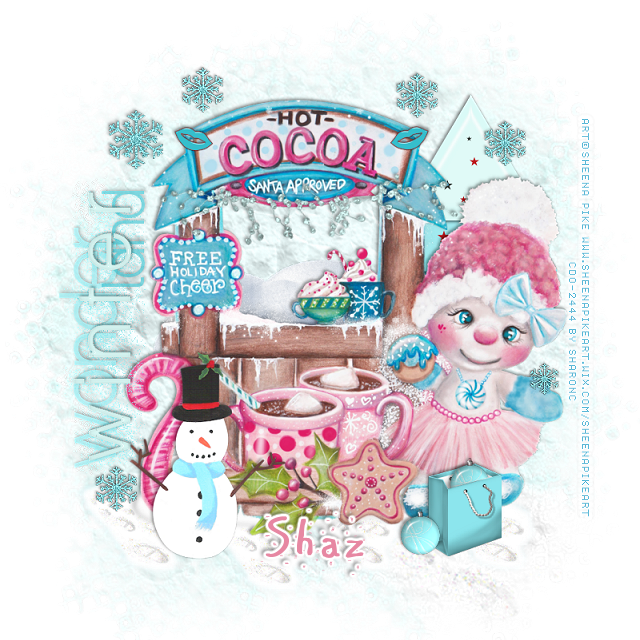
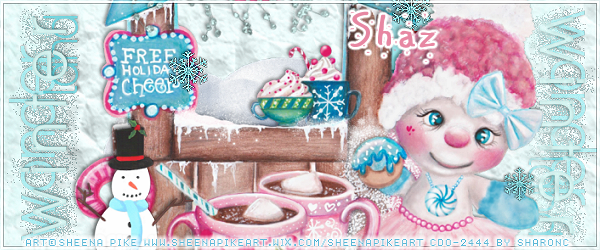
FTU Free Holiday Cheer


This tut was written Nov 29th, 2018 for those with a basic knowledge of psp.
I am using the awesome artwork of Sheena Pike
The tube is "26-1"
You need a license to use this tube, do not use without a license.
You can find this his art at CDO store now  HERE

I used PSPX...but any of them should work.
FTU kit Winter Diva Collab "Leah's part" by Gimptastic  HERE
Check out the rest of the blog HERE
WSL_Mask 535  HERE
Filters
EyeCandy 4000-Glass
AAA Frames-Foto Frame

Font of choice,  I used AR Carter

Drop shadow is usually V-2 H-2 Black, 50, 5, use what you prefer.
Let's get started
*Remember to add your drop shadow as you go along*

Open a new image 800 x 800
Select all, add a new layer, paste paper 6 into selections, apply your mask, delete,
merge group, duplicate, merge down.

Resize your tube to 70%, paste about center.

Paste the wordart, free rotate to the left at 90 degrees, move to the left.

Resize the footprints to 40%, paste at the lower left below the tube layer,
duplicate, move to the right a little, duplicate again, move more to the right and
up just a little, duplicate once more, move more to the right.

Paste the tree on the right behind the tube of the girl.

Resize snowflake 1 to 25%, paste at the upper left, add noise at 50%, duplicate,
resize to 75%, sharpen, move up and over a little from the first one, duplicate, move to 
the right, duplicate, move to the right on the tree, duplicate again, move down
on the left below the wordart. 
Duplicate once more, resize to 70%, sharpen, paste on the hand of the girl.

Paste the string on the stand below santa approved word, free rotate to 
the left at 17 degrees.

Resize the snowman to 65%, paste at the lower left being on the top layer.
Resize the snowdrift to 75%, paste below the tube layer and up so a little
shows in the open window part.

Resize the bag to 55%, paste at the lower right in front of the girl.
Resize element 2 to 20%, apply EyeCandy 4000-Glass, bevel 6.97, Smoothness 75,
color on white, paste by the bag, duplicate, move on the bag and erase the 
bottom part so it looks like it is in the bag.

Resize lips 2 to 20%, paste at the top on the sign, duplicate, mirror.

Add any other elements that you would like, make it your own.
Always readjust your elements how you like them before you merge your tag.

Signature Tag
If you want to do a Signature tag, don't merge your tag just yet.
Open a new image 600 x 250, paste paper 6.
On your tag close off the wordart and snowman, copy and paste, resize to 
85%, adjust.

Go back and open the wordart, copy, paste resize to 65%, paste on the left, duplicate,
mirror, flip, move to the right below the mask of the tag.
Copy and paste the snowman, resize to 65%, paste at the lower left.
Once happy, merge visible and add a frame of choice.
I used AAA Frames-Foto Frame, width on 3, color white and lower the opacity to
around 25.
Add your copyright and name.

Avator of choice, I did a circle one, but make what you prefer. 

Once happy with your tag, close off any background used, 
crop your tag to make sure no shadows or anything on the edges, merge visible, 
resize.  Now add your copyright and name.

That's it
Hope you enjoyed doing my tut.


Monday, November 26, 2018

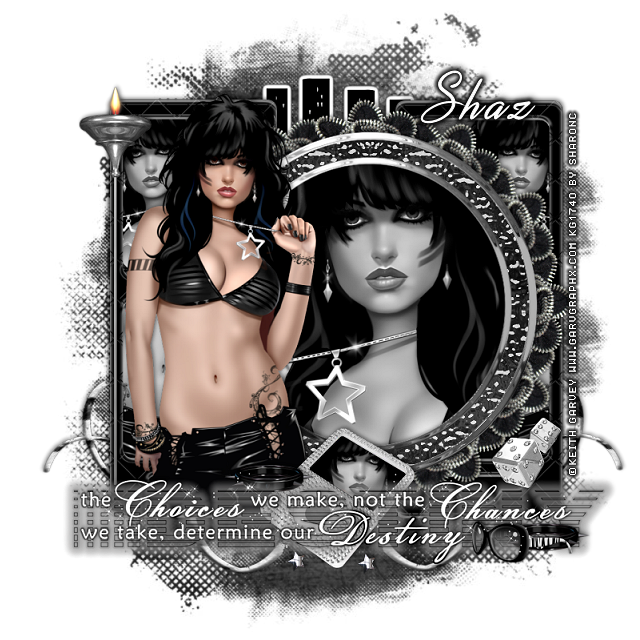
FTU Destiny


This tut was written Nov 26th, 2018 for those with a basic knowledge of psp.
I am using the awesome artwork of Keith Garvey
The tube is "Motley Tammy"
I bought mine when he still had his store.
You need a license to use this tube, do not use without a license.
You can find this his art at CDO store now  HERE

I used PSPX...but any of them should work.
FTU kit Let's Try by Gimptastic  HERE
Check out the rest of the blog HERE
Mask of Choice, I used Miz Teeques Mask 234  HERE
Check out the rest of the blog HERE
Wordart HERE
Click the wordart, it will take you to 4shared, then click it again, right click, save.
Check out the rest of the blog HERE
Filters
Mura Meister Copies-Encircle

Font of choice,  I used Distant Stroke_Medium

Drop shadow is usually V-2 H-2 Black, 50, 5, use what you prefer.
Let's get started
*Remember to add your drop shadow as you go along*

Open a new image 800 x 800
Select all, add a new layer, paste paper 6 into selections, apply your mask, delete,
merge group, resize larger to 120, move down, duplicate, move up more.

Resize your tube to 75%, paste to the left.

Paste frame 4 and move to the right some, click inside with your magic wand,
expand by 5, mirror and paste your middle size tube, invert, delete, then paste 
paper 3, delete, move below the tube. 
Change the blend mode of the tube to Luminance(L).

Resize flower 2 to 60%, apply Mura Meister Copies-Encircle, first number
on 12, move below the paper layer of the frame.

Resize the wordart to 55%, paste at the bottom above the tube, then select all, 
float, defloat,  expand by 2, add a new layer, move below the wordart, fill with black,
select none.
Resize frame 1 to 95%, flip,  move below the flower circle to the right, click inside
with your magic wand, expand by 5, paste paper 6, invert, delete, then paste your tube,
delete, select none. 
Change the blend mode to Luminance(L), then merge the paper,
tube and frame together, duplicate, mirror.
Paste the stem candle on the left below the tube layer.

Resize the lPod to 55%, paste below the wordart, take your free hand tool, draw
around the black screen part, paste the face of your tube, invert, delete, select none.
Change the blend mode to Luminance(L).

Resize the choker to 50%, paste above the lPod, duplicate, move above the
wordart to the lower right.
Resize the sunglasses to 50%, paste at the lower right above the choker.
Resize the dice to 35%, paste on the right above the wordart.

Resize the Zebra swirl to 95%, free rotate to the left at 90 degrees, move to the bottom 
right above the mask layer, duplicate, mirror.
Being on the top layer now, paste the sparkles on the wordart.
Past the city scape on the mask layer at the top, duplicate, mirror, erase the
parts you don't want showing, merge together. 
Go to Adjust, Hue and Saturation, Colorize, both numbers on 0.
Resize star 2 to 10%, paste at the bottom on one side of the lPod, duplicate, move
to the other side. 

Add any other elements that you would like, make it your own.
Always readjust your elements how you like them before you merge your tag.

Once happy with your tag, close off any background used, 
crop your tag to make sure no shadows or anything on the edges, merge visible, 
resize.  Now add your copyright and name.

That's it
Hope you enjoyed doing my tut.