Saturday, September 30, 2023

FTU Pierrot's Love Song Cluster

              Cluster and Spray 

AI elements by Adrienne's Designs
You can check out her blog HERE
Do not claim as your own

"For personal use only"  


PTU Sublime Beauty


 This tut was written  September 29th, 2023 for those with a basic knowledge of psp. 

I am using an awesome tube ©Goldwasser
It is included in the kit
Everything used in this tutorial is included in the kit.
Read the TOU for credits

I used PSP2020...but any of them should work.
PTU Scrap Sublime Beauty by Scraps Dimensions  HERE
Check her blog to see what stores her kits are in and check out 
all of her kits.
Mask of choice, I used Vivienne's Digital Tagging Mask 52 and 85 HERE
Check out the rest of the blog HERE

 Font of choice, I used Trendencia

Drop shadow as you go is V -2 H -4, 40, 10, or use what you prefer.
Let's get started
*Remember to add your drop shadow as you go along*

Open a new image 800 x 800, paste paper 8, apply mask 85, delete, 
move to the bottom, stretch out a little on the sides.
Paste paper 8, apply mask 52, delete, duplicate, mirror.

Paste element 30 on the upper left, click inside with the magic wand,
expand by 10, paste paper 8, invert, delete, keep selected, paste your tube,
 invert, delete, change the blend mode to Overlay, select none, 
duplicate the tube, merge down.
Resize element 19 to 75%, paste on the bottom left.
Resize element 24 to 85%, paste on the right below the chair layer.

Resize your tube to 55%, paste at the bottom above the chair.

Resize element 66 to 40%, paste on the bottom left behind the tube.
Resize element 21 to 35%, paste on the right below the tube.
Resize element 11 to 75%, paste on the right above the mask.
Resize element 16 to 75%, paste on the upper right behind the flowers.
Resize element 49 to 75%, paste on the mask behind the chair, duplicate,
mirror.

Resize element 58 to 25%, paste at the bottom left above the tube, duplicate.
Resize element 18 to 30%, paste at the bottom right.
Resize element 46 to 25%, paste at the bottom.
Resize element 38 to 15%, paste by the cup.
Resize element 52 to 40%, paste behind the tube above the books.
Resize element 2, 8 and 17 to 30%, paste at the bottom.

Resize element 50 to 30%, paste at the bottom right below the gift box,
duplicate, mirror, move above the books.
Resize element 28 to 20%, paste at the bottom right.

Add any other elements that you would like, make it your own.
Always readjust your mask and elements how you like them before you
 merge your tag, resize, sharpen.

Crop your tag to be sure no shadows or lines are on the edges.
 Then add your copyright and name.
That's it

Hope you enjoyed doing my tut.     


Friday, September 29, 2023

PTU Festive Season


 This tut was written  September 29th, 2023 for those with a basic knowledge of psp. 

I am using a tube AI generated by Kiya Designs
It is included in the kit
Everything used in this tutorial is included in the kit.
Read the TOU for credits

I used PSP2020...but any of them should work.
PTU Scrap Festive Season by Scraps Dimensions  HERE
Check her blog to see what stores her kits are in and check out 
all of her kits.
Mask of choice, I used Vivienne's Digital Tagging Mask 32 HERE
Check out the rest of the blog HERE

 Font of choice, I used Sweetline free

Drop shadow as you go is V -2 H -4, 50, 10, or use what you prefer.
Let's get started
*Remember to add your drop shadow as you go along*

Open a new image 800 x 800, paste paper 1, apply your mask.
Resize element 28 to 90%, paste at the upper left.
Resize element 15 to 90%, paste above the tree.
Resize element 10 to 85%, paste above the house.
Mirror element 31, paste on the left behind the house, erasing any part
showing at the bottom. 

Resize element 3 to 30%, paste at the top right below the tree.
Resize the tube to 50%, paste at the bottom above the arch.
Resize element 62 to 25%, paste on the left behind the arch.
Resize element 42 to 50%, paste behind the tube on the right.
Resize element 21 to 40%, paste on the left behind the mushroom.

Resize element 22 to 30%, paste at the bottom left above the arch.
Resize element 9 to 40%, paste at the bottom above the tube.
Resize element 5 to 30%, paste at the bottom right behind the dog.
Resize element 18 to 20%, paste at the bottom above the dog basket.
Resize element 26 to 20%, paste at the bottom left.
Resize element 27 to 60%, free rotate to the right at 25%, paste behind the 
tube on the right.

Resize element 21 to 75%, mirror, paste on the right below the mask,
move down below the umbrella.
Resize element 25 to 30%, paste behind the tube at the bottom.
Resize element 54 to 25%, paste at the bottom above the cup.

Add any other elements that you would like, make it your own.
Always readjust your mask and elements how you like them before you
 merge your tag, resize, sharpen.

Crop your tag to be sure no shadows or lines are on the edges.
 Then add your copyright and name.
That's it

Hope you enjoyed doing my tut.     


PTU Vampire Queen


 This tut was written  September 29th, 2023 for those with a basic knowledge of psp. 

I am using the awesome tube by ©Stella Felice Art

The tube is called Vampiressa
You need a license to use this tube, please do not use without a license.
You can find the tube at VMA store HERE

I used PSP2020...but any of them should work.
PTU Scrap Vampire Queen  by Curious Creative Dreams  HERE HERE
"Tube is NOT included"
You can find all Curious Creative Dreams kits HERE
Mask of choice, I used Vivienne's Digital tagging Mask 48 HERE
Check out the rest of the blog HERE

 Font of choice, I used The Night Creatures 2

Drop shadow as you go is V -2 H -4, 50, 10, or use what you prefer.
Let's get started
*Remember to add your drop shadow as you go along*

Open a new image 800 x 800, paste paper 6, apply your mask.

Resize element 34 to 50%, paste at the upper left, duplicate, move to the right
 above the mask layer.
Resize element 60 to 85%, mirror, paste on the mask layer at the top.
Resize element 3 to 40%, mirror, paste above the house on the right.
Resize element 5 to 50%, paste behind the house to the left, duplicate, 
mirror, resize smaller to 75%, move above the house behind the tube.

Resize your tube to 30%, paste to the right of the house.

Resize element 36 to 30%, paste at the bottom right above the tube.
Resize element 35 to 40%, paste behind the tube on the right.
Resize element 18 to 25%, paste on the right below the flower.
Resize element 22 to 155, paste at the bottom right above the pumpkins.
Resize element 7 to 25%, paste on the left above the house.

Resize element 62 to 50%, paste on the right behind the ride, duplicate,
mirror, move up a bit.
Resize element 8 to 25%, paste behind the pumpkin at the lower right, 
duplicate, move to the left below the pumpkin.

Resize element 44 to 25%, paste at the bottom being on the top layer.
Resize element 27 to 25%, paste at the bottom above the tube.
Resize element 21 to 15%, paste at the bottom.
Resize element 30 to 25%, paste at the bottom.
Resize element 17 to 15%, paste behind the flower.
Resize element 12 to 20%, paste on the left.
Resize element 31 to 20%, paste behind the skull on the left.
Paste element 103 below some of the elements where you like, duplicate,
move again where you like.

Add any other elements that you would like, make it your own.
Always readjust your mask and elements how you like them before you
 merge your tag, resize, sharpen.

Crop your tag to be sure no shadows or lines are on the edges.
 Then add your copyright and name.
That's it

Hope you enjoyed doing my tut.   

Tag for Stu 


PTU Mushroom Witch


This tut was written  September 29th, 2023 for those with a basic knowledge of psp. 

I am using the awesome tube by ©Alehandra Vanhek

The tube is called Irma and Kitten
You need a license to use this tube, please do not use without a license.
You can find the tube at VMA HERE

I used PSP2020...but any of them should work.
PTU Scrap Mushroom Witch by Doodle by Design  HERE
"Tube is NOT included"
You can find all Doodle by Design kits  HERE
Mask of choice, I used Vivienne's Digital Tagging Mask 41 and 85 HERE
Check out the rest of the blog HERE

 Font of choice, I used The Night Creatures 2

Drop shadow as you go is V -2 H -4, 50, 10, or use what you prefer.
Let's get started
*Remember to add your drop shadow as you go along*

Open a new image 800 x 800, paste paper 22, apply mask 85, delete,
merge group, move to the bottom, duplicate, mirror.
Paste paper 10, apply mask 41, delete, merge group.

Paste frame 3 on the mask layer.
Paste element 73 toward the top.
Resize element 26 to 50%, paste on the left.
Resize element 27 to 50%, paste on the right, duplicate, mirror, move 
up on the left.
Paste element 57 on the right above the frame, duplicate, mirror.
Resize your tube to 35%, paste at the bottom.

Resize element 5 to 40%, paste on the left behind the tube.
Resize element 26 to 25%, paste above the brown box.
Resize element 32 to 30%, paste on the left below the tube.
Resize element 77 to 40%, paste on the left behind the brown box.
Resize element 29 to 30%, paste at the bottom left above the tube.

Resize element 1 to 20%, paste at the bottom above the tube.
Resize element 28 to 30%, paste below the cup.
Resize element 54 to 25%, paste at the bottom left, duplicate, mirror, move 
by the mushrooms.
Resize element 13 to 30%, paste on the right below the fruit.
Resize element 7 to 40%, paste above the tube on the right.

Resize element 30 to 25%, paste below the cat.
Resize element 37 to 25%, paste on the right below the cat.
Resize element 11 to 15%, paste at the bottom right above the books.
Go back to the red fruit on the right, duplicate twice, move one under the 
cat and the other one above the cat.
Paste element 15 at the top above the flowers.
Paste element 109 behind the tube on the left, duplicate, mirror.

Add any other elements that you would like, make it your own.
Always readjust your mask and elements how you like them before you
 merge your tag, resize, sharpen.

Crop your tag to be sure no shadows or lines are on the edges.
 Then add your copyright and name.
That's it

Hope you enjoyed doing my tut

Tag for Lizzy   


Thursday, September 28, 2023

PTU Lost In memory


This tut was written  September 28th, 2023 for those with a basic knowledge of psp. 

I am using the awesome tube by ©Verymany

The tube is called Steampunk 115
You need a license to use this tube, please do not use without a license.
You can find the tube at Verymany HERE

I used PSP2020...but any of them should work.
PTU Scrap Lost In Memory by Wicked Princess Scraps  HERE  HERE
"Tube is NOT included"
You can find all Wicked Princess Scraps kits HERE
Mask of choice I used Miz Teeques Mask 197 HERE
Check out the rest of the blog HERE
Filter
Mura Meister Copies-Encircle

 Font of choice, I used Time To Get a Watch

Drop shadow as you go is V -2 H 4, 50, 10, or use what you prefer.
Let's get started
*Remember to add your drop shadow as you go along*

Open a new image 800 x 800, paste paper 10, apply your mask.

Paste element 41 to the left a little.
Resize element 37 to 95%, below the flower to the right.
Resize element 39 to 30%, apply Mura Meister Copies-Encircle, first 3 numbers
on 16, 40, 60, move below the window, erase the parts showing in the window.
Resize element 46 to 50%, mirror, paste at the bottom left.
Paste element 89 at the bottom left above the mask layer so the gears shows,
duplicate, move to the upper right, erase the parts showing in the window.
Paste element 70 at the top above the mask.

Resize the tube to 30%, paste above the car.
Resize element 39 to 40%, paste at the bottom right above the tube.

Resize element 67 to 35%, paste at the bottom right below the flower.
Resize element 113 to 35%, paste at the bottom above the tube.
Resize element 90 to 25%, paste at the bottom being on the top layer.
Resize element 117 to 30%, paste at the bottom right.
Resize element 79 to 15%, paste at the bottom by the dog.

Resize element 108 to 25%, paste at the bottom right behind the dog, duplicate,
mirror.
Resize element 89 to 30%, paste above the tube where you like.
Resize element 77 to 30%, paste at the bottom, duplicate, move over.
Resize element 80 to 30%, mirror, paste at the upper right.
Resize element 93 to 50%, mirror, paste on the right above the window.

Add any other elements that you would like, make it your own.
Always readjust your mask and elements how you like them before you
 merge your tag, resize, sharpen.

Crop your tag to be sure no shadows or lines are on the edges.
 Then add your copyright and name.
That's it

Hope you enjoyed doing my tut.  

Tag for Shani  


PTU Cozy Autumn


This tut was written  September 28th, 2023 for those with a basic knowledge of psp. 

I am using the awesome tube by ©Verymany 

The tube is called Cozy Morning 7
You need a license to use this tube, please do not use without a license.
You can find the tube at Verymany HERE

I used PSP2020...but any of them should work.
PTU Scrap Cozy Autumn by Doodle by Design  HERE
"Tube is NOT included"
You can find all Doodle by Design kits  HERE
Mask of choice, I used RD Mask 685 HERE
Check out the rest of the blog HERE

 Font of choice, I used Vacation in Phuket

Drop shadow as you go is V -2 H -4, 40, 10, or use what you prefer.
Let's get started
*Remember to add your drop shadow as you go along*

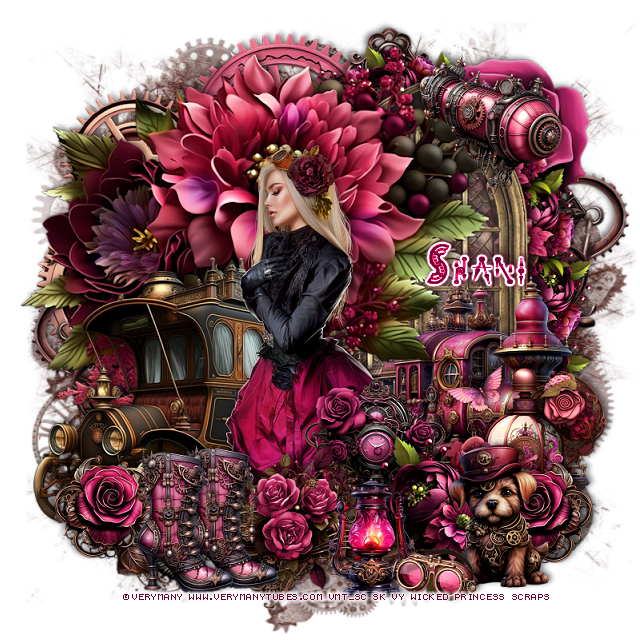
Open a new image 800 x 800, paste paper 5, apply your mask.

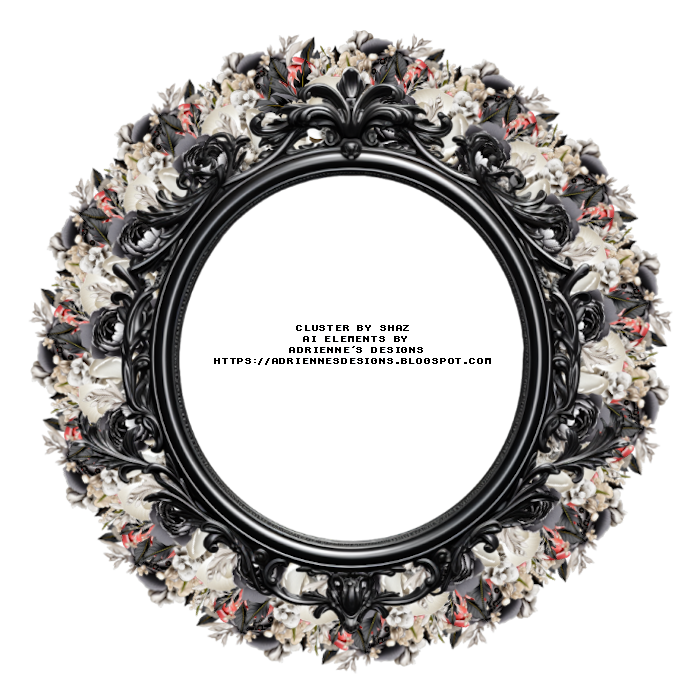
Resize frame 3 to 75%, paste, click inside with the magic wand, expand,
paste paper 13, invert, delete, keep selected, resize your tube to 75%, paste
in the frame, delete, select none.
Duplicate the tube, go to Adjust, Blur, Gaussian blur, number on 5, change
the blend mode to Soft Light or one you prefer, merge down.
Duplicate the frame and paper, free rotate to the left at 10, move below the
paper layer of the top frame.

Resize element 93 to 35%, paste between the 2 frames at the upper right, duplicate, 
mirror, duplicate several more times and move down on the right 
along the side of the frame, duplicate, each one and mirror.

Resize your tube to 40%, paste on the right above the frames, pull the flowers
out more behind the tube.

Resize element 1 to 40%, paste on the left above the frame.
Resize element 89 to 40%, mirror, paste on the left below the bear, duplicate, move 
more to the right behind the tube, duplicate again, move back to 
the center more behind the tube.
Resize element 58 to 30%, paste on the left above the flower.
Resize element 4 to 50%, paste at the bottom above the tube.
Resize element 49 to 50%, paste behind the tube on the right.
Resize element 35 to 30%, paste at the bottom right above the tube.

Resize element 101 to 40%, paste at the bottom above the books.
Resize element 14 to 20%, paste on top of the books.
Resize element 3 to 30%, paste at the bottom.
Resize element 55 to 25%, paste at the bottom below the dog.
Resize element 37 to 15%, paste on the books.
Resize element 15 to 15%, paste at the bottom right.
Resize element 47 to 10%, paste at the bottom right.

Resize element 21 and 22 to 15%, paste at the lower left.
Resize element 103 to 35%, free rotate to the right at 90, paste at the
upper left above the frame.
Resize element 56 to 20%, paste at the top.

Resize element 2 to 75%, paste on the right below the flowers just so the light
on the wagon and some of the leaves shows.
Paste element 125 above the mask on the left, duplicate, mirror, duplicate 
again, move to the center.
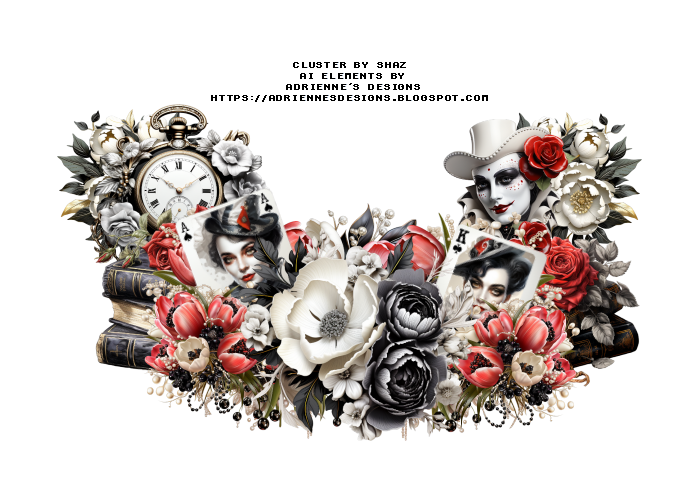
Paste element 117 at the bottom, mirror, being on the top layer.

Add any other elements that you would like, make it your own.
Always readjust your mask and elements how you like them before you
 merge your tag, resize, sharpen.

Crop your tag to be sure no shadows or lines are on the edges.
 Then add your copyright and name.
That's it

Hope you enjoyed doing my tut

Tag for Lizzy  


Tuesday, September 26, 2023

FTU BCA


 This tut was written September 26th, 2023 for those with a basic knowledge of psp.

I am using the awesome artwork of ©Lysisange
The tube is called October Rose, this is a Free tube
You need a license to use this tube, please do not use without a license.
You can find this tube at Lysisange store HERE

I used PSP2020...but any of them should work.
FTU Scrap Awareness mini by Scrappy Bit of Fun HERE  
Animation by Scrappy Bit of Fun HERE
Check out the rest of the blog  HERE
Mask of choice, I used RD Mask 129_2 HERE
Check out the rest of the blog HERE
Filter
Mura Meister Copies-Encircle

Font of choice I used Vacations in Phuket

Drop shadow is V -2 H -4, 35, 10, Black or use what you prefer.
Let's get started
*Remember to add your drop shadow as you go along*

Open a new image, size 800 x 800, paste paper 3, apply your mask, 

Resize frame 1 to 75%, paste to the right and up, duplicate, resize smaller
to 60%.
Click in the large frame, expand by 5, paste paper 2, invert, delete, select none.
Resize element 48 to 30%, paste below the small frame, change the 
blend mode to Overlay.
Paste frame 3 above the frames, change the color to #d989a7.
Resize element 34 to 35%, flip, apply Mura Meister Copies-Encircle, change
the first 3 numbers to 24, 65, 65, move below the lace frame.

Resize your tube to 30%, mirror, paste above the frame on the left.

Paste element 7c behind the tube, resize to 95%.
Resize element 4 to 60%, paste behind the tube on the right.
Paste element 10 at the bottom above the tube.
Resize element 2 to 35%, paste at the bottom left above the sign, duplicate,
mirror, duplicate 3 more times, move behind the sign how you like.

Resize element 27 to 35%, paste at the bottom above the sign on the left.
Resize element 21 to 25%, paste on the phone.
Resize element 15 to 45%, paste at the bottom by the phone.

Resize element 35 to 50%, paste above the tube at the bottom left behind
the flowers, duplicate, mirror, move below the bottles.
Resize element 24 to 25%, paste at the bottom right above the tube.
Resize element 25 to 25%, change the color to match your tag, paste
at the bottom right above the jar.
Paste element 20 up on the clock and frame where you like.
Resize element 53 to 25%, free rotate to the right at 90, paste at the bottom
above the sign.
Resize element 42 to 40%, free rotate to the right at 90, paste at the 
bottom below the flowers so some of the leaves shows, duplicate, move up
on the right a little above the bottles, duplicate once more, mirror, move
above the tube by the leg.

Add any other elements you like, once happy, add your name
and copyright.

Animation

If you want to do the animation, it is free also
Merge your tag with the white background, take it to animation shop and 
create 25 layers, apply your animation on the clock.
to animation, make 20 layers, then apply your animation.
I didn't explain the animation, I am assuming you already know how to do that.
That's it

Hope you enjoyed doing my tut.