Showing posts with label Patriotic. Show all posts

Tuesday, June 23, 2026

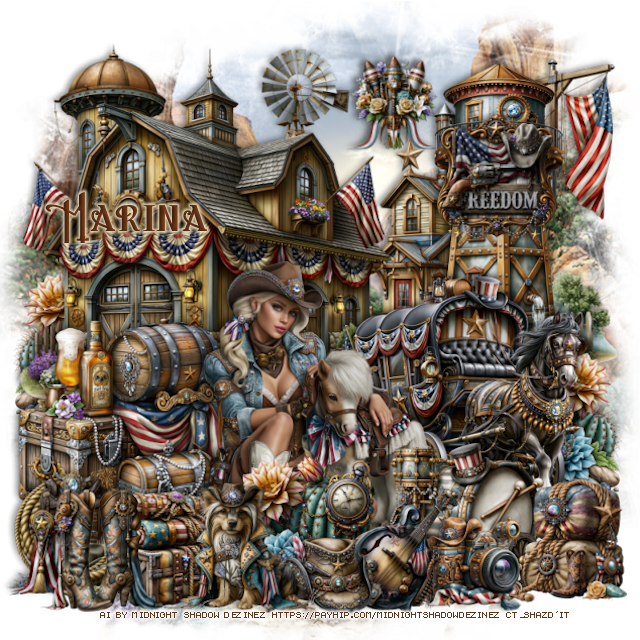
PTU Steam & Stripes


 This tut was written June 23rd, 2026 for those with a basic knowledge of psp. 

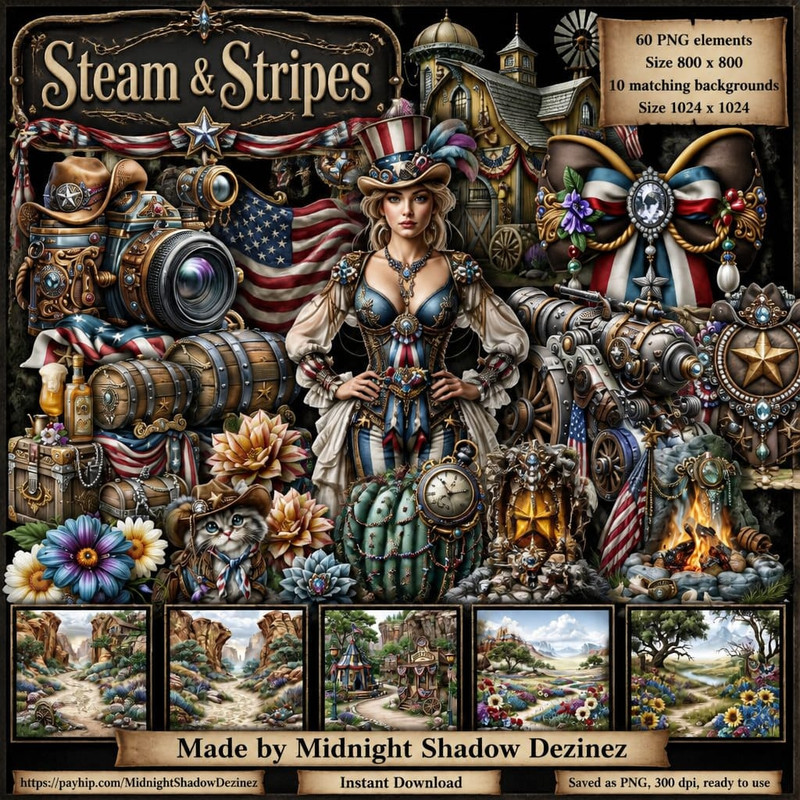
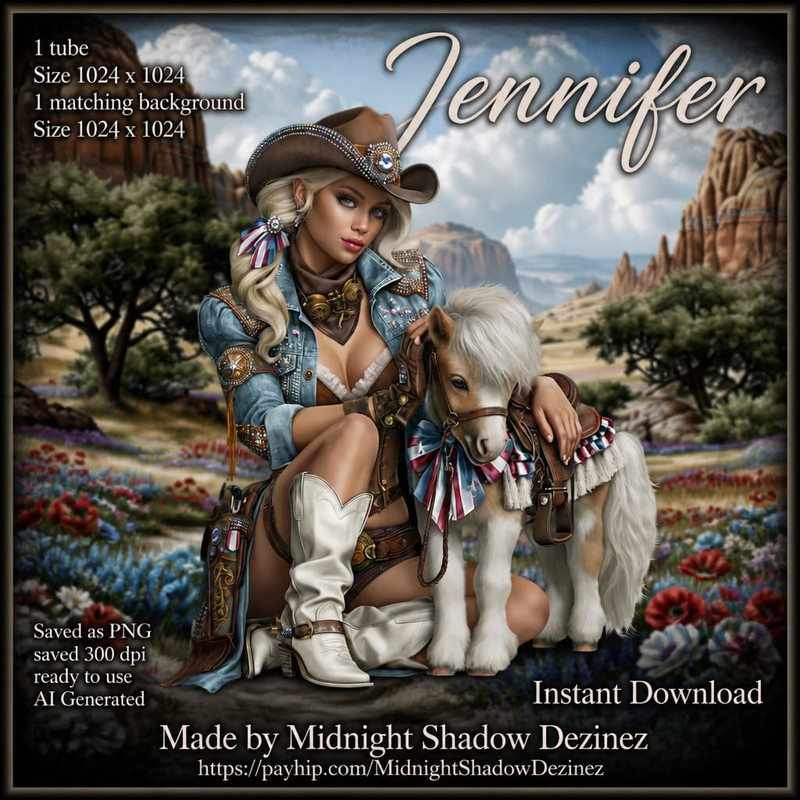
Awesome AI kit and tube by Midnight Shadow Dezinez

Tube I used is NOT included
Tube called Jennifer HERE
Read the TOU on how to credit your tags

I used PSP2020...but any of them should work.
PTU Scrap Steam & Stripes by Midnight Shadow Dezinez  HERE
You can find all Midnight Shadow Dezinez kits HERE
Miz Teeques Mask 40 HERE
Check the blog out HERE

Font of choice, I used Sucker Font

Drop shadow as you go is V -2 H -4, 50, 10, or use what you prefer.
Let's get started
*Remember to add your drop shadow as you go along*

Open a new image 800 x 800, paste paper 1, apply your mask.

Resize 1 to 60%, paste at the upper left.
Resize 49 to 50%, paste at the upper right below the barn.

Resize the tube to 35%, paste at bottom.

Resize 48 to 40%, mirror, paste on the bottom right below the tube.
Resize 24 to 35%, paste on the bottom left below the tube.
Resize 16 to 25%, paste at the bottom above the tube, duplicate, 
move below the barn on the left, duplicate, mirror.
Resize 55 to 25%, paste at the bottom right above the tube.
Resize 42 to 20%, paste at the bottom right.
Resize 23 to 20%, paste at the bottom left.

Resize 31 to 20%, paste at the bottom left.
Resize 27 to 20%, paste on the bottom.
Resize 22 to 20%, paste at the bottom left.
Resize 8 to 15%, paste at the bottom right.
Resize 17 to 15%, paste at the bottom.
Resize 38 to 20%, paste at the bottom to the right of the hat.
Resize 37 to 20%, paste on the tower on the upper right.
Resize 54 to 15%, paste at the top below the tower.

Add any other elements that you would like, make it your own.
Always readjust your mask and elements how you like them before you
 merge your tag, resize, sharpen.

Crop your tag to be sure no shadows or lines are on the edges.
 Then add your copyright and name.
That's it

                 Hope you enjoyed doing my tut                       

PTU American Pride

  This tut was written June 23rd, 2026 for those with a basic knowledge of psp. 

I am using the awesome Al kit by LadyDragus

Al tube used gen by Crystal's Creations
Everything used is included in the kit
Read the TOU on how to credit your tags


I used PSP2020...but any of them should work.

PTU Scrap American Pride by Lady Dragus  HERE  
Check her store out to see all her other kits and tubes HERE
Mask of choice, I used MizTeeque Mask 81 HERE
Check out the rest of the blog HERE

Font of choice, I used AR Julian

Drop shadow as you go is V -2 H 4, 40, 10, or use what you prefer.
Let's get started
*Remember to add your drop shadow as you go along*

Open a new image 800 x 800, paste paper 8, apply your mask.

Paste 45 on the mask.
Paste 23, move up to the top.
Paste 103 next.
Resize frame 2 to 70%, paste.
Resize 53 to 35%, paste on the upper left on the frame, change the
blend mode to Screen, erase the frame part showing on the face.
Resize 94 to 45%, paste on the upper right on the frame, lower the 
opacity to 80%.
Resize 86 to 50%, paste at the bottom to the left.

Resize the tube to 45%, paste at the bottom to the right of the truck.

Resize 1 to 35%, paste on the bottom right below the tube.
Resize 15 to 25%, mirror, paste at the bottom above the tube.
Resize 6, 10 and 100 to 15%, paste at the bottom right above the tube.
Resize 8 to 15%, paste at the bottom.
Resize 91 to 15%, paste at the bottom right below the other foods.
Resize 72 to 25%, paste at the bottom by the dog.
Resize 95 to 15%, paste at the bottom above the dog.

Resize 64 to 40%, paste at the top.
Resize 3 to 25%, paste at the bottom to the left of the dog.
Resize 99 to 35%, paste on the left below the truck.
Resize 46 to 20%, paste on the left above the flowers, duplicate, mirror.
Resize 101 to 25%, paste at the bottom left above the cake.
Being on the top layer, paste 83 on the left, duplicate, mirror, erase the 
part on the tube.

Add any other elements that you would like, make it your own.
Always readjust your mask and elements how you like them before you
 merge your tag, resize, sharpen.

Crop your tag to be sure no shadows or lines are on the edges.
 Then add your copyright and name.
That's it

Hope you enjoyed doing my tut   

Friday, June 19, 2026

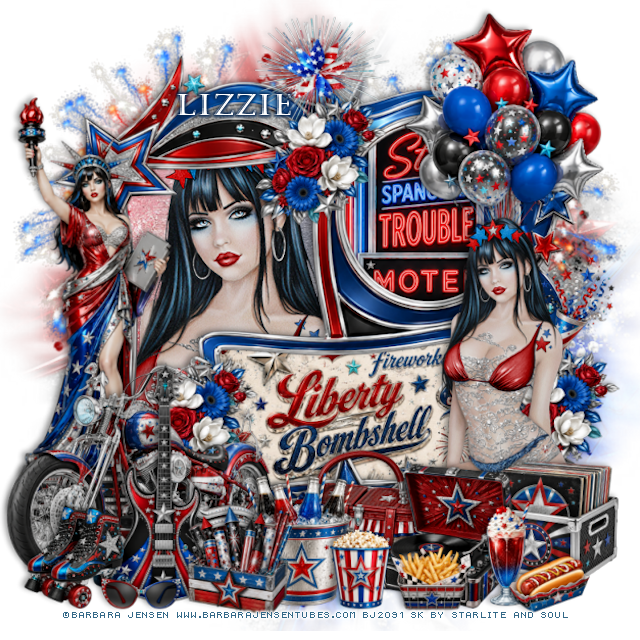
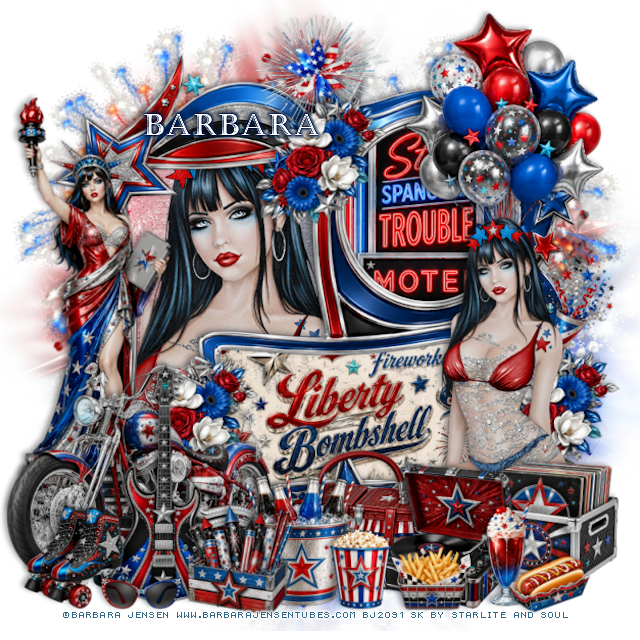
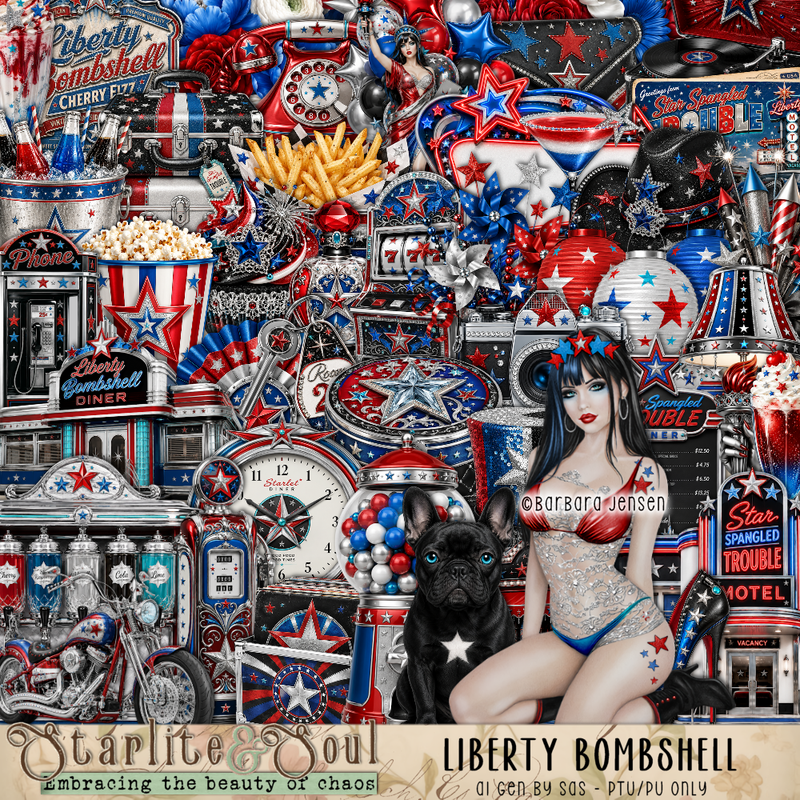
PTU Liberty Bombshell


  This tut was written June 19thth, 2026 for those with a basic knowledge of psp. 

I am using the beautiful tube by © Barbara Jensen

Tube is called Obsidian 164-2
Tube is NOT included
You need a license to use this tube, please do not use without a license
You can find this tube at Barbara store HERE

I used PSP2020...but any of them should work.
PTU Scrap Liberty Bombshell  by Starlite and Soul  HERE
You can find all Starlite and Soul kits  HERE 
Miz Teeques Mask 81 HERE
Check the rest of the blog HERE

Font of choice, I used Castellar

Drop shadow as you go is V -2 H 4, 40, 10, or use what you prefer.
Let's get started
*Remember to add your drop shadow as you go along*

Open a new image 800 x 800, paste paper 17, apply your mask.

Paste frame 4, click in the rectangle, paste paper 20, invert, delete,
keep selected. 
Paste your tube, delete, select none.
Select the oval frame, paste element 1 how you like, invert, delete.
Select the bottom frame, resize paper 12 to 50%, paste, invert, delete.
Resize 25 to 80%, paste on the left above the frame.
Resize 33 to 50%, paste on the bottom left.
Resize 178 to 75%, paste at the upper left being on the bottom layer, duplicate,
move to the right.

Resize the tube 55%, paste on the right.

Resize 70 to 20%, paste on the right below the tube.
Resize 17 to 45%, paste on the left above the bike.
Resize 48 to 25%, paste at the bottom above the tube.
Resize 32 to 27%, paste at the bottom above the records.
Resize 30 to 20%, paste at the bottom left.
Resize 51 to 20%, paste at the bottom right.
Resize 56 to 15%, paste at the bottom right.
Resize 54 to 15%, paste at the bottom.

Resize 134 to 25%, paste at the top on the frame, duplicate, move
down below the bike, duplicate again, move behind the tube.
Resize 81 to 28%, paste below the record player.
Resize 73 to 25%, paste at the bottom.
Resize 74 to 20%, paste at the bottom.
Resize 71 to 55%, paste on the upper right below the tube.
Resize 106 to 35%, paste below the flower at the top.
Resize 84 to 15%, paste at the bottom.
Resize 11 to 15%, paste at the bottom left.

Add any other elements that you would like, make it your own.
Always readjust your mask and elements how you like them before you
 merge your tag, resize, sharpen.

Crop your tag to be sure no shadows or lines are on the edges.
 Then add your copyright and name.
That's it

Hope you enjoyed doing my tut

Tag for Lizzie      


Thursday, June 11, 2026

PTU Summer Glory 1


 This tut was written June 11th, 2026 for those with a basic knowledge of psp. 

I am using the Beautiful tube ©Vi Nina
The tube is called Summer Glory
The tube is "NOT" included
You need a license to use this tube, please do not use without a license
You can find the tube at Vi Nina Store HERE

I used PSP2020...but any of them should work.
PTU Scrap Summer Glory by Carita Creationz  HERE
Kit has 118 elements and 10 papers 
Check her store out to see all her other kits and tubes HERE
Mask of choice, I used Miz Teeques Mask 100 HERE 
Check the blog out HERE

Font of choice, I used Russel Dexter

Drop shadow as you go is V -2 H 4, 50, 10, or use what you prefer.
Let's get started
*Remember to add your drop shadow as you go along*

Open a new image 800 x 800, resize paper 3 to 80%, apply your mask, 

Resize 44 to 55%, paste, click inside, resize paper 7 to 35%, paste below 
the frame, invert, delete.
Resize 46 to 50%, paste above the white frame.
Resize 11 to 20%, apply Mura Meister Copies-Encircle, first 3 numbers
on 9, 40, 40, paste below the frame.
Resize 67 to 20%, apply Mura Meister Copies- change the first 3 numbers
to 12, 45, 45, paste below the first circle, if using a white background, 
close that off first, then merge these layers together and move up.
Resize 30 to 50%, paste on the right below the frames, duplicate, mirror.

Resize your tube to 40%, paste on the right above the frame.

Resize 72 to 40%, paste below the tube on the left.
Resize 63 to 40%, paste on the bottom right below the tube.
Resize 23 to 40%, mirror, paste on the bottom left.

Resize 9 to 35%, paste on the upper left above the frame.
Resize 11 to 25%, paste on the upper right below the tube, duplicate,
mirror, move to the left below the sign at the top, duplicate,
move down behind the chair.
Resize 94 to 25%, paste on the bottom right  above the tube layer.
Resize 76 to 23%, paste at the bottom above the tube.
Resize 5 to 20%, paste at the bottom left above the chair.
Resize 26 to 20%, paste at the bottom left above the flowers.

Resize 18 to 17%, at the bottom left.
Resize 67 to 20%, paste at the bottom below the boots.
Resize 92 to 18%, paste at the bottom by the boots.
Resize 85 to 23%, paste at the bottom by the bottle.
Resize 29 to 15%, paste on the chair.
Resize 8 to 20%, paste on the bottom right.
Resize 69 to 15%, paste on the bottom right.
Resize 107 to 17%, paste on the bottom below the dog.
Resize 12 to 8%, paste at the bottom by the dog.
Resize 28 to 25%, mirror, paste at the top.

Add any other elements that you would like, make it your own.
Always readjust your mask and elements how you like them before you
 merge your tag, resize, sharpen.
Crop your tag to be sure no shadows or lines are on the edges.
 Then add your copyright and name.
That's it

Hope you enjoyed doing my tut.       

Tag for Nina   


Monday, June 8, 2026

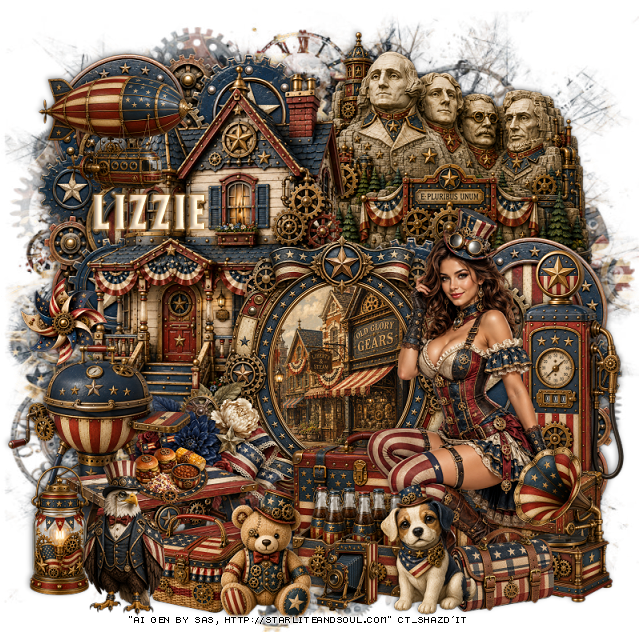
PTU Old Glory Gears

 This tut was written June 8th, 2026 for those with a basic knowledge of psp. 

I am using the beautiful Al tube gen by SAS

Tube is included

Everything is included in the kit
Read the TOU on how to credit your tags


I used PSP2020...but any of them should work.
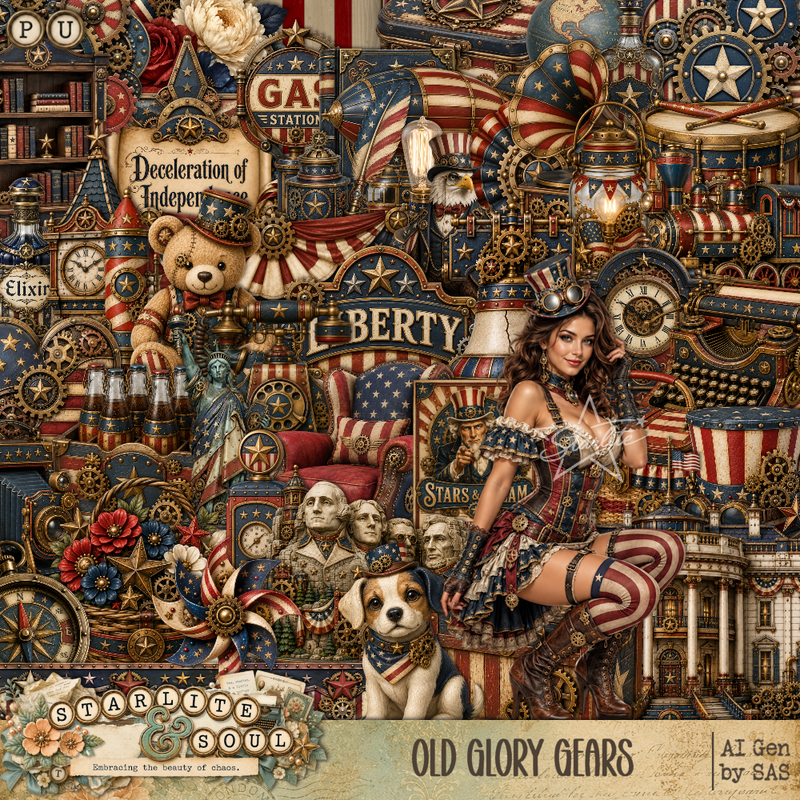
PTU Scrap Old Glory Gears by Starlite and Soul  HERE
You can find all Starlite and Soul kits  HERE 
Miz Teeques Mask 197 HERE 
Check the blog out HERE

Font of choice, I used Fracture Fir

Drop shadow as you go is V -2 H 4, 40, 10, or use what you prefer.
Let's get started
*Remember to add your drop shadow as you go along*

Open a new image 800 x 800, paste paper 13, apply your mask.

Resize 1 to 65%, paste on the upper left.
Resize 77 to 60%, paste on the upper left below the house, duplicate,
mirror, move down on the right.
Resize 22 to 55%, paste at the upper right below the house.
Resize 31 to 30%, mirror, paste at the upper left above the house.
Resize frame 4 to 50%, paste above the house, click inside, 
resize paper 10 to 40%, paste, invert, delete.
Resize 35 to 30%, paste on the bottom right.
Resize 136 to 30%, paste at the bottom of the house by the steps.

Resize the tube to 35%, mirror, paste on the wooden box.

Resize 39 to 50%, paste on the right below the box.
Resize 32 to 30%, paste on the bottom below the tube.
Resize 25 to 30%, paste on the bottom right above the tube.
Resize 7 to 25%, paste on the bottom right.
Resize 28 to 25%, paste at the bottom below the dog.
Resize 37 to 35%, paste on the left by the house.
Resize 74 to 45%, paste on the bottom left above the bar b que.
Resize 73 to 15%, paste on the table.
Resize 69 to 20%, paste below the dog.
Resize 34 to 25%, paste at the bottom above the table.
Resize 27 to 15%, paste at the bottom.

Resize 26 to 25%, paste on the bottom left above the table.
Resize 6 to 20%, paste below the bar b que on the left.
Resize 42 to 20%, paste at the bottom by the bear.
Resize 58 to 30%, paste at the bottom left.

Add any other elements that you would like, make it your own.
Always readjust your mask and elements how you like them before you
 merge your tag, resize, sharpen.

Crop your tag to be sure no shadows or lines are on the edges.
 Then add your copyright and name.
That's it

Hope you enjoyed doing my tut
  

Sunday, June 7, 2026

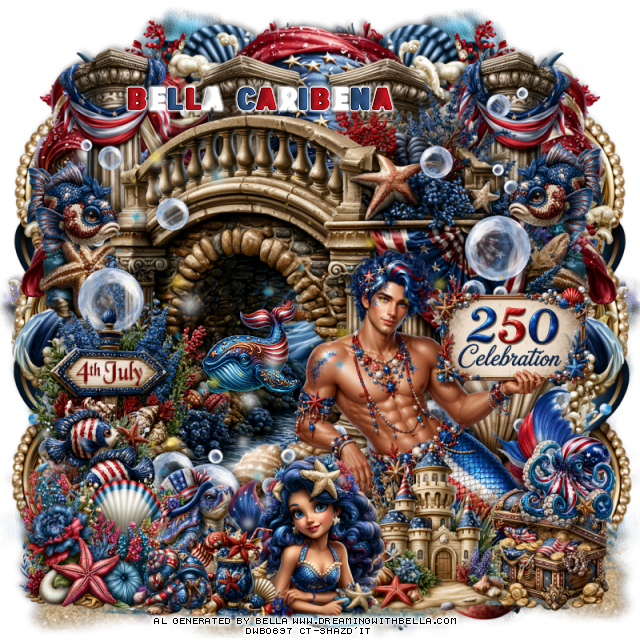
PTU 250 Celebration On The Ocean

  This tut was written June 6th, 2026,  for those with a basic knowledge of psp. 

Awesome Al kit and tubes by Bella Caribeña
Everything is included in the kit
Read the TOU on how to credit tags

I used PSP2020...but any of them should work.
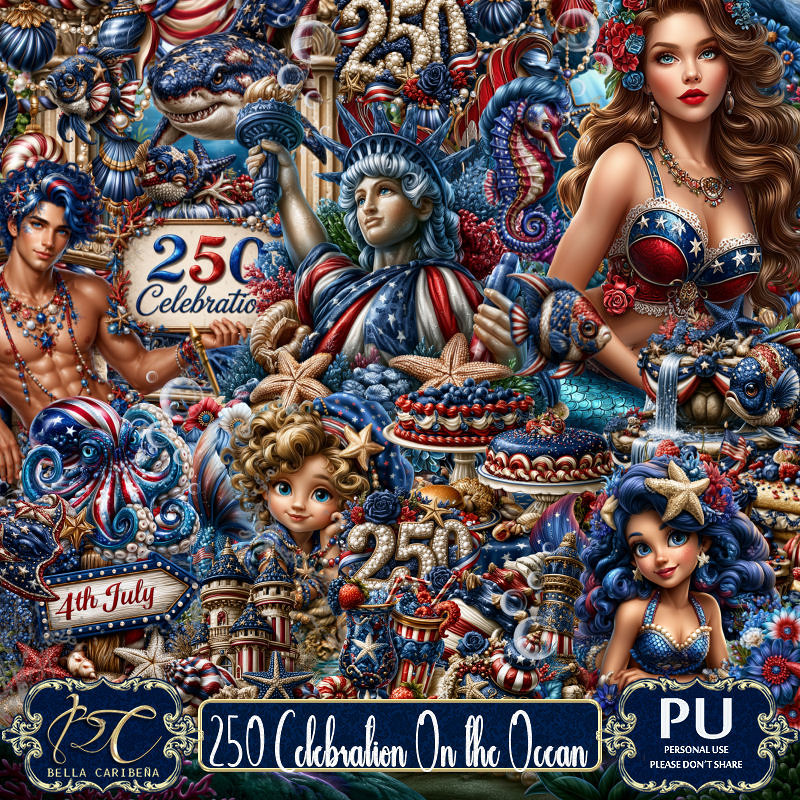
PTU Scrap 250 Celebration On The Ocean by Bella Caribeña  HERE
4th of July/Ocean Theme
Kit contains 5Al gen tubes, 149 elements, 15 papers and 3 masks
There are tubes that match this kit you can use also
Packs 290, 291 and 292
You can check out the rest of her store HERE 

Font of choice I used USA Spirit

 Drop shadow as you go is V -2 H 4, 50, 10, or use what you prefer.
Let's get started
*Remember to add your drop shadow as you go along*

Open a new image 800 x 800, paste mask 3, move to the left, 
duplicate, mirror, erase some if needed and adjust to fit, merge
together.
Go to Effects, Texture Effects, Sandstone, 20, 80, 13
45, color white. 
Paste 38 on the right, duplicate, mirror, let some of the gold show
on the sides, duplicate both, move to the bottom.

Paste element 4.
Resize 36 to 60%, paste below the bridge on the upper right, 
duplicate, mirror.
Paste 3 below the columns on the right, duplicate, mirror.
Resize 42 to 20%, paste in the opening of the bridge.
Paste 60 on the bottom layer above the mask at the bottom right,
duplicate, mirror, you just want the water showing at the bottom.
Paste 125 at the bottom above the water to the left, duplicate, mirror.

Resize tube 5 to 20%, paste at the bottom right above the bridge.

Resize 27 to 35%, paste at the bottom above the tube.
Resize 46 to 25%, paste at the bottom right below the castle.
Resize 62 to 35%, paste at the bottom above the castle.
Resize 66 to 20%, paste at the bottom by the mermaid.
Resize 146 to 30%, paste on the bottom left.
Resize 6 to 25%, paste on the left below the flower.
Resize 96 to 35%, paste on the left below the fish.

Resize 8 to 20%, paste above the tube on the right, duplicate, mirror.
Resize 16 to 20%, paste on the bottom right on top of the chest.
Resize 53 to 15%, paste at the bottom left by the drink.
Resize 14 to 20%, paste below the mermaid.
Paste 108 on the left being on the top layer.
Click on the bridge layer, paste 113 on the right below the tube,
duplicate, mirror.

Add any other elements you would like, resize.
Crop your tag to be sure no shadows or lines are on the edges.
 Then add your copyright and name.
That's it

            Hope you enjoyed doing my tut                   
Saturday, June 6, 2026

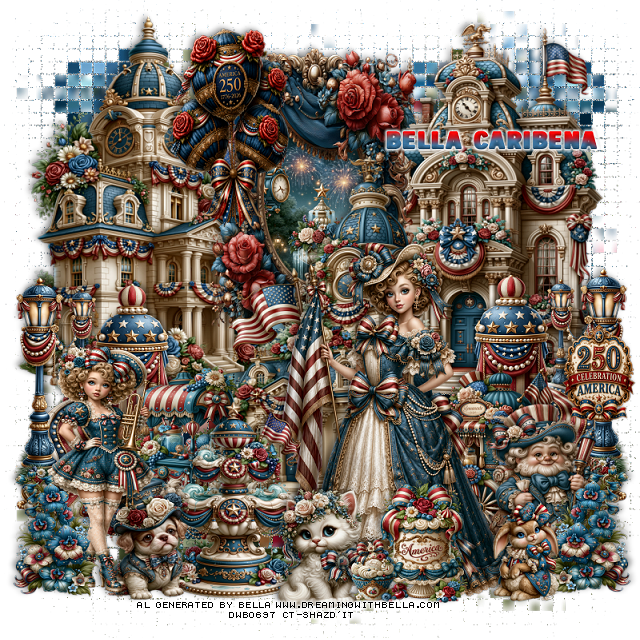
PTU Vintage 4th of July

 This tut was written June 6th, 2026,  for those with a basic knowledge of psp. 

Awesome Al kit and tubes by Bella Caribeña
Everything is included in the kit
Read the TOU on how to credit tags

I used PSP2020...but any of them should work.
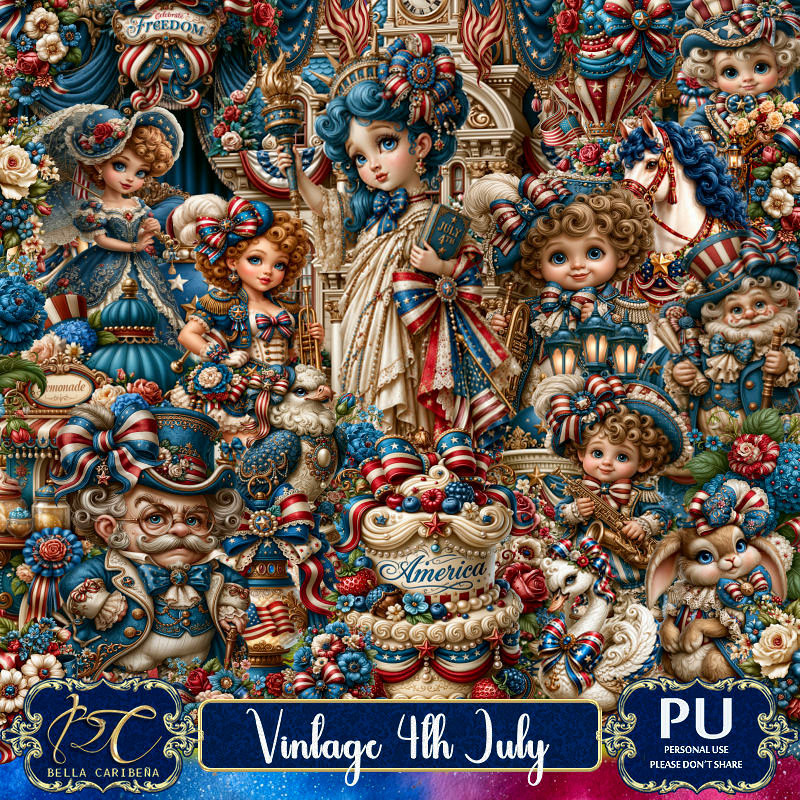
PTU Scrap Vintage 4th of July by Bella Caribeña  HERE
4th of July Theme
Kit contains 3Al gen tubes, 135 elements, 14 papers
You can check out the rest of her store HERE 

Font of choice I used USA Spirit

 Drop shadow as you go is V -2 H 4, 50, 10, or use what you prefer.
Let's get started
*Remember to add your drop shadow as you go along*

Open a new image 800 x 800
Paste 30 on the bottom layer , go to Effects, Texture, Mosaic Antique,
50, 50, 
70, 2, 50, apply 2 times
move to the right, duplicate, mirror, adjust

Resize 98 to 60%, paste at the top, click inside, resize 105 to 15%, 
paste, invert, delete.
Resize 88 to 75%, paste on the right above the frame.
Resize 87 to 75%, paste on the upper left below the frame.
Resize 89 to 75%, paste on the upper right below the frame.
Resize 17 to 50%, paste on the right, duplicate, mirror.
Resize 11 to 35%, paste at the bottom above the building on the left.
Resize 10 to 35%, paste at the bottom right above the building.

Resize tube 1 to 23%, paste at the bottom to the right.
Resize 47 to 50%, mirror, paste on the bottom left.
Resize 18 and 19 to 25%, paste at the bottom.
Resize 56 to 40%, paste at the top.
Resize 66 to 35%, paste on the bottom right.
Resize 46 to 40%, paste at the bottom below the dog and cat.
Resize 28 to 25%, paste at the bottom left above the girl, duplicate, mirror.
Resize 121 to 25%, paste at the bottom above the tube.
Resize 126 to 13%, paste at the bottom.
Resize 119 to 20%, paste at the bottom right.
Resize 51 to 20%, paste on the right on the light post.

Add any other elements you would like, resize.
Crop your tag to be sure no shadows or lines are on the edges.
 Then add your copyright and name.
That's it

            Hope you enjoyed doing my tut