Showing posts with label Beach. Show all posts

Saturday, August 8, 2026

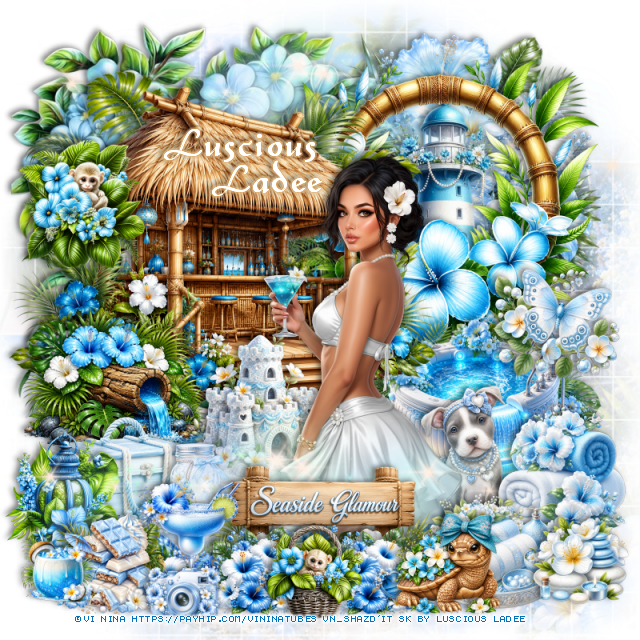
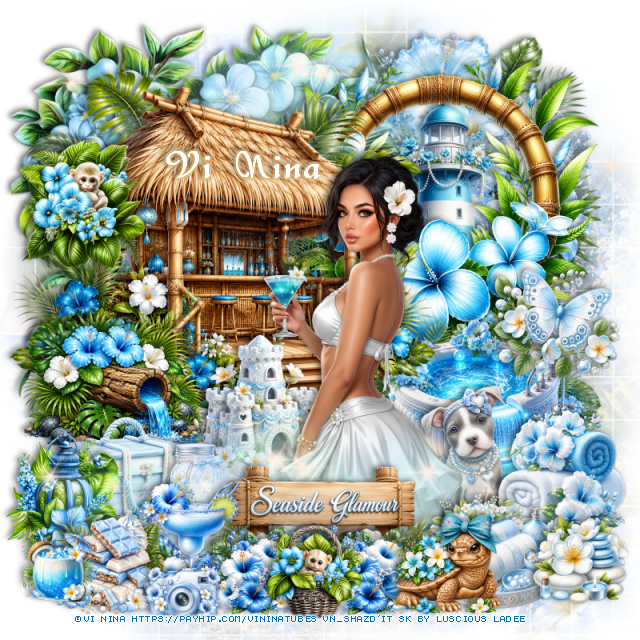
PTU Seaside Glamour


 This tut was written August 8th, 2026 for those with a basic knowledge of psp. 

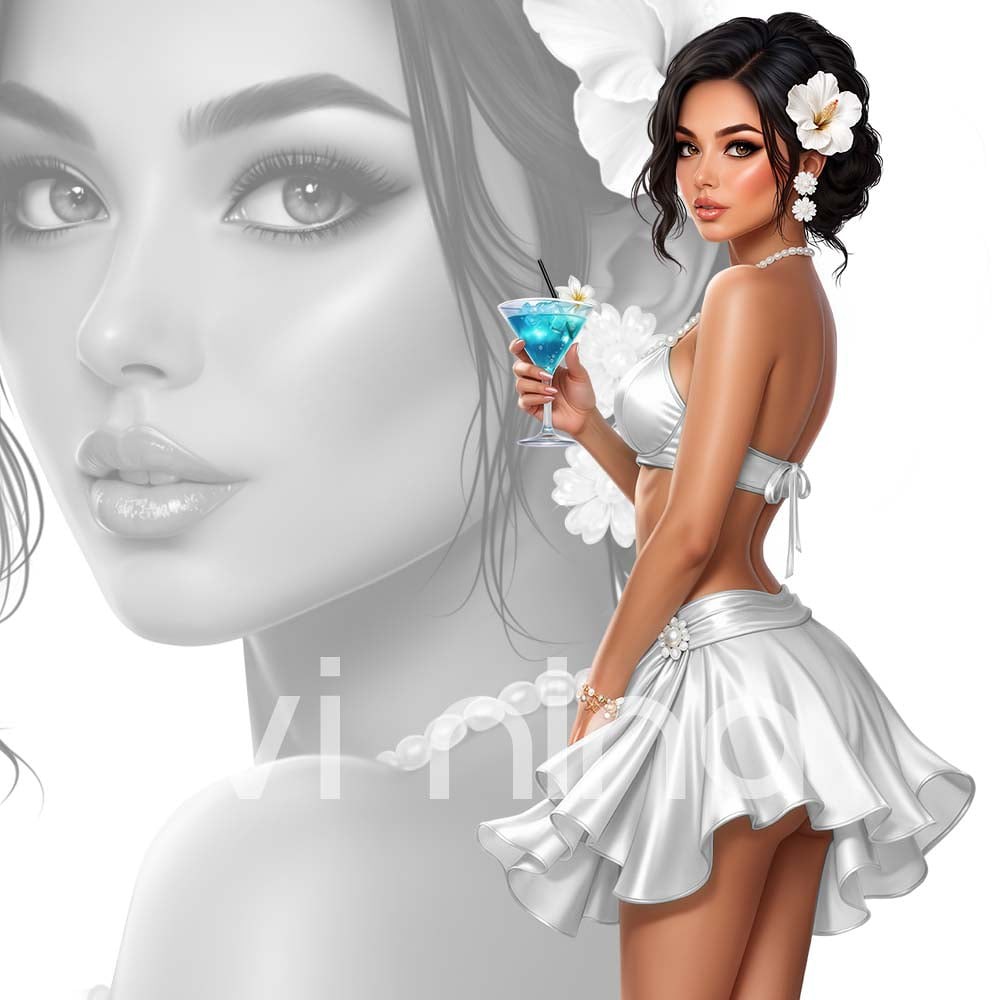
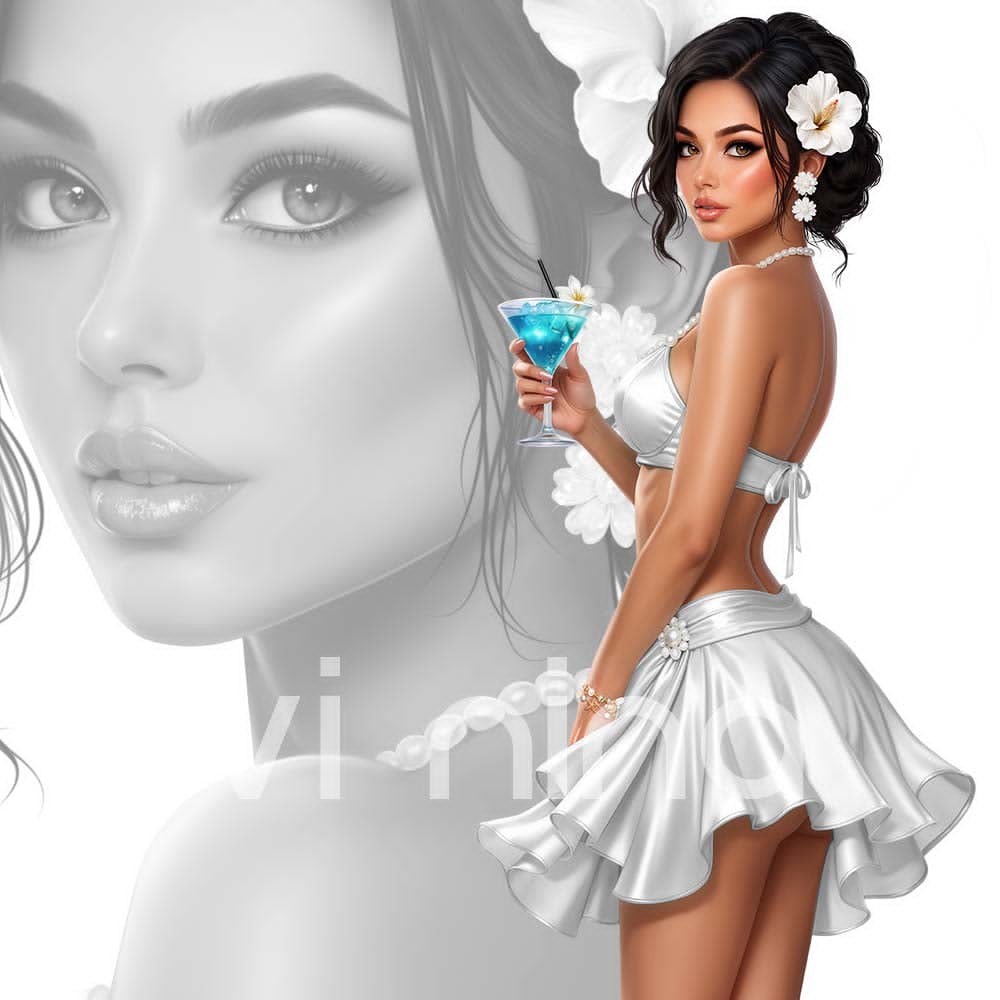
I am using the Beautiful tube ©Vi Nina
The tube is called Seaside Glamour
The tube is "NOT" included
You need a license to use this tube, please do not use without a license
You can find the tube at Vi Nina Store HERE

I used PSP2020...but any of them should work.
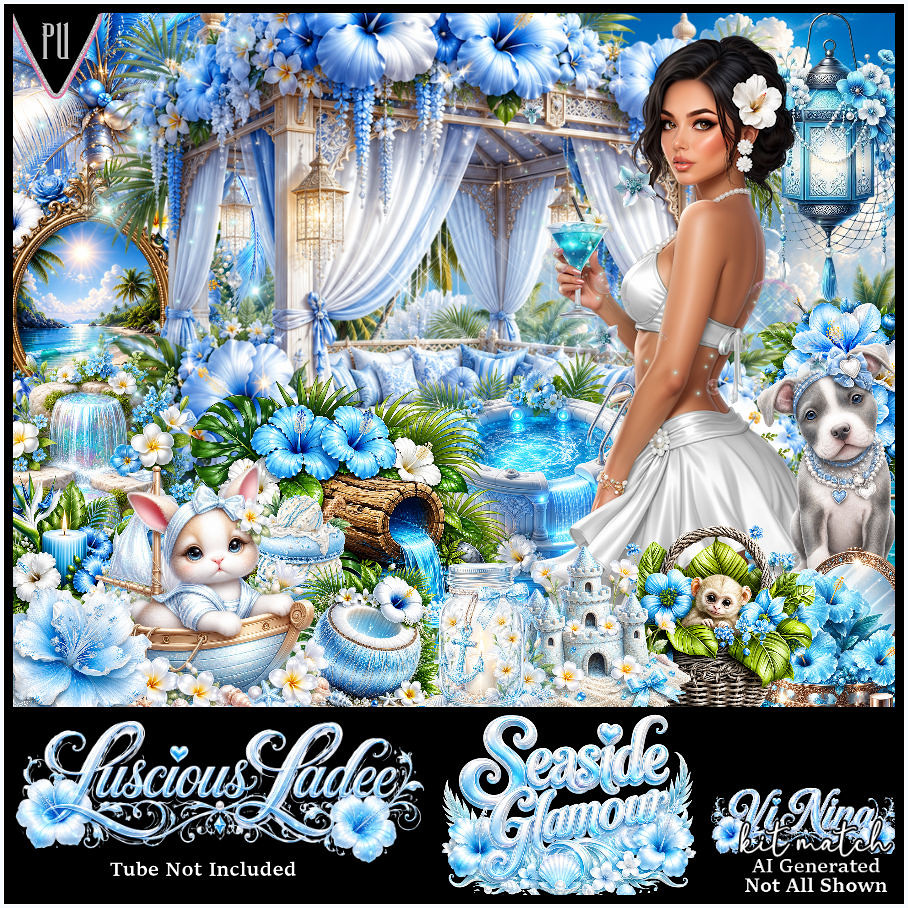
PTU Scrap Seaside Glamour by Luscious Ladee  HERE
Check her store out to see all her other kits and tubes HERE

Font of choice, I used Base Christmas

Drop shadow as you go is V -2 H 4, 50, 10, or use what you prefer.
Let's get started
*Remember to add your drop shadow as you go along*

Open a new image 800 x 800, paste mask 7, resize to fit your tag.

Resize frame 1 to 50%, paste at the upper right.
Resize 4 to 50%, paste on the left above the frame.
Resize 61 to 65%, paste on the upper left below the bar.
Resize 62 to 40%, paste on the right at the bottom of the frame.
Resize 6 to 40%, paste in the frame.
Resize 101 to 45%, paste below the light house and frame.
Resize the tube to 40%, paste at the bottom above the hot tub.

Resize 63 to 25%, paste at the bottom right above the hot tub.
Resize 64 to 20%, paste at the bottom right by the towels.

Resize 9 to 25%, paste at the bottom left above the bar.
Resize 49 to 20%, paste on the right above the hot tub.
Resize wordart 3 to 25%, paste at the bottom above the tube.
Resize 11 to 17%, paste at the bottom right above the sign.
Resize 35 to 20%, paste at the bottom to the left of the sign.

Resize 14 to 20%, paste at the upper left on the bar.
Resize 100 to 15%, paste at the bottom above the drink, duplicate, move
to the right more.
Resize 13 to 15%, paste at the bottom above the flowers.
Resize 26 to 25%, paste below the tube to the left a little.
Resize 65 to 15%, paste at the bottom right.
Resize 83 to 17%, paste at the bottom to the left of the drink.
Resize 46 to 18%, paste on the bottom left above the log.
Resize 42 to 15%, paste above the castle.
Resize 10 to 25%, paste on the right above the hot tub below the towels.
Resize 24 to 20%, paste on the bottom left below the lantern.
Resize 20 to 10%, paste at the bottom by the drink.
Resize 32 to 12%, paste on the bottom left.
Paste sparkle 7 at the bottom behind the sign, duplicate, move to 
the top above the tree.

Add any other elements that you would like, make it your own.
Always readjust your mask and elements how you like them before you
 merge your tag, resize, sharpen.
Crop your tag to be sure no shadows or lines are on the edges.
 Then add your copyright and name.
That's it

Hope you enjoyed doing my tut.     

Tag for Vi Nina  


Saturday, August 1, 2026

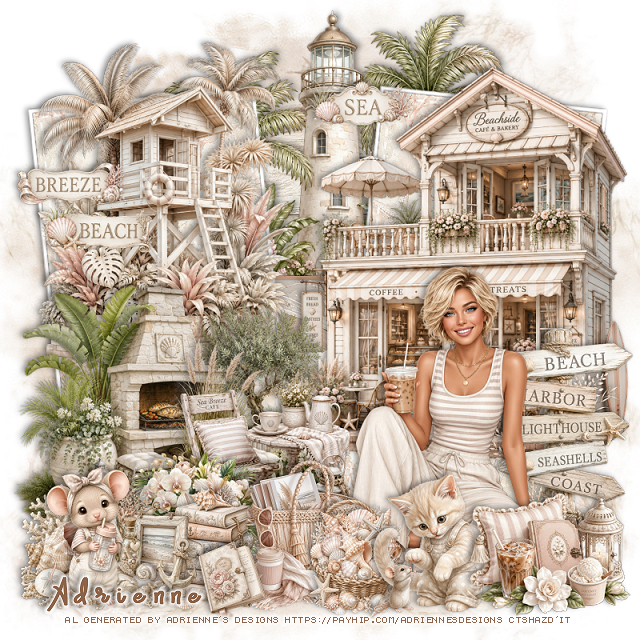
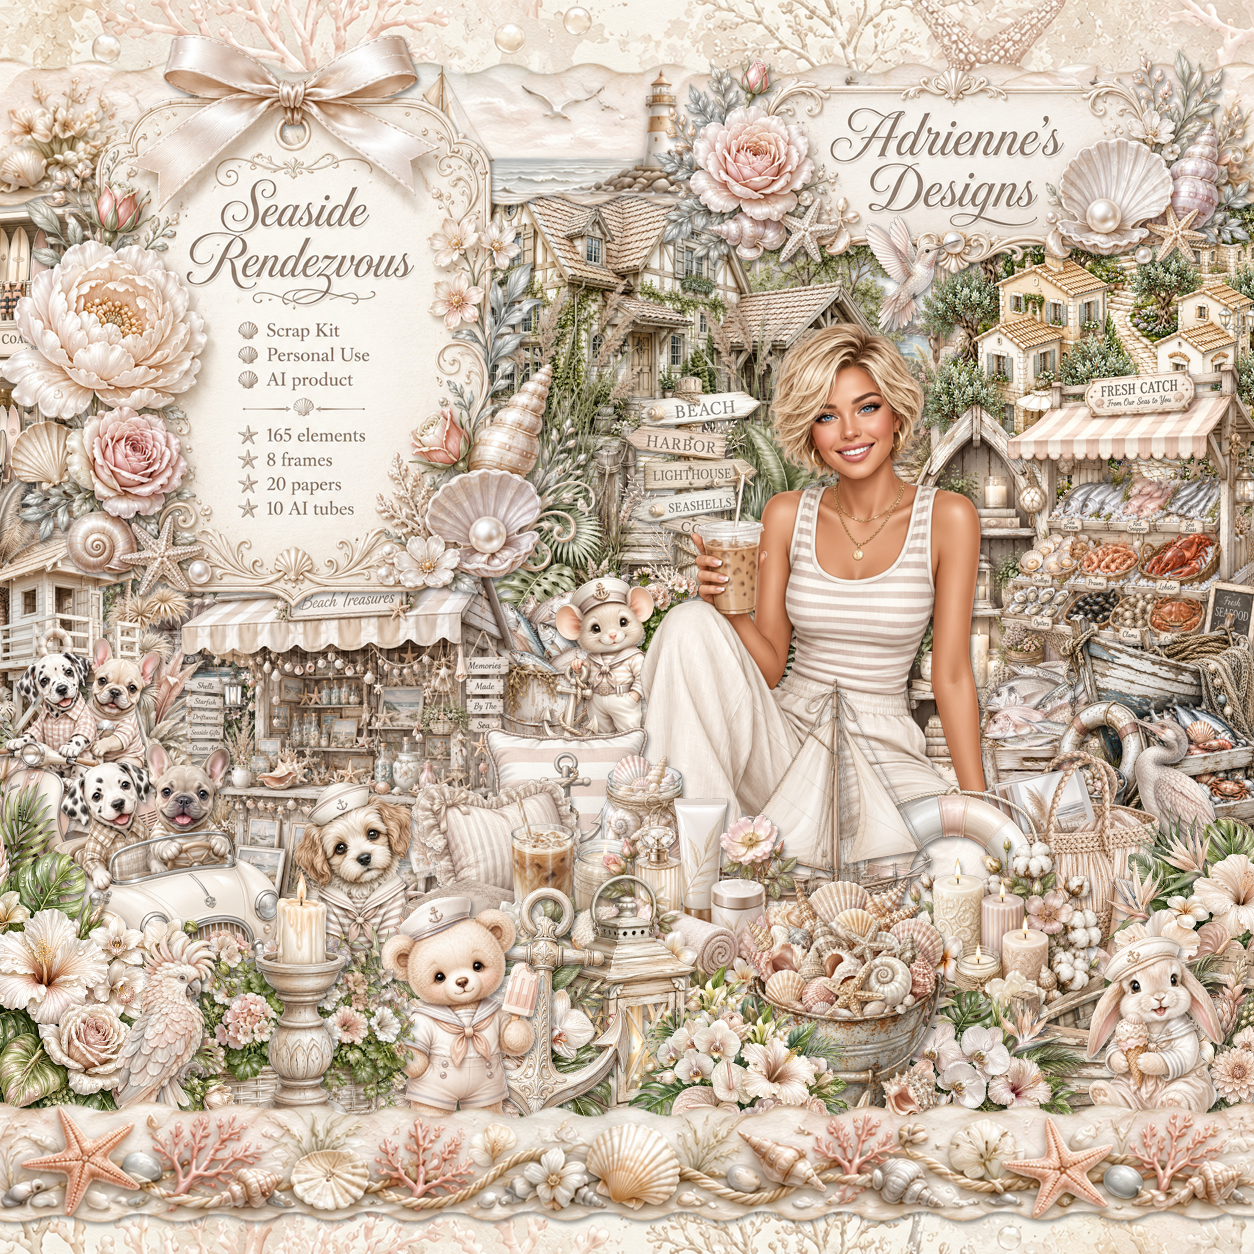
PTU Seaside Rendezvous

 This tut was written August 1st, 2026,  for those with a basic knowledge of psp. 

I am using the beautiful Al kit by Adrienne's Designs
Everything used is in the kit 
Read the TOU on how to credit your tags

I used PSP2020...but any of them should work.
PTU Scrap Seaside Rendezvous by Adrienne's Designs  HERE
Check out the rest of her store  HERE
or
you can find all her kits on her blog  HERE
Donna's Template 689 HERE 
Check the rest of the blog HERE
Mask of choice, I used Lori's PSP Graphics Mask 1230 HERE 
Check the blog out HERE

Font of choice I used Beach

 Drop shadow as you go is V -2 H 4, 50, 10, or use what you prefer.
Let's get started

*Remember to add your drop shadow as you go along* 

Open the template, Go to Image, resize to 125, all layers checked, then Canvas 
size 800 x 800, delete the credits.

Take your magic wand, click on the white circle part, resize paper 11
to 40%, paste, invert, delete.
Click on the black part of the circle, fill with a color from your tube,
add noise at 75%.

Select raster 4, select all, float, defloat, add a new layer fill with the 
color as the black circle, delete the dotted layer.
Click on copy of raster 2 with your magic wand, resize paper 15, to 50%, paste,
invert, delete.
Click on the white part, fill with the same color as before, add noise.
Delete raster 5.

Click on raster 2, resize paper 16 to 50%, paste, invert, delete.
Click on copy of raster 2, paste the same paper, invert, delete.
Leave the white part as is.

Resize 62 to 85%, mirror, paste at the top above the circle dotted layer.
Resize 34 to 65%, paste on the upper right above the template layer.
Resize 38 to 55%, paste on the bottom left.
Resize 48 to 55%, paste on the upper left below the fireplace.
Resize 52 to 40%, paste at the bottom above the fireplace.
Resize 65 to 40%, paste at the bottom right.

Resize tube 10 to 30%, paste at the bottom above the sign.

Resize 123 to 30%, paste at the bottom right above the tube.
Resize 121 to 30%, paste on the bottom left.
Resize 86 to 20%, paste at the bottom above the tube.
Resize 11 to 25%, paste on the left below the shells.
Resize 135 to 25%, paste at the bottom above the tube.
Resize 144 to 25%, paste on the bottom left.
Resize 108 to 25%, paste at the bottom below the basket of shells.
Resize 96 to 23%, paste at the bottom to the left below the shells.
Resize 94 to 15%, paste at the bottom.

Select the one you want from element 163, resize around 25%, paste 
where you like.
Resize paper 4 to 65%, paste on the bottom layer above the white background,
apply your mask.

Add any other elements that you would like, make it your own.
Always readjust your mask and elements how you like them before you
 merge your tag, resize, sharpen.

Crop your tag to be sure no shadows or lines are on the edges.
 Then add your copyright and name.
That's it

             Hope you enjoyed doing my tut                

Sunday, July 26, 2026

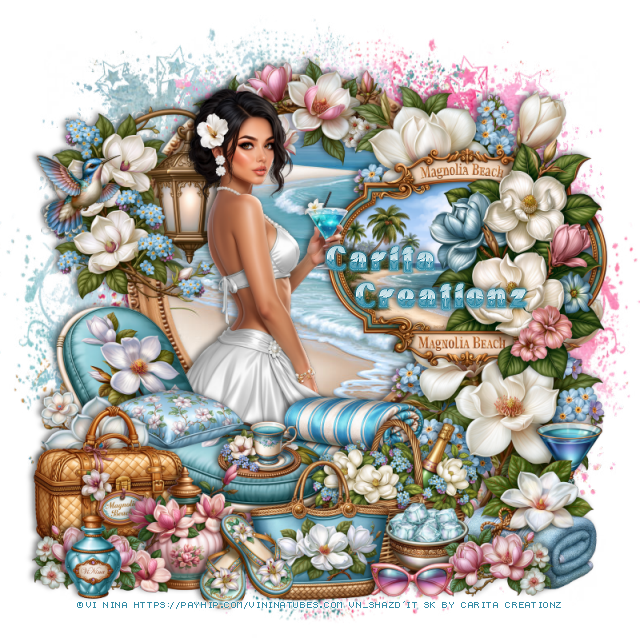
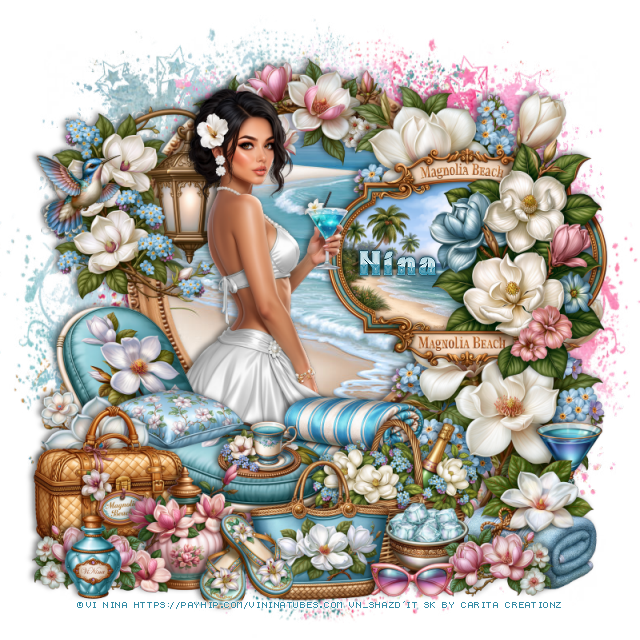
PTU Seaside Glamour


  This tut was written July 26th, 2026 for those with a basic knowledge of psp. 

I am using the Beautiful tube ©Vi Nina
The tube is called Seaside Glamour, comes in several colors
The tube is "NOT" included
You need a license to use this tube, please do not use without a license
You can find the tube at Vi Nina Store HERE

I used PSP2020...but any of them should work.
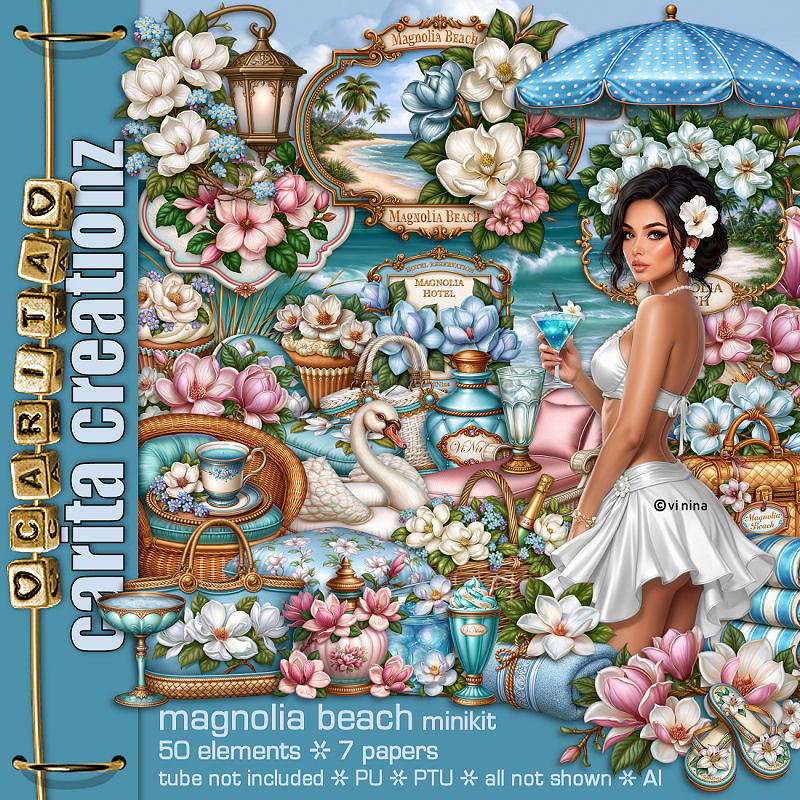
PTU Scrap Magnolia Beach mini kit by Carita Creationz  HERE
Kit has 50 elements and 7 papers 
Check her store out to see all her other kits and tubes HERE
Miz Teeques Mask 297 HERE
Check the blog Here

Font of choice, I used Tropical Taste

Drop shadow as you go is V -2 H 4, 50, 10, or use what you prefer.
Let's get started
*Remember to add your drop shadow as you go along*

Open a new image 800 x 800, paste paper 3 first, apply your mask, mirror,
paste paper 5, apply the mask, move to the right.

Resize 47 to 70%, paste, click inside, paste paper 2, invert, delete.
Resize 41 to 50%, paste on the frame on the right.
Resize 12 to 35%, paste on the left on the frame.
Resize 31 to 35%, paste at the top on the frame.

Resize the tube to 40%, mirror, paste on the left.

Resize 14 to 50%, paste on the bottom left above the tube.
Resize 13 to 30%, paste at the bottom above the lounge chair.
Resize 22 to 15%, paste at the bottom above the basket.
Resize 9 to 25%, paste on the chair.
Resize 19 to 15%, paste on the chair.
Resize 24 to 25%, paste at the bottom below the chair behind the basket.
Resize 38 to 27%, paste on the bottom left above the chair.

Resize 5 to 25%, paste at the bottom above the basket.
Resize 40 to 40%, paste on the right below the sign at the bottom, 
duplicate, move to the top.
Resize 26 to 25%, paste on the bottom right below the basket.
Resize 3 to 17%, paste at the bottom to the left of the bag.
Resize 32 to 23%, paste at the bottom below the flip flops.
Resize 33 to 20%, paste at the bottom left, duplicate, move to the right by the towel.
Resize 30 to 15%, paste at the bottom.
Resize 17 to 15%, paste at the bottom left above the flowers.
Resize 42 to 15%, paste on the left by the flowers.
Resize 20 to 20%, paste on the right below the towels.
Resize 6 to 20%, paste on the left below the basket.

Add any other elements that you would like, make it your own.
Always readjust your mask and elements how you like them before you
 merge your tag, resize, sharpen.
Crop your tag to be sure no shadows or lines are on the edges.
 Then add your copyright and name.
That's it

Hope you enjoyed doing my tut.       

Tag for Nina 

Tuesday, July 14, 2026

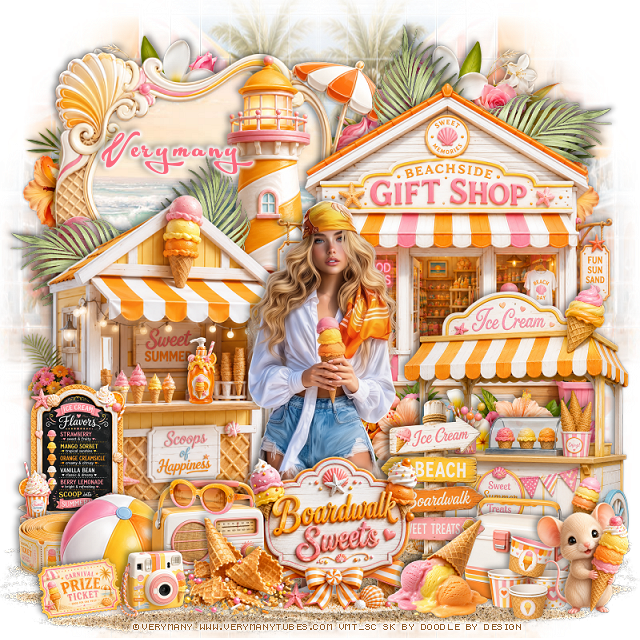
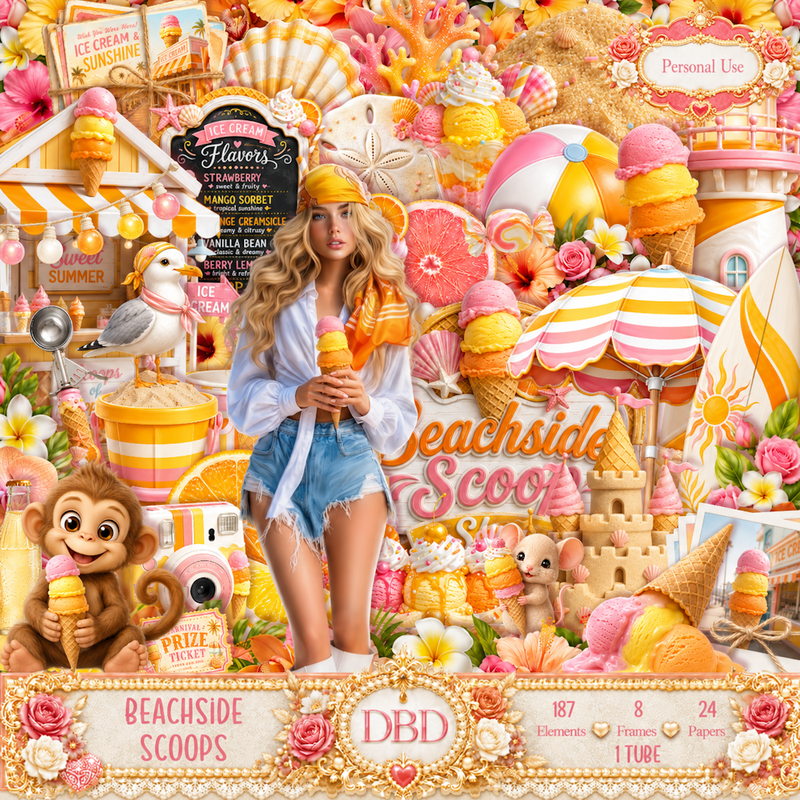
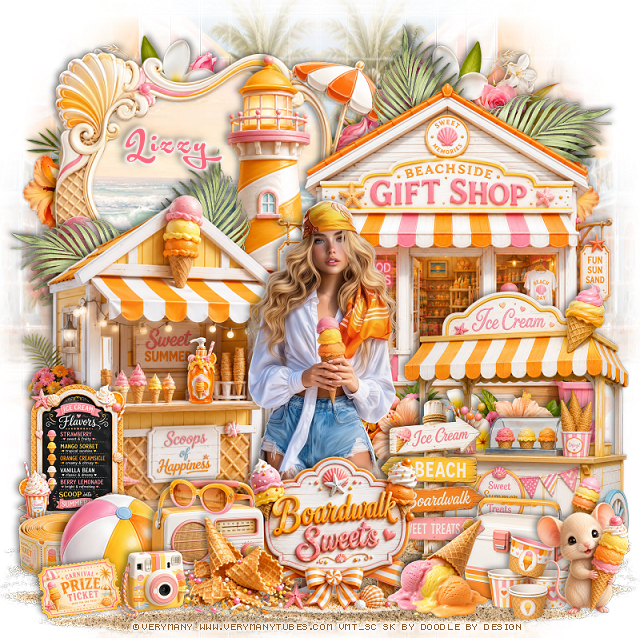
PTU Beachside Scoops


 This tut was written July 14th, 2026 for those with a basic knowledge of psp. 

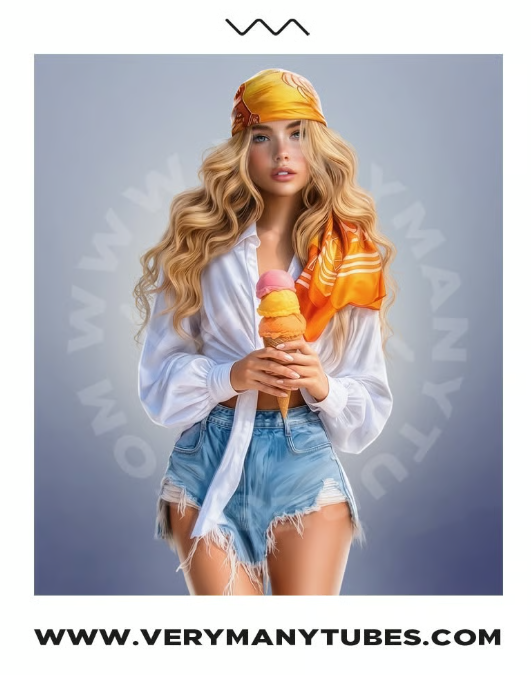
I am using the awesome tube ©Verymany
The tube is called Ice Cream 3
The tube is NOT included
You need a license to use this tube, please do not use without a license
You can find the tube at Verymany store HERE


I used PSP2020...but any of them should work.
PTU Scrap Beachside Scoops by Doodle by Design  HERE
You can find all Doodle by Design kits  HERE 
DBV Mask 72 HERE
Check the blog Here

Font of choice, I used Acryle Script

Drop shadow as you go is V -2 H 4, 40, 10, or use what you prefer.
Let's get started
*Remember to add your drop shadow as you go along*

Open a new image 800 x 800, paste paper 17, apply your mask, move
to the left, duplicate, mirror, adjust, duplicate, merge down.

Resize frame 8 to 60%, paste at the upper left, click inside, paste
paper 18, move how you like, invert, delete.
Resize 105 to 60%, paste on the upper right.
Resize 18 to 60%, paste on the left.
Resize 99 to 50%, paste above the frame behind the buildings.

Resize 162 to 50%, paste on the left below the ice cream building, 
duplicate, change the blend mode to Screen, merge down, duplicate, 
mirror, move up on the right.
Resize 134 to 50%, paste on the upper right below the palm leaves,
duplicate, mirror, move below the frame.
Resize 146 to 50%, paste on the right at the bottom of the gift shop.
Resize 19 to 25%, paste on the left by the ice cream stand.
Resize 17 to 50%, paste on the bottom right.

Resize the tube to 30%, paste in the center.

Resize 14 to 30%, paste at the bottom above the tube.
Resize 7 to 22%, paste at the bottom left above the sign.
Resize 110 to 18%, paste at the bottom on the right of the sign.
Resize 95 to 30%, paste below the tube on the right.
Resize 76 to 20%, paste on the bottom right below the sign.
Resize 90 to 20%, paste below the ice cream cones on the bottom left.
Resize 112 to 12%, paste at the bottom left by the cones.
Resize 21 to 15%, paste on the bottom right above the chest.
Resize 98 to 20%, paste on the bottom right.

Resize 89 to 15%, paste on top of the radio.
Resize 78 to 20%, paste below the radio on the left.
Resize 94 to 15%, paste on the bottom left above the camera.
Resize 25 to 12%, paste on the left on the counter of the ice cream stand.
Resize 93 to 15%, paste on the bottom left below the ball.
Paste 170 at the bottom left on the bottom layer, duplicate, mirror, adjust.

Add any other elements that you would like, make it your own.
Always readjust your mask and elements how you like them before you
 merge your tag, resize, sharpen.

Crop your tag to be sure no shadows or lines are on the edges.
 Then add your copyright and name.
That's it

Hope you enjoyed doing my tut 

Tag for Lizzy    


Tuesday, July 7, 2026

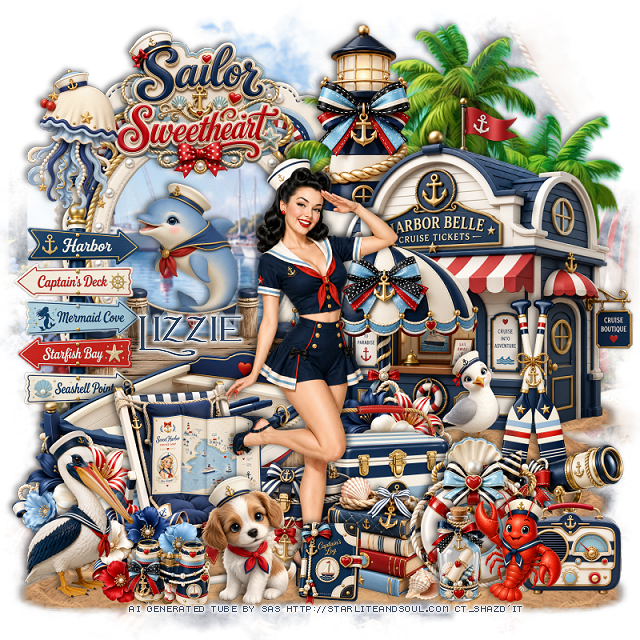
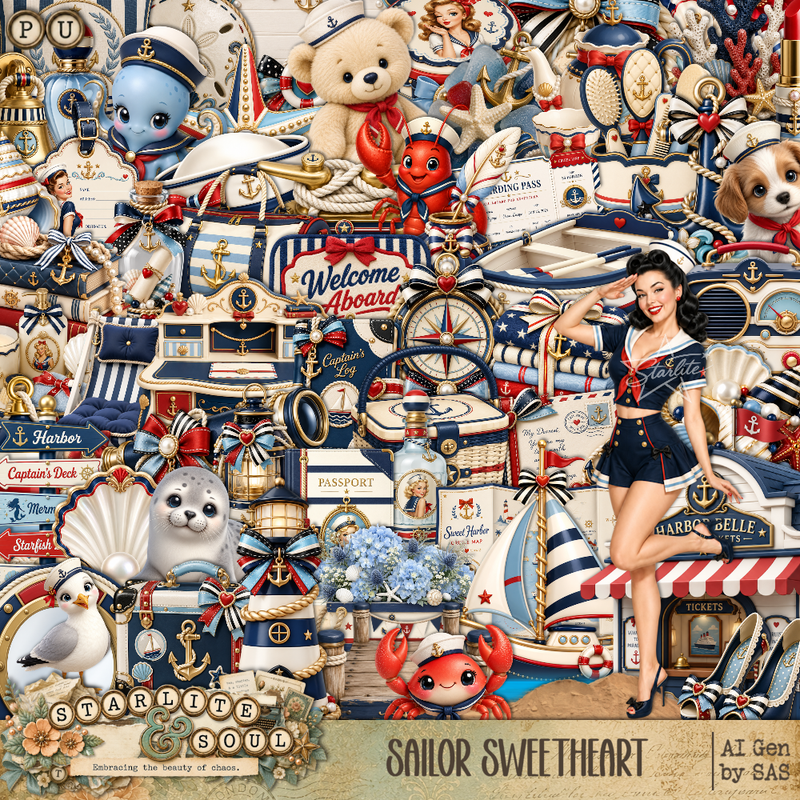
PTU Sailor Sweetheart

 This tut was written July 7th, 2026 for those with a basic knowledge of psp. 

I am using the beautiful Al tube gen by SAS

Tube is included

Everything is included in the kit
Read the TOU on how to credit your tags


I used PSP2020...but any of them should work.
PTU Scrap Sailor Sweetheart by Starlite and Soul  HERE
You can find all Starlite and Soul kits  HERE 
Lori's PSP Graphic 1230 HERE 
Check the blog out HERE

Font of choice, I used Avanti

Drop shadow as you go is V -2 H 4, 40, 10, or use what you prefer.
Let's get started
*Remember to add your drop shadow as you go along*

Open a new image 800 x 800, resize paper 7 to 90%, apply your mask.

Resize frame 6 to 60%, paste on the upper left
Resize frame 3 to 60%, paste on the frame.
Click inside the frame, paste paper 7, move how you like, invert, delete.
Resize the wordart to 30%, paste at the top on the frame.
Resize 7 to 25%, paste in the frame.
Resize 1 to 60%, paste on the upper right above the wordart.
Paste 120 below the building.
Resize 18 to 50%, paste at the top below the building.
Resize 125 to 75%, paste at the top right below the light house.

Resize the tube to 35%, mirror, paste above the building.

Resize 9 to 25%, paste at the upper left above the frame.
Resize 47 to 50%, paste on the left below the tube at the bottom of the frames.
Resize 44 to 40%, paste below the boat.
Resize 85 to 45%, paste below the boat on the left.
Resize 104 to 25%, paste at the bottom below the tube.
Resize 102 to 40%, mirror, paste at the bottom left.
Resize 76 to 30%, mirror, paste at the bottom left by the chair.
Resize 25 to 40%, paste below the tube.
Resize 89 to 25%, paste above the umbrella.

Resize 173 to 25%, paste on the bottom left below the chair,
duplicate, move to the right above the umbrella behind the chest.
Resize 175 to 20%, paste at the bottom left below the pelican.
Resize 93 to 22%, paste at the bottom below the tube on the right.
Resize 46 to 30%, paste on the right on the building.
Resize 15 to 25%, paste at the bottom above the books.
Paste 120 at the bottom left on the bottom layer, duplicate, mirror, move to
the right below the other sand layer.

Resize 5 to 23%, paste at the bottom by the chair.
Resize 2 to 18%, paste on the right by the oars.
Resize 16 to 17%, paste on the bottom right.
Resize 27 to 15%, paste at the bottom.
Resize 21 to 20%, paste on the bottom right below the life ring.
Resize 23 to 25%, paste on the bottom right below the shells.
Resize 103 to 20%, paste at the bottom right.
Resize 50 to 20%, paste in the chair below the dog.
Resize 22 to 15%, paste at the bottom left by the dog.
Resize 11 to 20%, paste at the bottom right by the radio.

Add any other elements that you would like, make it your own.
Always readjust your mask and elements how you like them before you
 merge your tag, resize, sharpen.

Crop your tag to be sure no shadows or lines are on the edges.
 Then add your copyright and name.
That's it

Hope you enjoyed doing my tut 

Thursday, June 25, 2026

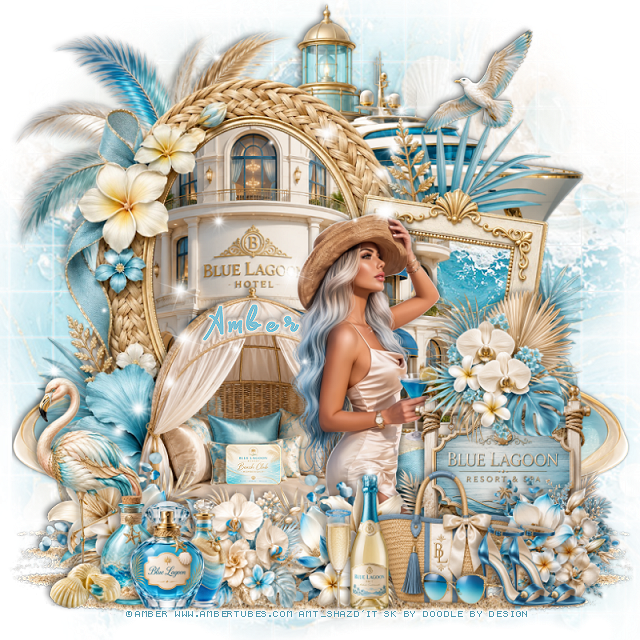
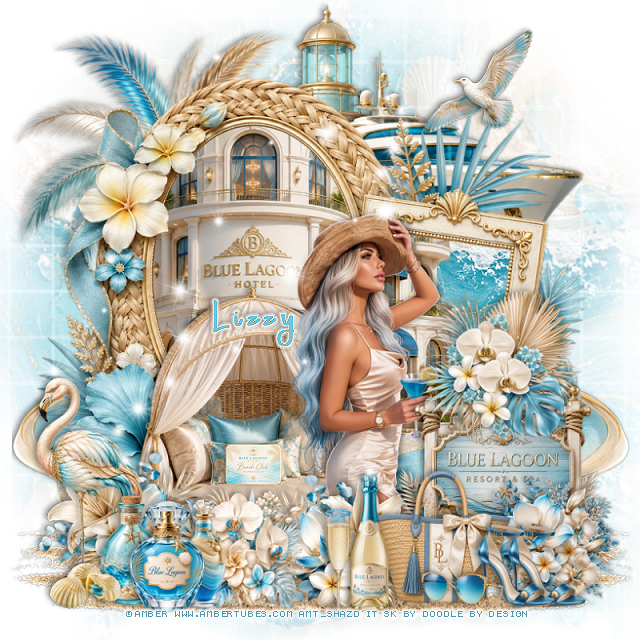
PTU Blue Lagoon


 This tut was written June 24th, 2026 for those with a basic knowledge of psp. 

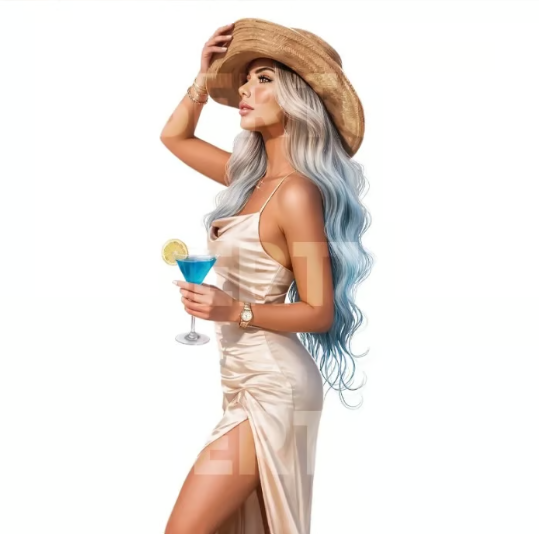
I am using the awesome tube ©Amber
The tube is called Blue Lagoon 2
The tube is NOT included
You need a license to use this tube, please do not use without a license
You can find the tube at Amber store HERE


I used PSP2020...but any of them should work.
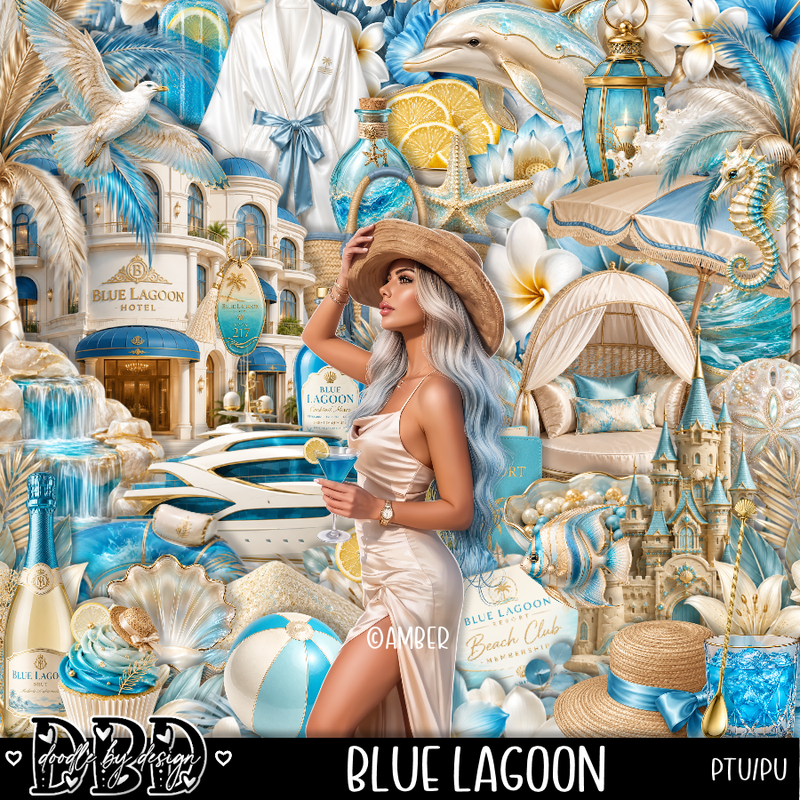
PTU Scrap Blue Lagoon by Doodle by Design  HERE
You can find all Doodle by Design kits  HERE 
DBV Mask 72 HERE
Check the blog Here

Font of choice, I used Lovely Butterfly

Drop shadow as you go is V -2 H 4, 40, 10, or use what you prefer.
Let's get started
*Remember to add your drop shadow as you go along*

Open a new image 800 x 800, paste paper 2, apply your mask,

Paste frame 3, click inside the frames, paste paper 2, invert, delete.
Resize 120 to 80%, paste in the left frame, erase the left side outside the frame 
and the top, leave the part in the smaller frame.
Resize 124 to 60%, mirror, paste at the upper right below the frame.
Resize 127 to 85%, paste at the upper left below the frame.
Resize 125 to 65%, paste at the top below the boat.

Resize the tube to 25%, paste above the frame about center.

Resize 18 to 40%, paste on the bottom right above the tube.
Resize 168 to 30%, mirror, paste on the right above the sign.
Resize 10 to 50%, paste below the tube.
Resize 170 to 30%, paste at the bottom left above the tube layer,
duplicate, mirror, move by the sign above the tube.
Resize 172 to 25%, paste at the bottom above the flowers.
Resize 12 to 25%, paste at the bottom right above the sign.
Resize 8 to 15%, paste at the bottom by the purse.
Resize 132 to 40%, paste on the bottom left.
Resize 166 to 25%, paste on the bottom right below the purse.

Paste 128 on the bottom layer to the bottom, duplicate, mirror,
let some show on each side and bottom.
Resize 9, 19 and 107 to 20%, paste on the bottom left.
Paste 208 on the bottom layer above the pool layer on the left, duplicate, mirror.
Resize 98 to 10%, paste on the bed seat.
Resize 39 to 12%, paste on the bottom left.
Resize 21 to 15%, paste at the bottom right, duplicate, move over.
Resize 32 to 25%, paste at the bottom by the purse.
Resize 33 to 20%, paste at the bottom.
Resize 119 to 20%, paste at the upper right.
Paste 205 where you like.

Add any other elements that you would like, make it your own.
Always readjust your mask and elements how you like them before you
 merge your tag, resize, sharpen.

Crop your tag to be sure no shadows or lines are on the edges.
 Then add your copyright and name.
That's it

Hope you enjoyed doing my tut 

Tag for Lizzy