Friday, March 27, 2020

FTU Rabbit Cutie


This tut was written March 26th, 2020 for those with a basic knowledge of psp.
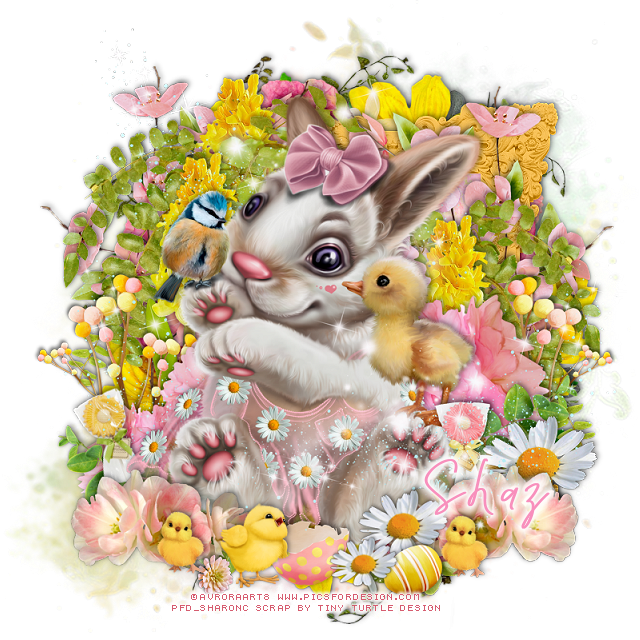
I am using the awesome artwork of Avroraart8
The tube is called "Rabbit"
You need a license to use this tube, do not use without a license.
You can find this tube at PFD store  HERE

I used PSPX...but any of them should work.
FTU kit Springtime Promise by Tiny Turtle Design  HERE
You will have to register at her store to get this.
Mask of choice, I used DFly Mask_0029  HERE
Check out the rest of the blog HERE

Font of choice,  I used Victorian Parlor Vintage

Drop shadow is usually V-2 H-2 Black, 50, 5, use what you prefer.
Let's get started
*Remember to add your drop shadow as you go along*

Open a new image 800 x 800
Paste paper 8, apply your mask, delete, merge group,
mirror.

Resize your tube to 33%, paste to the left.

Paste element 87 on the mask layer to the right of the tube a bit.
Paste element 86 on the frame behind the tube on the left, duplicate,
mirror, move down a little, erase the stem at the bottom.
Paste element 54 above the pink flower on the left, duplicate twice,
move to each side of the center yellow flower.

Paste element 93 at the upper left between the yellow flowers, duplicate, 
mirror, move down above the pink flowers.
Go back to the tall yellow flowers, duplicate one, move to the right 
above the green vine and down, erase any stem showing at the bottom.

Paste element 44 on the mask layer and move to the top a bit, duplicate,
move down.
Paste element 61 on top of that wreath, duplicate, move down.

Resize element 83 to 40%, paste at the lower left above the tube, 
duplicate, mirror.
Mirror element 35, paste behind the tube, erase the stem showing at the bottom.
Resize element 14 to 50%, paste below the pink flower on the left,
duplicate, mirror.

Resize element 95 to 20%, paste at the bottom.
Resize element 79 to 25%, paste on the right below the flowers, duplicate,
move to the top layer and resize to 75%, duplicate again and resize to 
75%, once more and move over a little.

Resize element 24 to 20%, paste at the bottom being on the top layer.
Paste element 11 being on the top layer to the right, duplicate, mirror,
move below the tube and up, duplicate once more and move down
behind the tube.
Resize element 52 to 15%, paste at the bottom left by the small chick.

Divide element 48, then resize both to 15%, paste where you like.
I rotated one to the left at 20 degrees.
Resize element 5 to 15%, paste at the bottom between the daisy flowers.
Resize element 63 to 15%, paste at the bottom being on the top layer to the right
by the egg, duplicate, move to the left.
Resize element 22 to 50%, paste behind the lollipop on the left, duplicate,
mirror.

Add any other elements that you would like, make it your own.
Always readjust your mask and elements how you like them before you
 merge your tag, sharpen once.

Crop your tag to make sure no shadows or anything on the edges, merge visible.
 Then add your copyright and name.

That's it
Hope you enjoyed doing my tut.

Thursday, March 26, 2020

FTU Nadine Beauty


This tut was written March 26th, 2020 for those with a basic knowledge of psp.
I am using the awesome artwork of Alex Prihodko
The tube is called "Nadine"
You need a license to use this tube, do not use without a license.
You can find this tube at VMArtists  store  HERE

I used PSPX...but any of them should work.
FTU kit Fantastic Nature by Dreamworld Design  HERE
Check out the rest of the blog HERE
Mask of choice, I used DFly Mask_0029  HERE
Check out the rest of the blog HERE

Font of choice,  I used Victorian Parlor Vintage

Drop shadow is usually V-2 H-2 Black, 50, 5, use what you prefer.
Let's get started
*Remember to add your drop shadow as you go along*

Open a new image 800 x 800
Resize paper 10 to 22%, paste, apply your mask, delete, merge group,
mirror.

Resize your tube to 45%, paste to the bottom.

Resize frame 16 to 18%, paste on the right and up behind the tube, 
duplicate, move
to the left and down and below the top frame layer, 
erase the hanger part on top of the left one.
Click inside the frames, expand by 5, paste the resized paper 10, invert,
delete, keep selected.
Resize your tube to 70%, paste in one frame, mirror and paste in the other
frame, select none.

Resize element 40 to 25%, paste above the frame on the left and behind
the tube, duplicate, mirror, erase the large green leaf.
Resize element 11 to 30% paste below the tube on the left, erase the rock
that is showing, duplicate, mirror, move above the white flower on 
the right, erase any rock that might be showing.

Resize element 32 to 30%, paste behind the tube on the frames, duplicate, 
mirror, move below the paper layer of the frames on the right above
the grass layer and down some, erase any stem showing at the bottom.
Duplicate one of them again, resize to 50%, move above the frame and to the 
lower right, duplicate, mirror, move below the tube on the left.

Resize element 68 to 10%, free rotate to the left at 90 degrees, mirror, paste
below the tube to the left, duplicate, move above the tube, mirror, resize to
60%, move by the tube.
Resize element 22 to 15%, paste at the bottom below the tube on the left,
duplicate, mirror.

Resize element 60 to 5%, paste at the bottom above the tube, duplicate
two more times, place on each side.
Resize element 12 to 5%, paste between the other flowers, duplicate, 
move over more.
Resize element 02 to 10%, paste at the lower right above the frame, duplicate, 
mirror, adjust on the left.

Resize element 44 to 25%, paste on the mask toward the upper left, 
duplicate a couple more times and move one down and the other to 
the right.
Resize element 55 to 5%, paste below the other flowers at the bottom,
duplicate a couple more times and move around.
Resize element 48 to 5%, paste at the bottom above the tube on her shoes,
duplicate, move over a little, duplicate again, move more to the right.
Resize element 61 to 5%, paste on the left, duplicate, mirror.

If you want some wordart saying on your mask, type out what you want,
paste above mask, apply Mura Meister Copies-Tiling, gap on 2, then select 
your mask, select all, float, defloat, invert, being on the wordart hit, delete,
select none. 
Change the blend mode or lower the opacity if you like.

Add any other elements that you would like, make it your own.
Always readjust your mask and elements how you like them before you
 merge your tag, sharpen once.

Crop your tag to make sure no shadows or anything on the edges, merge visible.
 Then add your copyright and name.

That's it
Hope you enjoyed doing my tut.

Wednesday, March 25, 2020

PTU Fairy VN


This tut was written March 25th, 2020,  for those with a basic knowledge of psp.
I am using the awesome artwork of  Vi Nina
The tube is  "Fairy"
I bought mine when she was still at S&CO 
You need a license to use this tube, do not use without a license.
You can find this tube at her store  HERE

I used PSPX...but any of them should work.
PTU kit Fairy_VN by All Dolled Up,  HERE or HERE
Mask of choice I used DFly Mask_0053 HERE
Check out the rest of the blog HERE


Font of choice,  I used Vytorla

Drop shadow is usually V-2 H-2 Black, 45, 10, use what you prefer.
Let's get started
*Remember to add your drop shadow as you go along*

Open a new layer 800 x 800
Paste paper 11, apply your mask, delete, merge group.

Paste element 54 at the bottom.
Paste element 64 on the mask layer behind the pond on the right
toward the bottom, duplicate, mirror.
Duplicate again, move to the top layer, resize to 55%, paste at the
bottom above the water pond, duplicate, mirror.
Paste element 34 on the left above the bushes.

Resize your tube to 45%, paste on the grass edge of the pond.

Paste element 27 on the mask layer to the right of the mushroom.
Resize element 32 to 30%, paste at the lower left above the bushes,
duplicate, move behind the tube, duplicate, mirror, adjust on the right.

Resize element 39 to 55%, paste on the right below the small bush,
duplicate, mirror.
Resize element 14 to 40%, paste on the left above the tall grass, duplicate,
mirror.

Resize element 29 to 40%, paste on the left below the rocks.
Resize element 10 to 20%, paste at the lower right on the rock.
Resize element 74 to 35%, paste on the right below bush by the frog,
duplicate, move to the left.

Paste element 7 on the right on the mask layer, duplicate, mirror.
Paste element 133 on the mask now and to the right.
Resize element 9 to 20%, being on the top layer now, paste on the stump.

Paste element 45 on the right below the bush behind the frog, duplicate,
move to the left above the mushroom.

Resize element 131 to 30%, paste at the bottom by the small mushroom.
Resize element 125 to 60%, paste on the right on the pond layer.
Resize element 33 to 25%, paste at the lower left on the rock.

Add any other elements that you like, make your own.
Remember to always adjust all the elements how you like on your tag,
then resize your mask if needed before merging your tag.

Once happy, close off any background you had.
 Crop your tag to get rid of any stray edges, merge visible.
Resize, sharpen, add your Copyright and name.

That's it
Hope you enjoyed doing my tut.

Tuesday, March 24, 2020

PTU Cozy Easter


This tut was written March 24th, 2020, for those with a basic knowledge of psp.
I am using the awesome tube by artist ©Lysisange
Tube is included in this kit for use with this kit only.
 You need a license to use this art, please do not use without a license.
You can find this kit along with all her other kits at her store HERE

I used PSPX...but any of them should work.
 PTU kit Cozy Easter by LMB HERE  HERE or HERE
Mask of choice, I used RD Mask 758 HERE
Check out the rest of the blog HERE

Font of choice,  I used Vytorla

Drop shadow is usually V-2 H-2 Black, 50, 5, use what you prefer.
Let's get started
*Remember to add your drop shadow as you go along*

Open a new image 800 x 800
Paste paper 11, apply your mask, delete, merge group, mirror.

Resize element 68, the tube to 20%, paste.

Paste element 43 behind the tube toward the top.
Paste element 49 next on top of the flowers.
Resize element 50 to 75%, paste on the right on the mask layer and down,
duplicate, mirror.

Resize element 55 to 50%, paste on the left below the top flowers,
click inside with your magic wand, expand by 5, paste paper 11, invert,
delete, keep selected.
Pasted your resize tube in the frame, delete, select none, merge the paper, 
tube and frame together, duplicate, mirror, move down on
the right.

Resize element 9 to 50%, paste at the bottom above the tube, 
duplicate, mirror.
Resize element 38 to 35%, paste at the lower left below the daisies.
Resize element 39 to 30%, paste at the bottom below the daisy layer.

Paste element 70 on the mask layer on the right, duplicate, mirror.
Paste element 13 below the daisies on the right, duplicate, mirror.

Resize element 26 to 20%, paste at the bottom being on the top layer now.
Resize element 7 to 15%, paste at the lower left under the flower, 
duplicate, move over a little.

Resize element 24 to 30%, paste at the lower right below the flower.
Resize element 5 to 30%, paste at the top below the top flowers, 
duplicate, mirror, move to the right and down more.
Paste element 69 on the mask layer at the upper right, duplicate, mirror,
duplicate move down, duplicate, mirror.

Resize element 25 to 25%, paste at the lower right below the flowers.
Paste element 35 on the right being on the top layer.
Resize element 37 to 25%, paste on the stool on the left.
Resize element 1 to 25%, paste behind the book.
Resize element 36 to 15%, paste at the bottom above the birdhouse,
duplicate twice, move each one on the frames where you like.

Add any other elements you would like, make it your own.
Always remember to adjust the elements before merging to get them like you like.

Once happy with your tag, close off any background, crop your tag to make
sure there are no stray edges, merge visible, resize first.
Add your copyrights and name.

That's it
Hope you enjoyed doing my tut.