Saturday, June 19, 2021

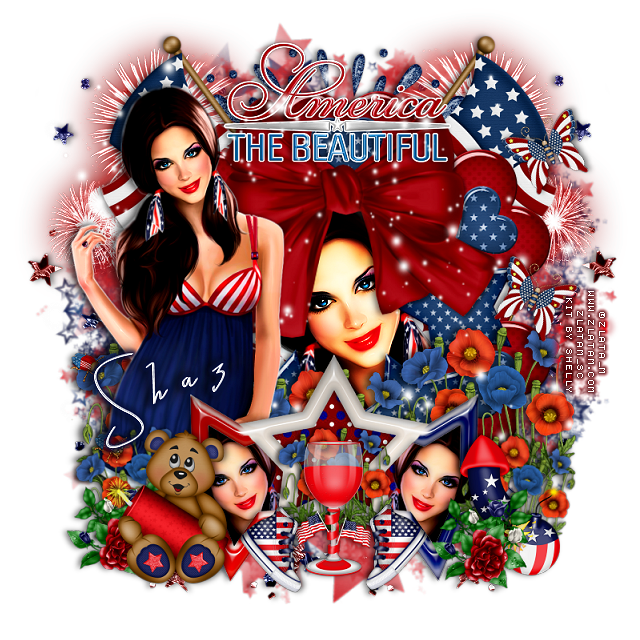
FTU America

 This tut was written June 19th, 2021 for those with a basic knowledge of psp.

I am using the awesome artwork of  Zlata_M
The tube is called "4th  July Nikki" 
You need a license to use this tube, do not use without a license.
You can find this tube at ZlataM Store  HERE

I used PSPX6...but any of them should work.
FTU kit America PTU now FTU by Shelly  HERE
Check out the rest of the Blog  HERE
DD Star Masks 1 and 2  HERE
Check out the rest of the blog HERE
Filter
Eye Candy 4000-Glass
xero-Porcelain

Font of choice,  I used Bestlife

Drop shadow is  V -1 H -4, 40, 10, or use what you prefer.
Let's get started
*Remember to add your drop shadow as you go along*

Open a new image 800 x 800 or a size you prefer, can always resize later.

Paste paper 116 apply mask 1, delete, merge group, move to the bottom,
duplicate, flip, move to the top more.
Paste paper 115 apply mask 2, delete. merge group.
Merge the 3 masks together.

Paste element 17, resize large to 110, click inside with your magic wand,
expand by 5, paste your tube, invert, delete, select none.
Duplicate the tube, go to Adjust, Blur, Gaussian blur, number on 5, change the
blend mode to Overlay, merge down.
Paste element 15 above the mask and move up.

Resize your tube to 60%, paste above the frame on the left.

Resize element 57 to 40%, paste behind the tube to the left, duplicate, move
to the center and down a little, duplicate again, move to the right.
Resize element 105 to 60%, paste at the bottom above the tube, duplicate, change
the blend mode to burn, merge down.
Resize element 24 to 35%, paste at the bottom above the star frames.

Resize element 35 to 40%, duplicate, paste one on each side of the glass.

Click inside each star, expand by 5, paste your resize tube in one side
duplicate, mirror, invert, delete, paste a paper of choice, I used paper 123.
Apply xero filter, Porcelain, default settings.
Apply Eye Candy 4000 Glass to the star frames.
10.80
75
30, 35, 50
0, 50 
color White
Paste element 89 at the upper left above the mask, duplicate, mirror.
Resize element 5 to 40%, paste at the lower left above the star frames.
Resize element 87 to 35%, paste at the top below the tube,
select all, float, defloat, expand by 2, add a new layer, fill with white, move below
the wordart.

Paste element 86 on the mask to the right, erase the ones you don't want,
duplicate, mirror.
Go back to the flowers behind the tube, duplicate one, resize to 70%,  paste behind
the glass above the star frames, duplicate again, free rotate to 
the left at 15 degrees, move behind the bear, duplicate, mirror.

Resize elements 21, 22 and 72 to 25%, mirror 22, paste all the three down on the
lower right.
Duplicate the flower, mirror, move behind the bear.

Paste element 104 below the tube layer, arrange where you like, erase any on 
the face inside the frame.
Resize element 81 to 20%, free rotate to the right at 25%, paste on the right about
half way down, duplicate, mirror, move back to the right and up.
Resize element 77 to 10%, paste on the left on the flower, duplicate, move down
on another flower.

Add any other elements that you would like, make it your own.
Always readjust your mask and elements how you like them before you
 merge your tag, resize, sharpen.

 Then add your copyright and name.
That's it

Hope you enjoyed doing my tut.    

Tuesday, June 15, 2021

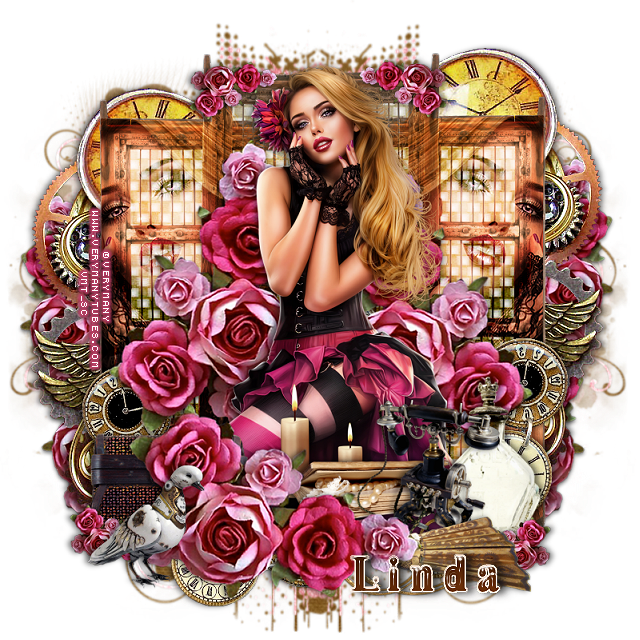
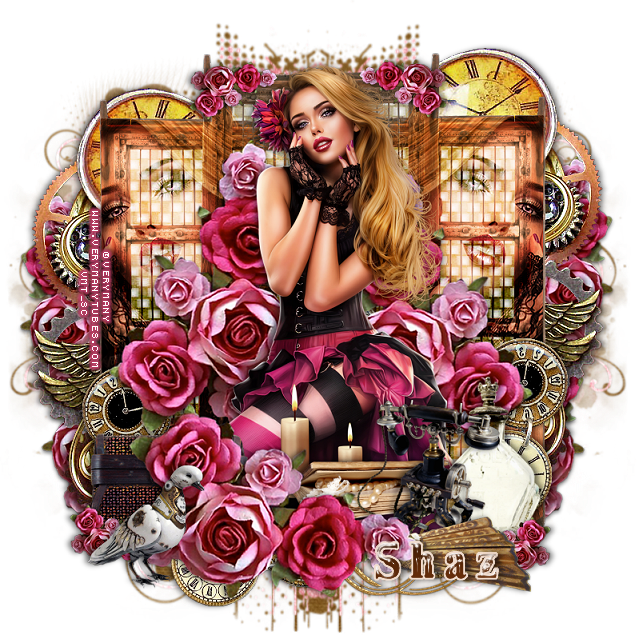
FTU Romantic Steampunk


 This tut was written June 15th, 2021 for those with a basic knowledge of psp.

I am using the awesome artwork of  Verymany
The tube is called "Steampunk 21" 
You need a license to use this tube, do not use without a license.
You can find this tube at Verymany store  HERE

I used PSPX6...but any of them should work.
FTU kit  Romantic Steampunk by 
My Tagging Addiction  HERE
Check out the rest of the blog HERE
Dfly Mask 0007  HERE
Check out the rest of the blog HERE

Font of choice,  I used  Steamy

Drop shadow is  V -2 H 4, 50, 10, or use what you prefer.
Let's get started
*Remember to add your drop shadow as you go along*

Open a new image 800 x 800 or a size you prefer, can always resize later.
Paste paper 1, apply the mask, delete, merge group.
Paste paper 3, apply the mask, delete, merge group, resize this mask to 95%,
merge down with the first mask, duplicate, mirror, adjust both mask.
Paste paper 2, apply the mask, delete, merge group.

Resize element 7 to 50%, paste on one side, duplicate, mirror, duplicate
again and move to the center and up a little, merge these three together, 
take your free hand tool, draw around the screens, paste paper 2 below, invert.
delete, keep selected.
Paste your tube above the frames on one side, duplicate the tube 
and
 paste on the other side, delete both, change the blend mode to Overlay.

Resize your tube to 45%, paste being on the top layer.

Mirror element 30, paste behind the tube and move to the left just a little.
Paste element 52 at the bottom above the tube, duplicate, free rotate to the left
at 90 degrees, move behind the tube on the left, duplicate, mirror, move down 
a little on the right, duplicate again, resize to 70%, move to the mask layer on one side,
duplicate, mirror, move behind the gears where you like on each side.
Duplicate both and move down more on each side.

Resize element 52 to 30%, flip, move on the frame at the top, duplicate, mirror.
duplicate, flip, move down to the lower right, duplicate, mirror.
Paste element 45 below the flowers at the lower left, duplicate, mirror.
Paste element 29 above the tube to the left.
Resize element 8 to 40%, paste above the tube off center to the right.
Resize element 6 to 40%, paste at the bottom below the flowers.

Resize element 50 to 50%, paste at the lower right below the fan.
Resize element 20 to 75%, paste at the lower right below the smaller flowers and 
phone.

Resize element 1 to 30%, mirror, paste at the lower left.
Resize element 15 to 40%, paste above the tube by her leg, erase one candle
on the left.

Add any other elements that you would like, make it your own.
Always readjust your mask and elements how you like them before you
 merge your tag, resize, sharpen.

 Then add your copyright and name.
That's it

Hope you enjoyed doing my tut.   
Tag for Linda


Monday, June 14, 2021

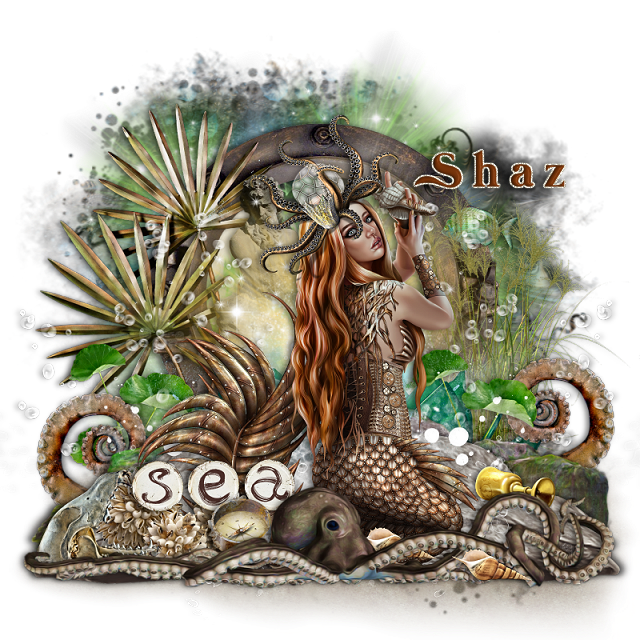
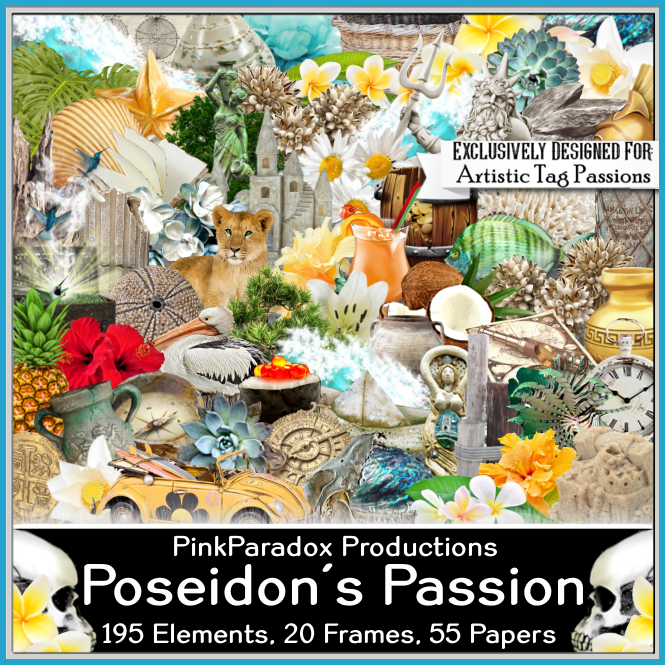
Exclusive Poseidon's Passion at ATP


This tut was written June 14th, 2021 for those with a basic knowledge of psp.

I am using the awesome artwork of  Sheokate
The tube is called "Eleanor" 
You need a license to use this tube, do not use without a license.
You can find this tube at Elegance Fly store  HERE

I used PSPX6...but any of them should work.

Exclusive kit Poseidon's Passion, by PPP, this kit is awesome. 
This kit is an Exclusive at ATP, you will have to join to be able to get the kit.
Artistic Tag Passions Forum HERE
Artistic Tag Passions Blog HERE
DFly Mask 0017 HERE 
Check out the rest of the blog HERE

Font of choice,  I used Mermaid Swash

Drop shadow is  V 0 H -4, 50, 10, or use what you prefer.
Let's get started
*Remember to add your drop shadow as you go along*

Open a new image 800 x 800 or a size you prefer, fill with white, can always resize later.
Select all, add a new layer, paste paper 55 into selection, select none.
Resize your mask larger to 125, paste, delete, merge group.
Paste element 66 on the mask layer.
Resize frame 11 to 45%, paste on the glow.

Paste element 67, move down a little.
Resize element 1 to 40%, paste on the right down some, duplicate, mirror,
move down a little more.
Resize element 103 to 85%, paste at the bottom.
Resize element 107 to 65%, paste at the bottom above the green rocks,
duplicate, move down and below the green rocks.
Resize element 170 to 75%, paste on the left below the the glowing element.
Resize element 21 to 50%, paste below the glowing element toward the left.
Resize element 159 to 60%, paste on the right.

Resize element 112 to 55%, being on the top layer, paste at the lower left, duplicate, mirror.

Resize your tube to 30%, paste above the brown rocks.

Resize element 14 to 95%, paste at the bottom above the tube.
Resize element 49 to 30%, paste on the lower left below the octopus.
Resize element 76 to 40%, paste at the lower left below the sea wordart.

Resize element 44 to 15%, paste below the octopus by the head.
Paste element 192 below the tube on the left, erase the blue frame part, duplicate, mirror.
Resize element 2 to 30%, paste at the lower left below the octopus.

Resize element 38 to 20%, paste at the lower right on the rock.
Resize element 73 to 20%, paste at the bottom right above the octopus, duplicate,
move below the octopus where ever you like.

Resize element 16 to 20%, paste on the right below the glow and grass elements.
Resize element 177 to 40%, paste on one side below the bubbles, duplicate, mirror.

Add any other elements that you would like, make it your own.
Always readjust your mask and elements how you like them before you
 merge your tag, resize, sharpen.

 Then add your copyright and name.
That's it

Hope you enjoyed doing my tut.   

Saturday, June 5, 2021

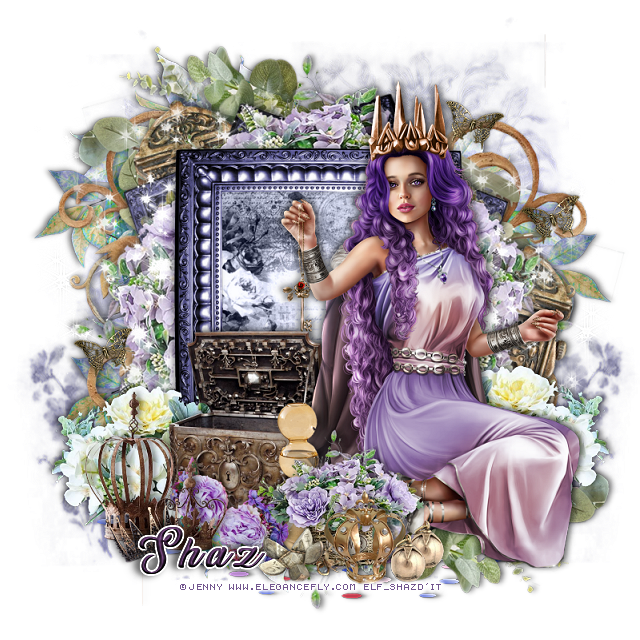
FTU The Key


 This tut was written June 5th, 2021 for those with a basic knowledge of psp.

I am using the awesome artwork of  Jenny
The tube is called "Rosemary" 
You need a license to use this tube, do not use without a license.
You can find this tube at Elegance Fly store  HERE

I used PSPX6...but any of them should work.
FTU kit  Aged Crown by Miz Teeques HERE
Miz Teeque Mask 329  HERE
Check out the rest of the blog HERE

Font of choice,  I used  Sunrise Place

Drop shadow is  V -2 H 4, 50, 10, or use what you prefer.
Let's get started
*Remember to add your drop shadow as you go along*

Open a new image 800 x 800 or a size you prefer, can always resize later.
Paste paper 18, apply the mask, delete, merge group, duplicate, mirror,
adjust more once everything is placed.

Resize frame 2 to 65%, paste, duplicate, free rotate to the right at 20 degrees,
 duplicate, mirror. Move both frames below the top frame.
Click in the top frame with your magic wand expand by 5, add a new layer,
paste paper 8 into selection, move below the frame, select none.

Paste element 52 at the bottom below the frames and move to the right 
 a little, duplicate, mirror, flip, move to the upper left.
Resize element 28 to 50%, paste at the top above the rotated frames, duplicate, 
flip, move to the bottom, duplicate free rotate to the left, duplicate, mirror,
adjust on the sides.

Resize your tube to 37%, paste on the right above the frames.

Resize element 41 to 40%, paste to the left of the tube and below the tube layer.
Resize element 7 to 75%, free rotate to the right, move above the mask layer on the
right, duplicate, mirror.
Paste element 47 below the gold swirls on the right, duplicate, mirror.

Resize element 29 to 45%, paste behind the chest and tube on the right,
duplicate, mirror.
Resize element 3 to 50%, paste at the lower left above the chest.
Resize element 28 to 30%, paste at the bottom above the tube.
Resize element 2 to 25%, paste in front of the basket.
Resize element 49 to 15%, paste at the bottom.
Resize element 16 to 40%, paste behind the basket of flowers.

Resize element 51 to 40%, paste at the bottom below the crowns that are on
the left.
Paste element 66 below the paper layer of the frame on the left, duplicate, mirror.
Resize element 47 to 50%, free rotate to the left at 15 degrees, 
paste at the upper left below the frames.
Paste element 54 at the bottom below all the elements.
Resize element 39 to 15%, free rotate to the left at 15 degrees, duplicate, mirror,
paste on the right where you like, duplicate one and mirror, adjust on the left.
Resize element 5 to 15%, paste at the lower left above the crowns.
Resize element 48 to 10%, paste at the bottom, duplicate, move over a little.

Add any other elements that you would like, make it your own.
Always readjust your mask and elements how you like them before you
 merge your tag, resize, sharpen.

 Then add your copyright and name.
That's it

Hope you enjoyed doing my tut.   
Tag for Mythical