Showing posts with label Kajenna. Show all posts

Friday, June 6, 2025

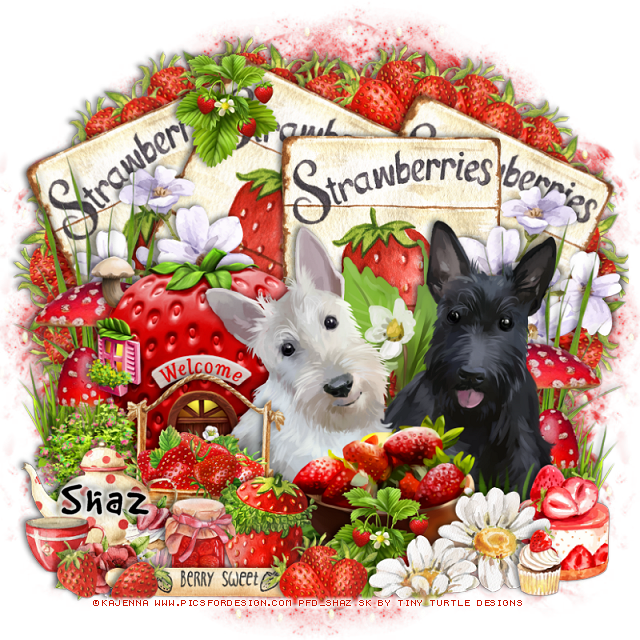
PTU Strawberry Harvest


 This tut was written June 6th, 2025 for those with a basic knowledge of psp. 

I am using the awesome tube by © Kajenna

Tube is called Strawberry
You need a license to use this tube, please do not use without a license
I bought mine at PFD HERE

I used PSP2020...but any of them should work.
PTU Scrap Strawberry Harvest by Tiny Turtle Designs  HERE
You can find all Tiny Turtle Designs Scraps kits  HERE
Lori's PSP Graphics Mask 1226 HERE
Check the rest of the blog HERE
Filter
Mura Meister Copies-Encircle

Font of choice, I used Good Dog Cool

Drop shadow as you go is V-2 H-4, 40, 10, color black or use what you prefer.
Let's get started

*Remember to add your drop shadow as you go along*

Open a new image 800 x 800, paste paper 13, apply your mask.

Resize element 100 to 50%, paste at the top, duplicate, free rotate to the right
at 20, move below the first sign, duplicate, move to the right more.
Duplicate the top one, free rotate to the left at 20, move to the left below
the other signs.
Resize element 78 to 30%, apply Mura Meister Copies-Encircle, first 3 numbers
on 16, 60, 60, move below the signs on the left, duplicate, mirror.
Resize element 203 to 75%, paste on the bottom left.

Resize the tube to 25%, paste at the bottom.

Resize element 98 to 35%, paste on the bottom left above the tube.
Resize element 210 to 65%, paste below the house on the left, duplicate, mirror.
Resize element 47 and 48 to 25%, paste at the bottom above the tube.
Resize element 118 to 50%, paste below the house, duplicate, mirror.
Resize element 185 to 35%, paste at the bottom left above the box of strawberries.

Resize element 206 to 25%, paste at the bottom between the flowers, duplicate, move
to the top on the signs.
Resize element 137 to 25%, paste on the bottom right below the flowers.
Resize element 78 to 25%, paste at the bottom above the flowers.
Resize element 105 to 25%, paste at the bottom below the strawberries.
Resize element 139 to 15%, paste at the bottom right.
Resize element 58 to 20%, paste at the bottom left.
Resize element 80 to 25%, paste at the bottom.
Resize element 86 to 50%, paste at the bottom, move the strawberries above the 
rolling pin.

Add any other elements that you would like, make it your own.
Always readjust your mask and elements how you like them before you
 merge your tag, resize, sharpen.

Crop your tag to be sure no shadows or lines are on the edges.
 Then add your copyright and name.
That's it

Hope you enjoyed doing my tut


Monday, June 17, 2024

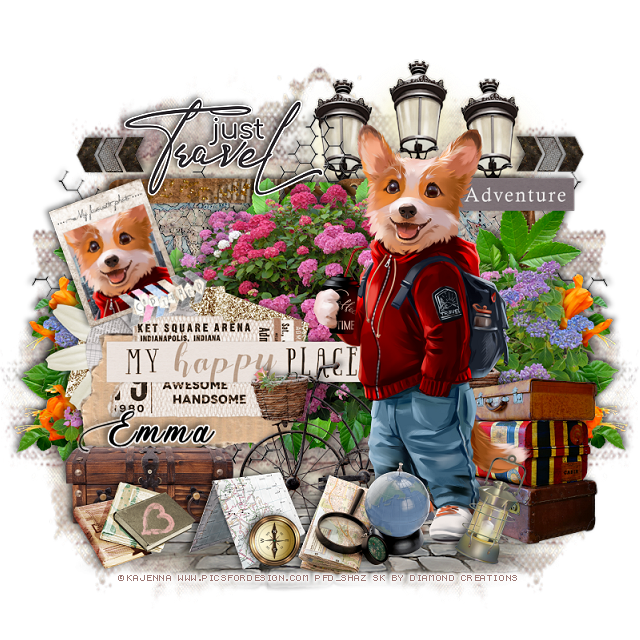
FTU Just Travel


This tut was written June 17th, 2024 for those with a basic knowledge of psp. 

I am using an adorable tube by ©Kajenna
The tube is called Corgi
You need a license to use this tube, please do not use without a license
You can find this tube at PFD HERE

I used PSP2020...but any of them should work.
FTU Scrap Adventure Awaits by Diamond Creations HERE 
Check out the rest of the blog HERE
Mask of choice, I used Miz Teeques Mask 234 HERE
Check out the rest of the blog HERE
 Vivienne's Digital Tagging Mask 78 HERE
Check out the rest of the blog HERE

Font of choice, I used Ants Valley

Drop shadow as you go is V -2 H 4, 40, 10, or use what you prefer.
Let's get started
*Remember to add your drop shadow as you go along*

Open a new image 800 x 800, paste paper 1, apply your mask, move
to the left, duplicate, mirror.

Resize element 30 to 115, apply mask 78, invert, delete, merge group, 
move to the bottom.
Resize element 65 to 70%, paste to the left, duplicate, mirror.
Resize element 5 to 65%, paste, click inside with the magic wand, paste 
element 34, invert, delete. 
Paste element 52 above the frame on the left, duplicate, mirror.
Resize element 51 to 65%, paste below the flowers on the left, duplicate, mirror.
Paste element 49 below the flowers on the left, duplicate, mirror.
Resize element 64 to 30%, free rotate to the left at 90, paste at
the upper left, duplicate, mirror.

Resize your tube to 28%, paste on the right.

Resize element 28% to 72%, paste on the left below the tube.
Resize element 11% to 40%, paste behind the tube on the right.
Resize element 4 to 50%, mirror, paste behind the tube.
Resize the wordart from the tube to 30%, paste at the upper left.
Resize element 27 to 25%, paste at the bottom above the tube.
Resize element 63 to 20%, paste at the bottom.
Resize element 12 to 30%, paste at the bottom left.

Open element 10, click inside with the magic wand, paste paper 5,
invert, delete, keep selected, paste element 2, delete, resize your tube to 75%, 
paste, delete, select none.
Merge together, resize to 30%, free rotate to the left at 20, paste on the left.
Resize element 17 to 15%, paste at the bottom.
Resize element 3 to 50%, paste at the upper right below the tube.
Resize element 37 to 22%, paste at the bottom left.
Resize element 33 to 50%, paste on the bottom right above the tube.
Resize element 32 to 85%, paste above the mask on the right.

Add any other elements you would like, resize.
Crop your tag to be sure no shadows or lines are on the edges.
 Then add your copyright and name.
That's it

Hope you enjoyed doing my tut   

Tag for Emma 


Sunday, February 18, 2024

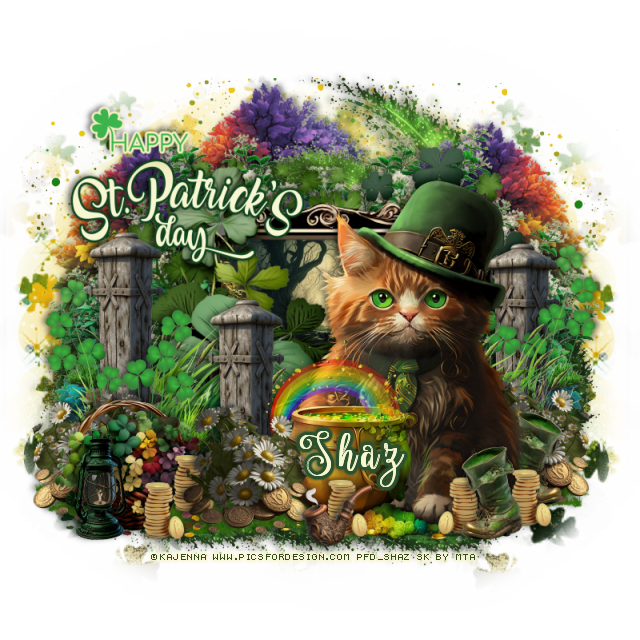
FTU St Patrick Cat


This tut was written February 18th, 2024 for those with a basic knowledge of psp.

I am using an awesome tube ©Kajenna
The tube is called Patrick
You need a license to use this tube, please do not use without a license
You can find this tube at PFD store HERE

I used PSP2020...but any of them should work.
FTU Scrap Kiss Me I'm Irish by Vicki HERE  
Check out the rest of the blog HERE
Mask of choice I used RD Mask 737 HERE
Check out the rest of the blog HERE  
Millie's PSP Madness Template 888 HERE
Check out the rest of the blog HERE
Filters 
xero-Fritillary
Mura Meister Copies-Encircle 

Font of choice I used Kiss Boom

Drop shadow is V -2 H -4, 40, 10, Black or use what you prefer.
Let's get started
*Remember to add your drop shadow as you go along*

Open the template, close the original, delete the credits and layers
15, 16, and 17.
Go to Adjust, Canvas size, 800 x 800.
Select layer 1, select all, float, defloat, paste paper 1, invert, delete.
Delete the template layers as you go along.
Paste paper 6 on the bottom layer, apply your mask, delete, invert,
duplicate, change the blend mode to Multiply, merge down.

Select layer 2, paste paper 6, invert, delete, do this same paper on layer 8.
Layers 7 and 9, paste paper 4, invert, delete, apply  the xero filter-Fritillary
 with these numbers 
5, 30, 35, 25

Layer 10, go to Effects, Texture Effects, Tiles with these settings
Tile shape Square
25, 32, 2
25, 1, 100, 50
350, 38, 30 
Color of choice, I used Color #627b25

Layer 14 apply twice the xero filter-Fritillary with these numbers 
5, 30, 35, 25
Resize element 1 to 25%, apply Mura Meister Copies-Encircle, first 3
numbers on 24, 60, 60, paste above the black circle, layer 11.
Duplicate, move to the bottom layer to the left duplicate mirror.
Paste element 38 on the bottom layer to the left, duplicate mirror.
Resize element 37 to 50%, apply Mura Meister, change the first 3
numbers to 30, 65, 65, move to the bottom layer to the left, duplicate, mirror.

Resize your tube to 20%, paste on the top layer.
Resize element 1 to 40%, paste on one side half way down below the tube, 
duplicate, mirror.
Resize element 17 to 30%, paste on the flower, duplicate, mirror.

Resize element 8 to 65%, free rotate to the left at 25, paste on the left,
duplicate, mirror, sharpen both.
Resize element 1 to 60%, paste at the bottom left, duplicate, mirror.
Resize element 5 to 50%, paste on the left on the flower, duplicate, mirror.
Resize element 10 to 40%, paste at the bottom.
Resize element 36 to 40%, paste behind the cup.

Resize element 9 to 40%, paste behind the flowers, duplicate, move over.
Resize element 26 to 60%, paste at the bottom below the flowers to the right,
duplicate, mirror.
Paste element 29 at the top behind the tube.
Resize element 40 to 78%, paste behind the tube.
Resize element 33 to 40%, paste above the cup.
Resize element 31 to 60%, paste behind the coins.

Add any other elements you like, once happy, add your name
and copyright.
Crop your tag to be sure no stray shadows or lines or on the edges.

That's it

Hope you enjoyed doing my tut.    

Monday, February 5, 2024

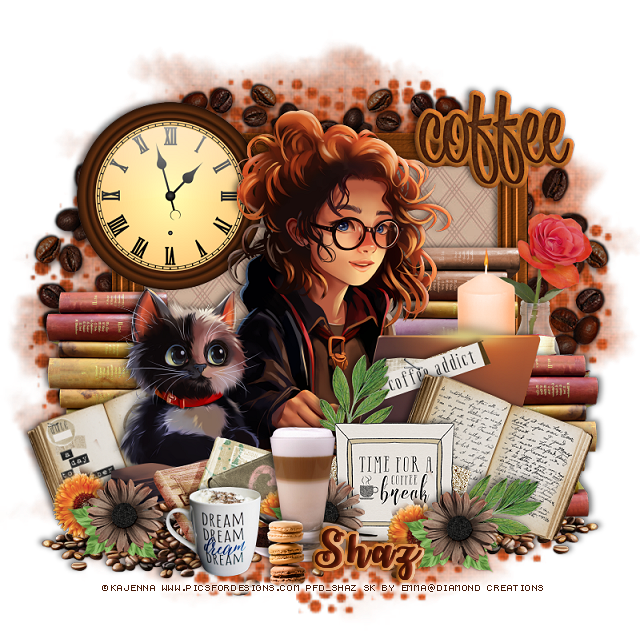
FTU Time for Coffee

 This tut was written February 5th, 2024 for those with a basic knowledge of psp.

I am using an awesome tube ©Kajenna
The tube is called Kate
You need a license to use this tube, please do not use without a license
You can find this tube at PFD HERE

I used PSP2020...but any of them should work.
FTU Scrap Espresso Tales  by Diamond Creations HERE  
Mask of choice, I used Miz Teeques Mask 70 HERE
Check out the rest of the blog HERE 
 
Font of choice I used October Twilight

Drop shadow is V -2 H -4, 40, 10, Black or use what you prefer.
Let's get started
*Remember to add your drop shadow as you go along*

Open a new image 800 x 800, paste paper 7, apply your mask.

Resize element 36 to 80%, paste, click inside with the magic wand,
paste paper 4 first, invert, delete, keep selected, paste paper 12 next, delete,
change the blend mode to Multiply.
Back to the frame, go to Effects, 3D Effects, Inner Bevel, 
Shape number 6, Width on 30
5, 2, 35, 40, 
96, 35, 40, 
color on #dd9e6b
Free rotate element 17 to the left at 90, paste on the right below the frame,
duplicate, mirror.

Resize the tube to 30%, paste above the frame.

Resize element 5 to 35%, free rotate to the right at 20, paste on the bottom right.
Resize element 40 to 25%, paste behind the cat, free rotate to the left at 20.
Resize element 19 to 70%, paste at the bottom above the book.
Resize element 34 to 45%, paste behind the tube at the upper left.
Resize element 35 to 30%, paste at the bottom by the card.
Resize element 53 to 30%, paste at the bottom.

Resize element 22 to 50%, paste at the bottom left below the paper
layer of the frame, duplicate, mirror.
Resize element 54 to 25%, paste at the bottom by the cup.
Resize element 33 to 30%, paste on the left below the cup.
Resize element 9 to 35%, paste on the left behind the book and cat, duplicate,
mirror.
Resize element 20 to 50%, paste behind the books on the right.
Resize element 6 to 25%, paste at the bottom left, erase the leaves, duplicate,
move to the right by the card.
Duplicate the brown and orange flower, move behind the cups.
Resize element 32 to 25%, paste at the bottom right by the card, duplicate,
move to the left above the orange flower.
Resize element 18 to 50%, erase all but the strip with the words on it, paste
on the back of the laptop of the tube.
Resize element 8 to 40%, paste at the upper right.

Add any other elements you like, once happy, add your name
and copyright.
Crop your tag to be sure no stray shadows or lines or on the edges.

That's it

Hope you enjoyed doing my tut.    

Monday, May 22, 2023

FTU Adventure Awaits

 This tut was written May 22nd, 2023 for those with a basic knowledge of psp.

I am using the awesome artwork of ©Kajenna
The tube is called Adventure
You need a license to use this tube, please do not use without a license.
You can find this tube at PFD Store HERE

I used PSP2020...but any of them should work.
FTU The Jungle Babies by MTA HERE  
Check out the rest of the blog  HERE
Mask of choice, I used Miz Teeque's Mask 70 HERE
Check out the rest of the blog HERE

Font of choice I used Jungle

Drop shadow is V -1 H -4, 50, 10, Black or use what you prefer.
Let's get started
*Remember to add your drop shadow as you go along*

Open a new image 800 x 800, paste paper 4, apply your mask, resize as needed.

Resize frame 6 to 65%, paste, click inside with the magic wand, expand,
resize paper 6, to 65%, paste how you like, invert, delete, select none.
Resize element 34 to 65%, paste at the top below the paper layer of the frame.
Resize element 45 to 50%, paste on the frame to the right.

Resize element 37 to 40%, paste on the right above the mask, duplicate, 
mirror.
Resize element 25 to 30%, paste below the paper layer of the frame down
on the right, duplicate, mirror.
Resize element 22 to 90%, paste at the bottom above the frame.
Resize element 34 to 30%, paste behind the grass.
Resize element 38 to 30%, paste above the bush, duplicate twice, move one to
the upper left below the paper layer of the frame, move the other down 
on the left above the grass, duplicate, mirror.

Resize your tube to 35%, close off the wordart part, paste at the bottom below 
the flowers that are on the right.
Resize the wordart to 50%, paste at the top, change to a color of choice and 
add a fat white gradient glow.
Resize element 29 to 30%, paste at the bottom right below the flowers and
tube layer, duplicate, mirror, move below the flowers on the left.

Duplicate the flower on the right, move below the car and to the center more.
Resize element 44 to 10%, paste at the bottom being on the top layer, duplicate
a couple of times and move where you like.
Resize element 3 to 25%, paste on the left, duplicate, mirror.
Duplicate element 38 a few times and place where you like, being on the top layer.

Add any other elements you would like, make it your own.
Crop your tag to be sure no shadows or lines are on the edges.
 Then add your copyright and name.
That's it

Hope you enjoyed doing my tut.  


Friday, February 24, 2023

FTU Happy St Patrick Day


This tut was written February 24th, 2023 for those with a basic knowledge of psp.

I am using the awesome artwork of ©Kajenna
Tube is Graham
You need a license to use this tube, do not use without a license.
You can find this tube at PFD Store HERE

I used PSP2020...but any of them should work.
FTU Grumpy Leprechaun by MTA   HERE  
Check out the rest of the blog HERE

Font of choice, I used Nouradilla

Drop shadow is V -1 H -4, 40, 10, Black or use what you prefer.
Let's get started
*Remember to add your drop shadow as you go along*

Open a new image 800 x 800, resize element 26 to 70%, paste to the left, 
duplicate, change the blend mode to Multiply, merge down, duplicate, mirror.

Resize frame 2 to 105%, draw around it with your free hand tool, resize paper 2 to 30%,
paste below the frame, invert, delete, select none.
Paste element 2 at the bottom above the frame.

Paste element 24 below the paper layer on the left, duplicate, mirror.
Resize element 14 to 75%, paste on the right below the flower bush, duplicate, 
mirror.
Paste element 29 toward the top below the trees, duplicate the tree on the left,
move below the green swirl and over a little.
(Optional) Take the green swirl and move to the bottom so just a little shows,
duplicating a couple of times and move over a little with each one.

Resize element 17 to 35%, paste to the left above the frame, duplicate 2 more
times, move one a little more to the right and the other one all the 
way to the right.
Resize element 5 to 45%, paste on the left above the column.
Resize element 20 to 50%, paste behind the column on the left, duplicate, move
to the right above the column.
Resize element 1 to 25%, paste above the column on the left, duplicate, mirror,
move above the column on the right.

Resize your tube to 25%, paste to the right.

Resize element 9 to 35%, paste at the bottom above the tube, duplicate, move
to the right below the tube, duplicate again, mirror, adjust behind the basket.
Resize element 15 to 20%, paste above the tube on the right, duplicate,
mirror, move back to the right behind the tube.
Resize element 13 to 20%, paste at the lower left above the basket.

Resize element 18 to 20%, paste at the bottom above the tube.
Resize element 11 to 20%, duplicate 2 or three times and move where you like.
Paste element 3 at the top above the mask layer on one side, duplicate, mirror.
Wordart of choice or use the wordart that comes with the tube, resize the 
St Patrick to 35%, and Happy to 40%, paste on the upper left.

Add any other elements you would like, make it your own.
Crop your tag to be sure no shadows or lines are on the edges.
 Then add your copyright and name.
That's it

Hope you enjoyed doing my tut.  


Saturday, October 17, 2020

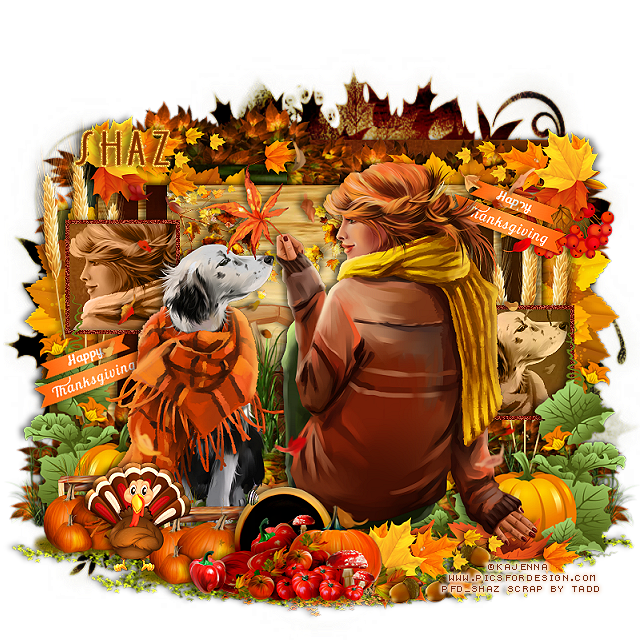
FTU Thanksgiving Time


  This tut was written October 17th, 2020 for those with a basic knowledge of psp.

I am using the awesome artwork of Kajenna
The tube is called "October"
You need a license to use this tube, do not use without a license.
You can find this tube at PFD store  HERE

I used PSPX...but any of them should work.
FTU kit Thanksgiving by TADD  HERE
Millie's Template 895 HERE
Check out the rest of the blog HERE
Mask of choice, I used DD Fall Mask 6  HERE
Check out the rest of the blog HERE

Font of choice,  I used  DK Soerabaja

Drop shadow is  V-1 H-5 Black, 50, 10, use what you prefer.
Let's get started
*Remember to add your drop shadow as you go along*

Open the template, hold the shift key and hit d to duplicate, close
the original. Delete the credits.
Go to Adjust, Canvas size, make it 800 x 800, I like mine large,
you can always resize later.

Paste paper 4 on the bottom layer above the white, apply your mask, 
delete, merge group, duplicate, change the blend mode to Burn, merge down.

Merge layer 2 of the template down with layer 1, select all, float, defloat,
paste paper 5, invert, delete.  Duplicate, change the blend mode to Multiply, merge down.

Delete each layer of the template as you go along.

Merge layer 4 down with layer 3, select all, float, defloat, flip paper 1, paste, 
invert, delete, select none.
Merge layer 6 down with layer 5, paste paper 4, invert, delete, select none.
Select layer 7, paste paper 3, invert, delete.

Merge layer 9 down with layer 8, paste paper 5, invert, delete.
Duplicate, change the blend mode to Multiply, merge down.
Move layer 12 down below layer 11, merge down with layer 10, select all, float,
defloat, paste paper 5, invert, delete, keep selected.

Resize your tube to 30%, duplicate, paste the girl in one square and the dog 
in the other, delete, select none, change the blend mode to Luminance(L) or 
one you prefer.
Merge layer 13 down with layer 11, change to color to one that matches your tube.
Add noise at 50%.

Resize element 61 to 75%, flip, paste at the top to the left below the green square,
duplicate, move to the right above the green square, duplicate, move down to the 
bottom above the brown bars, duplicate, mirror.

Resize element 10 to 65%, paste on the left below the light color layer, duplicate, mirro.
Resize element 58 to 50%, paste on the light color layer and move to the left a bit
under the bars, duplicate, mirror, move to the right more.
Resize element 47 to 50%, paste and move down a little off center.

Resize element 28 to 75%, paste on the lower right above the small frames, duplicate,
 mirror.
Resize element 7 to 75%, paste on the lower left above the grass, to help hide the
vegetables, duplicate, mirror.
Paste element 6 at the bottom below the leaves cluster to one side, duplicate, move to 
the other side.

Resize your tube to 32%, paste being on the top layer.

Paste element 66 at the bottom below the tube layer.
Resize element 25 to 65%, paste on the left below the bars, duplicate, mirror.
Resize element 65 to 50%, paste at the upper left below the tube layer, duplicate, mirror, 
duplicate the upper left one, move down to the lower right above the tube.
Resize element 52 to 25%, paste at the upper right under the leaves.

Resize element 37 to 50%, paste at the bottom above the tube.
Resize element 32 to 30%, paste on the left below the tube layer, duplicate, 
move above the tube and a little behind the apples.
Resize element 22 to 25%, paste at the lower left being on the top layer.
Go to Effects, 3D effects, Inner bevel with these settings for the turkey
Shape2, width 10
12, 3, 3, 25
330, 49, 51 
color #f2d1ae
Resize element 68 to 25%, free rotate to the right at 20 degrees, paste on the right
below the tube layer, duplicate, free rotate to the left at 40 degrees, move down 
on the left where you like.
Resize element 73 to 15%, duplicate 2 or 3 times and paste at the lower right by the 
leaves, mirror one and move below the leaves.

Add any other elements that you would like, make it your own.
Always readjust your mask and elements how you like them before you
 merge your tag, sharpen once.
Crop your tag to make sure no shadows or anything on the edges

 Then add your copyright and name.

That's it

Hope you enjoyed doing my tut.