Thursday, November 26, 2020

FTU Under the Stars

This tut was written November 25th, 2020 for those with a basic knowledge of psp.

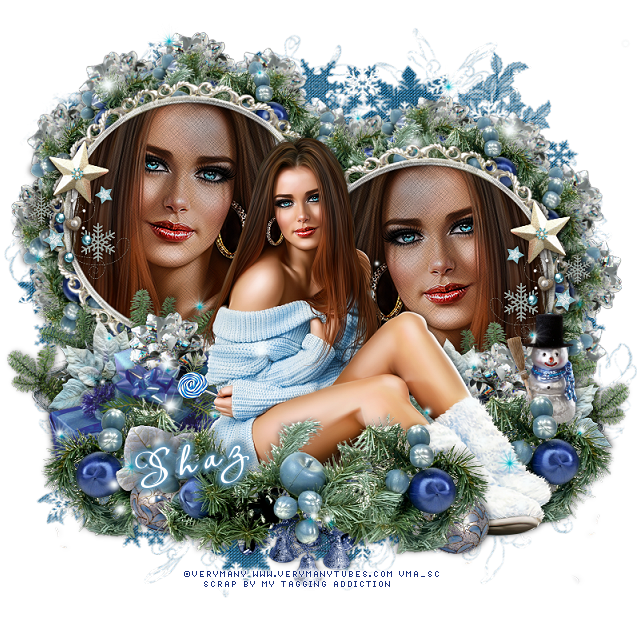
I am using the awesome artwork of  Amber
The tube is called "New Year Star"
You need a license to use this tube, do not use without a license.
You can find this tube at VMArtists  store  HERE

I used PSPX...but any of them should work.
FTU kit Northern Lights by Kathy's PSP Designs  HERE
Check out the rest of the blog HERE
Template 874 by Millie's PSP Madness HERE
Check out the rest of the blog HERE

Filters
Eye Candy 4000-Gradient Glow

Font of choice,  I used Everything Calligraphy

Drop shadow is  V-0 H 4 Black, 35, 10, use what you prefer.
Let's get started
*Remember to add your drop shadow as you go along*

Open the template, hold the shift key and hit the d to duplicate, close 
the original. Delete the credits layer 10 and wordart.
Go to Image, canvas size 800 x 800.

Paste element 43 below all the template layers, duplicate, mirror.
Then paste element 106, duplicate, mirror, arrange both how you like.

Starting on the bottom layer 1, select all, float defloat, paste paper 6, first, 
invert, delete, keep selected, paste paper 18, delete, select none.
Change the blend mode to Luminance(L), merge down.
Add a fat white gradient glow.
As you go along delete the template layer.

Layer 2, select all, float, defloat, paste paper 8, move to where more of the
purple shows, delete, select none.
Add the fat gradient glow to this too.

Merge layer 4 down with 3, select all, paste paper 6, delete, select none.
Add the fat gradient glow.

Merge layers 8, 7, 6, 5 together, select all, paste paper 12, move so the ice shows 
in all the squares, invert, delete, keep select.
Resize your tube to 40%, paste on one side, invert, delete, duplicate, mirror, 
adjust on the other side, merge down.
Duplicate the tubes, go to Adjust, Blur, Gaussian blur, number on 4, 
change the blend mode to Screen or what you prefer, merge down.

Select layer 9, paste paper 6, invert, delete, keep selected, paste paper 18, 
delete, select none. Change the blend mode to Luminance(L).

Resize element 1 to 73%, paste on the circle.
Resize element 30 to 90%, paste in the frame.
Resize element 53 to 82%, paste below the paper layer of the frame,
sharpen once.

Resize your tube to 85%, paste below the frame, duplicate, move above
the frame, erasing the bottom part you don't want showing.

Resize element 102 to 45%, paste at the lower left being on the top layer,
duplicate, mirror.
Paste element 71 above the bottom template layer, duplicate, mirror,
duplicate,  resize to 75%, move to the top layer and down to the left above the
greenery, duplicate, mirror.
Duplicate one of the top ones, free rotate to the left, move below all the 
layers of the template to one side, duplicate, mirror, erase any 
part you don't want.

Resize element 70 to 28%, paste on the silver bush on one side, duplicate, mirror.
Resize element 17 to 38%, paste in the center above the other flowers.
Resize element 27 to 40%, paste below the silver bush behind the flowers,
duplicate, mirror.

Resize element 65 to 20%, paste on one side of the top flower, duplicate, mirror.
Resize element 72 to 30%, paste at the lower left, duplicate, mirror,
duplicate once more move to the center below the flower.

Resize element 42 to 40%, mirror, paste on the right below the silver bush.
Paste element 55 below the paper element of the frame.
Resize element 54 to 85%, paste being on the top layer, move down, you might
want to erase a few stars at the bottom, fill with a dark color for the background
to see them, then delete the dart background.

Resize element 81 to 50%, paste at the bottom below all the other elements,
duplicate, mirror, duplicate twice more, move to the center more.
You just want a little of it showing.
Duplicate once more move to the center above the frame.

Resize element 21 to 25%, paste below the deer on the right, duplicate, mirror.
Resize element 66 to 50%, paste above the ice cubes, duplicate, mirror.
Resize element 61 to 60%, paste on the left above the frame, duplicate, mirror.
Resize element 44 to 35%, change the color to white and change the blend mode
to Hard Light, paste at the upper right, duplicate, move to the left and down.
Give it a purple drop shadow.

Add any other elements that you would like, make it your own.
Always readjust your mask and elements how you like them before you
 merge your tag, sharpen once.
CROP your tag to make sure no shadows or anything on the edges

 Then add your copyright and name.
That's it

Hope you enjoyed doing my tut.     

Tuesday, November 24, 2020

FTU Believe in the Magic


 This tut was written November 24th, 2020 for those with a basic knowledge of psp.

I am using the awesome artwork of  Misticheskaya
The tube is called "Christmas Elf Evelyn"
This is an Exclusive tube.
You need a license to use this tube, do not use without a license.
You can find this tube at PFD  store  HERE

I used PSPX...but any of them should work.
FTU kit Joyful Times by Magic Moments  HERE
Mask of choice, I used Moonbeams and Spiderwebs Mask 66  HERE
Check out the rest of the blog HERE

Font of choice,  I used Austie Bost Happy Holly

Drop shadow is  V-0 H-4 Black, 40, 10, use what you prefer.
Let's get started
*Remember to add your drop shadow as you go along*

Open a new image 800 x 800 or a size you prefer.
I always fill with white and delete the white layer at the end. 
Paste paper 3, apply your mask, delete, select none, mirror.

Paste element 14, move up and to the left a little.

Resize your tube to 30%, paste, this will help more to place the elements.

Paste element 11, apply your mask with Fit to layer checked, delete, merge group.
Duplicate two or three times and flip one and arrange at the bottom
below the tube how you like.

Resize element 27 to 55%, paste on the left below the tube layer, duplicate,
being on the bottom one, free rotate to the left at 10 degrees.
Move the top one up a little.

Resize element 13 to 85%, paste behind the tube to the left, erase the 
smaller leaf over the sign.
Resize element 71 to 75%, paste behind the tube on the left.
Resize element 6 to 15%, paste above the tube at the bottom, duplicate, move
to the right below the tube.

Resize element 16 to 40%, paste at the bottom above the top gift box.
Resize element 26 to 50%, paste on the right below the gift box.

Resize element 65 to 30%, paste at the lower left being on the top layer now.
Resize element 17 to 22%, paste by the teapot.

Resize element 25 and 36 to 30%, paste on the lower left of the teapot.
Resize element 28 to 15%, paste between the cup and teapot.
Resize element 15 to 13%, mirror, paste on the cup, duplicate, mirror, free
rotate to the left at 90 degrees, paste by the teapot.

Resize element 62 to 15%, paste at the bottom below the candle, duplicate, 
move over a little more, duplicate a couple more times, move where you like.

Resize element 41 to 40%, paste on the right below the tube at the bottom.
Resize element 24 to 30%, paste above the tube at the lower right.
Resize element 1 to 25%, paste at the lower right.
Element 20 free rotate to the left at 90 degrees, paste on the left above the mask.
Paste element 50 on the mask layer at the top, duplicate, move down.

For the Avator I resize some of the elements before merging my tag.
Resize to your liking and place how you like, merge, add name.

Add any other elements that you would like, make it your own.
Always readjust your mask and elements how you like them before you
 merge your tag, sharpen once.
Crop your tag to make sure no shadows or anything on the edges

 Then add your copyright and name.
That's it

Hope you enjoyed doing my tut.    

Sunday, November 22, 2020

FTU It's A Blue Christmas


 This tut was written November 22nd, 2020 for those with a basic knowledge of psp.

I am using the awesome artwork of  Verymany
The tube is called "Blue Lollipop"
You need a license to use this tube, do not use without a license.
You can find this tube at Verymany  store  HERE

I used PSPX...but any of them should work.
FTU kit Silver and Blue Christmas by My Tagging Addiction HERE
Check out the rest of the blog HERE
Mask of choice, I used Moonbeams and Spiderwebs Mask 82  HERE
Check out the rest of the blog HERE
Filters
Mura Meister Copies-Encircle

Font of choice,  I used Aquarelle

Drop shadow is  V-0 H-5 Black, 50, 10, use what you prefer.
Let's get started
*Remember to add your drop shadow as you go along*

Open a new image 800 x 800 or a size you prefer.
I always fill with white and delete the white layer at the end. 
Paste paper 2, resize your mask to 85%, paste, delete, merge group.

Resize frame 1 to 65%, paste, click inside with your magic wand, expand by 5,
paste paper of choice, I used #3, invert, delete, keep selected,
Mirror your tube, paste in the frame, delete, select none.
Change the blend mode on the tube to Multiply.
Merge the frame, tube and paper together, duplicate, mirror, move down
on the right more.
Resize element 25 to 35%, apply Mura Meister Copies-Encircle,
first number on 12, change the X and Y to 35, paste below the paper layer of
the frame, duplicate, move to the other frame.
Resize element 40 to 40%, apply the same setting Mura Meister Copies,
move below the first circle so the ribbons shows.

Resize your tube to 50%, paste above the frames and arrange the frames
behind the tube how you like.

Resize element 25 to 50%, paste at the bottom above the tube, duplicate, move 
below the tube and to the right, duplicate, mirror.
Resize element 40 to 40%, paste on the left below the branches, duplicate, mirror.
Resize element 39 to 40%, paste on the left above the other gift.

Resize element 16 to 45%, paste on the right above the frame layer, duplicate, 
mirror.
Paste element 55 above the tube to the left,  erase the parts you don't,
duplicate, mirror, erase again any parts you don't want.
Duplicate a couple more times, move below the frame on each side, adjust.

Resize element 10 to 25%, paste at the bottom below the branches.
Resize element 7 to 25%, paste below the branches on the lower left, duplicate,
move to the right by the foot of the tube.
Resize element 44 to 20%, paste on top of the ornament that is on the left.

Resize element 2 to 25%, paste on the left below the gifts, duplicate, mirror,
move to the right a bit, duplicate again and move more to the right.
Resize element 15 to 50%, erase all but the snowman, paste on the right below
the branches.
Resize element 41 to 25%, paste on the frame on one side, duplicate, mirror.

Add any other elements that you would like, make it your own.
Always readjust your mask and elements how you like them before you
 merge your tag, sharpen once.
Crop your tag to make sure no shadows or anything on the edges

 Then add your copyright and name.
That's it

Hope you enjoyed doing my tut.    

Saturday, November 14, 2020

FTU Thanksgiving is Near


 This tut was written November 14th, 2020 for those with a basic knowledge of psp.

I am using the awesome artwork of Alicia Mujica
The tube is called "Special Edition Dream Catcher_1 2017"
You need a license to use this tube, do not use without a license.
You can find this tube at Alicia Mujica  store  HERE

I used PSPX...but any of them should work.
FTU kit A Country Thanksgiving by My Tagging Addiction HERE
Check out the rest of the blog HERE
Mask of choice, I used DD Assorted Masks  HERE
Check out the rest of the blog HERE

Font of choice,  I used Dragging Canoe

Drop shadow is  V-0 H-5 Black, 50, 10, use what you prefer.
Let's get started
*Remember to add your drop shadow as you go along*

Open a new image 800 x 800 or a size you prefer.
I always fill with white and delete the white layer at the end. 
Paste element 21 paper, apply your mask, delete, merge group, duplicate,
merge down.

Resize frame 4 to 85%, click inside with your magic wand, expand by 3,
paste paper 2, invert, delete, keep selected.
Resize your tube to 25%, paste on one side, duplicate,
mirror, paste on the other side. delete. select none, change the blend mode
to Soft Light or one you prefer.
Go to Effect, Texture Effects, Blinds and apply this on the paper layer in
the frame with these settings
4, 25 both boxes checked and color #4d3500

Resize your tube to 25%, paste above the frame center.

Flip element 41, mirror, paste at the bottom below the paper layer of the frame,
 move to the right more, duplicate, flip, mirror, adjust at the top.
Paste element 2 on the left below the tube layer.

Resize element 3 to 60%, paste behind the wagon on the left, duplicate, 
resize to 85%, move to the right above the wagon handles.
Resize element 7 to 60%, paste on the left behind the barrel, duplicate, mirror.
Resize element 11 to 40%, paste at the lower left below the wagon layer, duplicate,
mirror, move above the barrel of pumpkins on the right.

Resize element 17 to 40%, paste at the lower left above the wagon.
Resize element 28 to 80%, paste at the bottom above the tube layer.
Resize element 14 to 35%, paste on the right below the stump.
Paste element 6 on the right below the tube layer.
Resize element 15 to 50%, paste on the right below the brown tall grass.

Resize element 25 to 30%, paste on the stump on the right.
Resize element 44 to 50%, paste on the right behind the crate, duplicate, 
move to the left more by the wagon wheel, duplicate again, move to the left
behind the barrel of pumpkins.
Resize element 52 to 25%, paste on the post.
Resize element 26 to 35%, paste on the right in front of the crates.

Resize element 61 to 60%, paste at the lower right above the stump.
Resize element 30 to 55%, paste on the left above the pumpkin.
Resize element 20 to 35%, paste at the lower right below the stump layer.

Resize element 40 to 25%, paste at the bottom being on the top layer.

Duplicate element 1 4 times, paste 2 at the top, flip the other 2 and move 
to the bottom to each side how you like them all.

Add any other elements that you would like, make it your own.
Always readjust your mask and elements how you like them before you
 merge your tag, sharpen once.
Crop your tag to make sure no shadows or anything on the edges

 Then add your copyright and name.
That's it

Hope you enjoyed doing my tut.    

FTU Santastic

 This tut was written November 14th, 2020 for those with a basic knowledge of psp.

I am using the awesome artwork of Jennifer Janesko
The tube is called "53-1"
I bought this one when CILM was still open.
You need a license to use this tube, do not use without a license.
You can find this tube at CDO store now  HERE

I used PSPX...but any of them should work.
FTU kit Christmas Gift 2019 by Frenchie Lover Design at PFD  HERE
Mask of choice, I used DD Gradient Star Mask 3  HERE
Check out the rest of the blog HERE
Filters
Mura Meister Copies-Encircle
Font of choice,  I used Christmas

Drop shadow is  V-0 H-5 Black, 50, 10, use what you prefer.
Let's get started
*Remember to add your drop shadow as you go along*

Open a new image, 800 x 800 or a size you prefer.
Select all, new layer, paste paper 3 into selection, select none, apply your mask,
delete, merge group, adjust to fit later.

Resize element 80 to 65%, paste, click inside with the magic wand, expand
by 5, paste paper 4, invert, delete, select none.
Resize element 8 to 30%, apply Mura Meister Copies-Encircle, first number on 16,
move below the paper layer.
Resize element 79 to 25%, apply Mura Meister Copies, first number on 14,
paste above the green branch.
Take your Pick tool and adjust your mask, branch and flower circle to fit behind
the frame better now.
Paste element 24 on the mask layer on the right, duplicate, mirror.

Resize element 8 to 30%, paste at the upper left on the frame, duplicate, move
down, duplicate, mirror.
Resize element 52 to 35%, paste on the upper left above the branches.

Paste your tube off center being on the top layer now, duplicate, go to Adjust,
Blur, Gaussian blur, number on 4, change the blend mode to 
Soft Light, merge down.

Resize element 45 to 50%, mirror, paste at the lower left above the tube.
Resize element 40 to 85%, paste at the bottom below the sled.
Resize element 29 to 55%, paste at the bottom, duplicate, flip move below the tube,
duplicate, free rotate to the right at 90, duplicate, mirror., move below the sign
on the left.

Resize element 21 to 20%, paste on the sled, duplicate, free rotate to the right at 
90 degree, place on the lower left.
Resize element 10 and 18 and 19 to 20%, paste at the lower right.

Resize element 55 to 20%, free rotate to the left at 15, paste in the sled and erase part
of the sled to make it look like it is inside the sled.
Resize element 33 to 20%, paste on top of the sign.
Resize element 47 to 20%, duplicate, paste both under the sign.

Resize element 1 to 40%, paste on the right below the gift box.
Resize element 48 to 30%, paste at the bottom above the sled.
Resize element 25 to 25%, paste at the lower right between the green box and drum.
Resize element 27 to 30%, paste at the bottom being on the top layer.

Resize element 5 to 15%, paste at the bottom by the basket.
Resize element 38 to 10%, paste at the lower left by the skates.

Add any other elements that you would like, make it your own.
Always readjust your mask and elements how you like them before you
 merge your tag, sharpen once.
Crop your tag to make sure no shadows or anything on the edges

 Then add your copyright and name.

That's it

Hope you enjoyed doing my tut.    

Tuesday, November 10, 2020

FTU Thankful


This tut was written November 10th, 2020 for those with a basic knowledge of psp.

I am using the awesome artwork of Alicia Mujica
The tube is called "Thankful"
You need a license to use this tube, do not use without a license.
You can find this tube at her store  HERE

I used PSPX...but any of them should work.
FTU kit Pumpkin Farm by Dreaming with Bella  HERE
You will have to register at her store to get the kit. HERE
While there have a look around her store.
Mask of choice, I used DD Autumn  Mask Set 3_9  HERE
Check out the rest of the blog HERE
Filters
xero-Clarity
Mura Meister Copies-Encircle

Font of choice,  I used Pilgrim Hats

Drop shadow is  V-0 H-5 Black, 50, 10, use what you prefer.
Let's get started
*Remember to add your drop shadow as you go along*

Open a new image 800 x 800 or a size you prefer.
I always fill with white and delete the white layer at the end.
Paste paper 1, apply your mask, delete, merge group.

Paste element 69, resize to 70%, move up on the left, duplicate, mirror,
move down on the right.
Click inside with your magic wand, expand by 5, paste paper 3, invert, delete,
keep selected.
Resize your tube to 70%, paste in the frame, delete, mirror the tube, paste in
the other frame, delete, select none.
Duplicate the tubes in the frame, go to Adjust, Blur, Gaussian blur, number on 4,
change the blend mode to Multiply, merge down.
Apply xero filter Clarity.

Resize your regular tube to 40%, mirror, paste above the frames now to help 
adjust everything.
Paste element 2 at the bottom under the tube, resize a little larger to 105%.

Mirror element 58, paste at the top below the paper layer of the frames,
duplicate move above the frames, resize to 50%, paste on the left, duplicate,
mirror, move down more on the right.

Resize element 28 to 50%, apply Mura Meister Copies-Encircle, first number on 18,
move to the mask layer and up on the left, duplicate, mirror, move down 
on the right.
Resize element 76 to 40%, paste at the lower right to cover the stems of the flowers,
duplicate, resize to 75%, mirror, move back by the first pumpkin.
Resize element 111 to 75%, paste on the mask at the top so just a little of the 
tree shows, duplicate, move to the left and down, erasing the trunk at the bottom,
duplicate, mirror.

Resize element 73 to 65%, paste on the lower left below the tube.
Resize element 30 to 20%, paste on the lower left above the wagon.

Resize element 42 to 25%, paste at the lower left being on the top layer.
Resize element 66 to 20%, paste at the lower right.
Resize element 32 to 15%, paste at the bottom.
Resize element 31 to 17%, paste to the left of the cup.
Resize element 59 to 25%, paste behind the tube to the right and down so 
just part of it shows, duplicate, mirror, adjust behind the tube so part shows 
between the legs and a little on the frame, duplicate once more, move
above the wagon and down.

Resize element 8 to 5%, paste at the bottom by the turkey.
Resize element 55 to 10%, mirror, paste at the lower right.
Resize element 105 to 25%, paste on the left on the wagon.
Resize element 4 to 10%, paste on the pumpkin on the left, duplicate, move down
by the turkey, duplicate, mirror, move by the coffee and pie.

Resize element 55 to 10%, paste at the lower right by the mushroom.
Resize element 21 to 10%, paste to the right by the mushroom, duplicate, mirror,
move to the left below the turkey.
Paste element 11 behind the tube and down how you like.
Resize element 10 to 25%, duplicate as many times as you like and move around.
Resize element 60 to 20%, paste on the right, duplicate, mirror.

Add any other elements that you would like, make it your own.
Always readjust your mask and elements how you like them before you
 merge your tag, sharpen once.
Crop your tag to make sure no shadows or anything on the edges

 Then add your copyright and name.

That's it

Hope you enjoyed doing my tut.