Monday, February 27, 2023

FTU Fairy Luck


This tut was written February 27th, 2023 for those with a basic knowledge of psp.

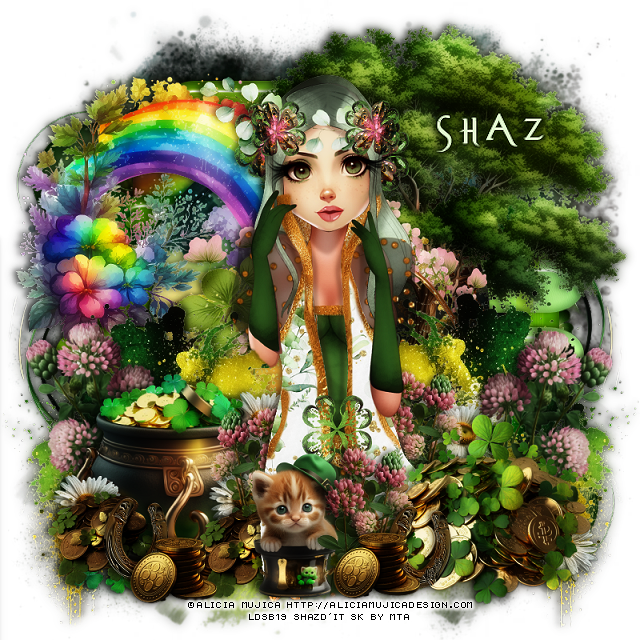
I am using the awesome artwork of ©Queen Uriel
Tube is Daisy Fairy
You need a license to use this tube, do not use without a license.
You can find this tube at her Store HERE

I used PSP2020...but any of them should work.
FTU St Patty's Day2020 by MTA   HERE  
Check out the rest of the blog HERE
Lori's PSP Graphics Mask 1159  HERE
Check out the rest of the blog HERE

Font of choice, I used Leprechaun Hats

Drop shadow is V -1 H -4, 40, 10, Black or use what you prefer.
Let's get started
*Remember to add your drop shadow as you go along*

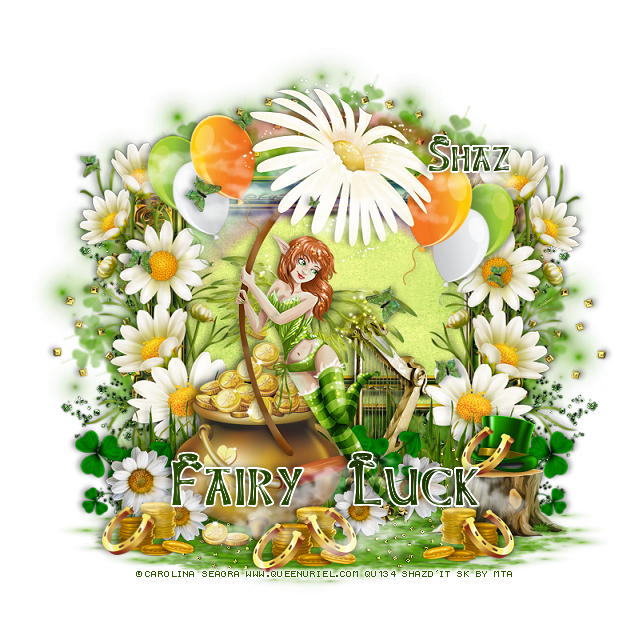
Open a new image 800 x 800, paste paper 3, apply your mask.
Duplicate the green mask, take your Free Hand Tool and hold the shift key,
drag down one side of the squares and then the other side until flat as  you like, move
to the bottom.

Paste frame 2, click inside with the magic wand inside the frame and the other
openings on the sides and top, expand by 4, paste paper 2, invert, delete.
Paste the rainbow at the top above the frame.

Resize flower 3 to 70%, paste on the left, duplicate, mirror.
Resize the grass to 90%, paste at the bottom.
Resize the coin bucket to 80%, paste on the left.

Paste your tube to the right on the edge of the bucket.

Resize the harp to 50%, paste behind the tube to the right.
Resize flower 1 to 30%, paste at the bottom behind the harp, duplicate, move 
to the left behind the bucket, duplicate, resize smaller to 90%, move above the 
bucket, duplicate, move above the harp.

Resize the stump to 30%, paste at the lower right.
Resize clover deco 3 to 25%, paste behind the bucket on the left, duplicate, 
mirror, move behind the stump, duplicate once more, move above the harp.

Resize the coins to 25%, paste at the bottom by the pot, duplicate, resize smaller
to 90%, duplicate 2 or 3 times and move where you like.

Resize the horseshoe to 20%, paste at the bottom, duplicate 3 times, mirror, move back
by the other one and the other by the coins by the stump and the last one to the left.
Resize the hat to 18%, paste on the stump.
Duplicate one of the horseshoes and place by the hat.
Resize glitter_2 to 110%, paste on the mask layer on the left, duplicate, mirror.
Paste glitter 1 at the bottom right, duplicate, mirror.

Resize the balloons to 35%, free rotate to the left at 20, paste at the upper left
below the tube, duplicate, mirror, move down a little.
Paste the clouds at the top being on the top layer, duplicate, move down to the bottom.
Paste the butterflies on the upper left, duplicate, mirror, move down some, 
erase any you don't want.
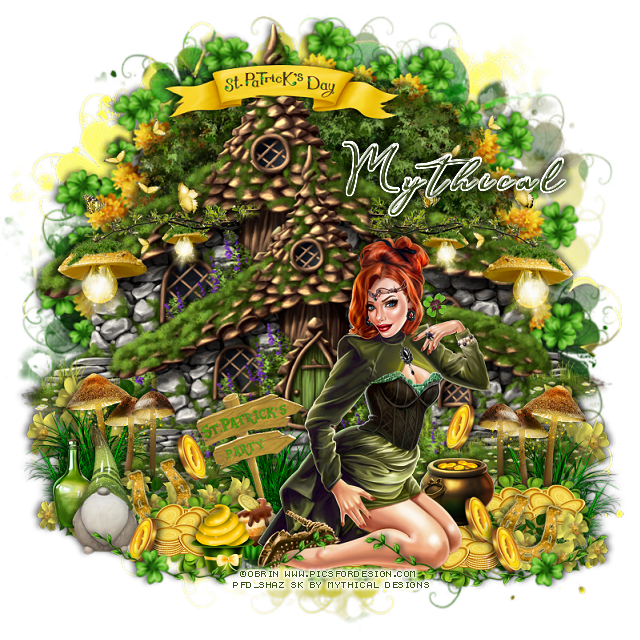
Wordart of choice, I typed out Fairy Luck with the Leprechaun hat font.

Add any other elements you would like, make it your own.
Crop your tag to be sure no shadows or lines are on the edges.
 Then add your copyright and name.
That's it

Hope you enjoyed doing my tut.  


Saturday, February 25, 2023

PTU Cool Blue


This tut was written February 25th, 2023 for those with a basic knowledge of psp. 

I am using the awesome artist ©Goldwasser
Tubes is NOT included
You need a license to use this artist, please do not use without a license.
You can this tube at GA HERE
You can find all Shelley's kits HERE

I used PSP2020...but any of them should work.
PTU Cool Blue by Shelley Lynn Designz  HERE 
A match for Abigail tube by Goldwasser
Beautiful kit contains 121 elements, 12 frames, 10 papers and 2 Wordarts
and Bonus Cluster frame (layered)

Font of choice, I used Nouradilla

Drop shadow is V -1 H -4, 50, 10, or use what you prefer.
Let's get started
*Remember to add your drop shadow as you go along*

Open a new image 800 x 800, resize wordart 2 to 50%, paste at the upper left,
duplicate, move down on the right.
Resize frame 11 to 65%, paste, click inside with the magic wand, expand by 5,
resize paper 8 to 20%, paste below the frame how you like, invert, delete, keep selected,
resize element 119 to 110%, paste, invert, delete, keep selected,
paste element 19 and move down some, invert, delete.

Resize element 119 to 90%, free rotate to the left at 20 degrees, paste on the left above
the wordart, duplicate, mirror, flip on the right.

Resize element 58 to 50%, paste on the frame at the upper right.
Resize element 59 to 55%, paste on the frame on the lower left.
Resize element 56 to 40%, paste on the bottom right above the frame, duplicate,
mirror.

Resize your tube to 40%, paste on the right above the flowers.

Resize element 36 to 30%, paste under the tube.
Resize element 30 to 25%, paste at the lower right below the tube.
Resize element 18 to 50%, paste on the right below the other box.
Resize element 55 to 25%, paste at the lower right above the boxes.
Resize element 43 to 30%, paste on the lower right below the flowers.

Resize element 57 to 25%, paste at the bottom below the table the tube is sitting on,
duplicate, move up on the right behind the tube, duplicate again, mirror,
move below the paper layer of the frame on the left.

Resize element 2 to 20%, paste at the bottom left of the tube.
Resize element 32 to 10%, paste at the bottom.
Resize element 11 to 25%, paste on the lower right above the tube,
duplicate, mirror, move below the gift box on the left.

Resize element 40, 41, and 42 to 25%, paste at the lower left.
Resize element 21 to 30%, paste behind the bottles.
Resize element 52 to 20%, paste at the bottom being on the top layer to the left,
duplicate, move to the right more under the tube.
Resize element 38 to 15%, paste on the bottle on the right.

Add any other elements that you like, make it your own.
Crop your tag to be sure no shadows or lines are on the edges.
 Then add your copyright and name.
That's it

Hope you enjoyed doing my tut.              

Friday, February 24, 2023

FTU Happy St Patrick Day


This tut was written February 24th, 2023 for those with a basic knowledge of psp.

I am using the awesome artwork of ©Kajenna
Tube is Graham
You need a license to use this tube, do not use without a license.
You can find this tube at PFD Store HERE

I used PSP2020...but any of them should work.
FTU Grumpy Leprechaun by MTA   HERE  
Check out the rest of the blog HERE

Font of choice, I used Nouradilla

Drop shadow is V -1 H -4, 40, 10, Black or use what you prefer.
Let's get started
*Remember to add your drop shadow as you go along*

Open a new image 800 x 800, resize element 26 to 70%, paste to the left, 
duplicate, change the blend mode to Multiply, merge down, duplicate, mirror.

Resize frame 2 to 105%, draw around it with your free hand tool, resize paper 2 to 30%,
paste below the frame, invert, delete, select none.
Paste element 2 at the bottom above the frame.

Paste element 24 below the paper layer on the left, duplicate, mirror.
Resize element 14 to 75%, paste on the right below the flower bush, duplicate, 
mirror.
Paste element 29 toward the top below the trees, duplicate the tree on the left,
move below the green swirl and over a little.
(Optional) Take the green swirl and move to the bottom so just a little shows,
duplicating a couple of times and move over a little with each one.

Resize element 17 to 35%, paste to the left above the frame, duplicate 2 more
times, move one a little more to the right and the other one all the 
way to the right.
Resize element 5 to 45%, paste on the left above the column.
Resize element 20 to 50%, paste behind the column on the left, duplicate, move
to the right above the column.
Resize element 1 to 25%, paste above the column on the left, duplicate, mirror,
move above the column on the right.

Resize your tube to 25%, paste to the right.

Resize element 9 to 35%, paste at the bottom above the tube, duplicate, move
to the right below the tube, duplicate again, mirror, adjust behind the basket.
Resize element 15 to 20%, paste above the tube on the right, duplicate,
mirror, move back to the right behind the tube.
Resize element 13 to 20%, paste at the lower left above the basket.

Resize element 18 to 20%, paste at the bottom above the tube.
Resize element 11 to 20%, duplicate 2 or three times and move where you like.
Paste element 3 at the top above the mask layer on one side, duplicate, mirror.
Wordart of choice or use the wordart that comes with the tube, resize the 
St Patrick to 35%, and Happy to 40%, paste on the upper left.

Add any other elements you would like, make it your own.
Crop your tag to be sure no shadows or lines are on the edges.
 Then add your copyright and name.
That's it

Hope you enjoyed doing my tut.  


FTU Clover Girl


This tut was written February 23rd, 2023 for those with a basic knowledge of psp. 

I am using the awesome artwork of ©Alicia Mujica
Tube is Clover
You need a license to use this tube, do not use without a license.
You can find this tube at her Store HERE

I used PSP2020...but any of them should work.
FTU Saint Patrick's 2023 by MTA   HERE  
Check out the rest of the blog HERE
Millie's PSP Madness Template 903 HERE
Check out the rest of the blog HERE
Mask of Choice, I used RD Mask 756 HERE
Check out the rest of the blog HERE
Filter
EyeCandy 4000-Glass
xero-Soft Mood

Font of choice, I used Evanescent

Drop shadow is V -1 H -4, 40, 10, Black or use what you prefer.
Let's get started
*Remember to add your drop shadow as you go along*

Open the template, duplicate, close the original, delete the credits and the 
top layers 11 to 15.
Go to Image, resize to 90%, all layers checked, then Image, Canvas Size 800 x 800.
Select all, new layer, paste paper 1 into selection, apply your mask.

Select layer 1, rotate paper 4 90 degrees, paste, invert, delete, delete the 
template on each one as you go along.
Apply Eye Candy 4000, Glass with these settings to each layer.
Bevel Width 15.55,  Smoothness 75
30, 35, 50, 0, 50
Lighting 94, 38 or whatever you prefer.

On each paper, move where you like, then invert, delete and add the glass settings.
Layer 2, paste paper 1 so some of the rainbow shows, invert, delete, same 
glass setting.
Layer 3, resize paper 3 to 55%, paste, invert, delete, same glass setting.
Layer 4, paper 4, glass setting.
Layer 5, paper 2, glass setting.
Merge layers, 6, 7, 8 and 9 together, select, paper 4, glass setting.
Layer 10, paper 2, glass setting.

Resize your tube to 50%, paste in the center.

Paste element 6 on the upper left above the circle.
Paste the tree on the upper right above the circle, worry about the root 
area later.
Paste element 22 on the right below the tube and cover the root area of the tree,
duplicate, mirror.
Paste frame 4 below these splatters and down a little.

Resize element 24 to 75%, paste on the lower left behind the tube.
Resize element 9 to 60%, paste at the lower right above the tube.
Resize element 7 to 30%, paste at the bottom below the tube by the pot, duplicate, 
move over to the left above the pot.

Resize element 11 to 25%, duplicate, paste one by the pot and the other by the tube.
Resize element 3 to 40%, paste at the bottom below the coins, duplicate, move
to the right behind the tube, duplicate, mirror.
Resize element 4 to 50%, free rotate to the right at 15, paste on the right 
below the coins and clover, duplicate, mirror, move behind the pot.
Resize kitty 2 to 45%, paste at the bottom above the tube.

Resize element 5 to 25%, paste at the lower left above the pot, duplicate, move
to the right.
Resize element 8 to 20%, duplicate 3 or 4 times, place where you like below
the other elements.
(Optional)
Once happy with your tag, merge visible, go to Adjust, Blur, Gaussian blur,
number on 5, change the blend mode to Soft Light.
Apply the xero filter-Soft Mood, merge down.

Add any other elements you would like, make it your own.
Crop your tag to be sure no shadows or lines are on the edges.
 Then add your copyright and name.
That's it

Hope you enjoyed doing my tut.  

Tag for Linda


Thursday, February 23, 2023

CT Tag Ruth Thompson/La Reina Designz

   **CT Tag FOR *** LaReina Designz***

***NEW kit inspired by the February Bonus Tube 2023 by Ruth Thompson
by LaReina Designz *** Scrap LRD_IB-Ruth Thompson-Feb2023bt
You can find the kit at CDO  HERE
Awesome kit with 20 elements, 6 papers, 4 frames and 1 wordart
Tube not included
You can find all Ruth Thompson tubes HERE

Below is a tag I made with this kit


Wednesday, February 22, 2023

PTU Down the Rabbit Hole


 This tut was written February 22nd, 2023 for those with a basic knowledge of psp. 

I am using the awesome artwork of ©Amber
Tube is Alice and Bunny_2
You need a license to use this tube, do not use without a license.
You can find this tube at VMA Store HERE

I used PSP2020...but any of them should work.
PTU Down The Rabbit Hole by Wicked Princess Scraps  HERE  
Mask of Choice, I used RD Mask Set 163_2 HERE
Check out the rest of the blog HERE
Filters
Mura Meister Copies-Encircle
Screen Works-Light Gauze

Font of choice, I used Alice In Wonderland

Drop shadow is V -1 H -4, 50, 10, Black or use what you prefer.
Let's get started
*Remember to add your drop shadow as you go along*

Open a new image 800 x 800, paste paper 4, apply your mask.

Resize frame 5 to 90%, paste click inside with the magic wand, expand by 5,
resize paper 8 to 75%, paste, invert, delete, keep selected.
Resize your close up to 85%, paste, delete, select none.
Duplicate the tube, go to Adjust, Blur, Gaussian blur, number on 5, change the
blend mode to Screen, then apply Screen Works-Light Gauze 
Resize frame 10 to 68%, paste on the frame.

Resize element flower17 to 20%, apply Mura Meister Copies-Encircle, change the first
3 numbers to 22, 55, 55, move below the paper layer.
Resize element flower1 to 18%, apply Mura Meister, changing the first 3 numbers
to 22, 62, 62, move below the first circle.
Duplicate the first circle, resize larger to 110%, move below the other 2 circles.
Resize the floor to 40%, paste at the bottom.

Resize your tube to 40%, paste on the left above the frames.
Resize the cat to 30%, mirror, paste on the frame at the top.

 Resize card5 to 40%, paste on the left above the tube, duplicate, move behind the
tube and up a bit.
Resize the book to 30%, paste at the bottom left above the tube.
Resize the note to 15%, paste at the bottom above the book.

Resize cardman1 and cardman2 to 20%, paste at the bottom.
Resize the jar to 10%, paste at the bottom to the left.
Resize the brush to 15%, paste by the jar.
Resize cup2 to 20%, paste at the bottom above the note.

Resize card6 to 50%, mirror, paste at the upper right above the frames.
Resize chess piece and chess piece 2 to 10%, paste at the bottom.
Resize cup3 to 30%, paste between the cardman and move one more to the right.

Resize the stool and lamp to 30%, paste on the right above the frame.
Resize the rabbit to 40%, mirror, paste on the right above the stool.
Resize teapot 2 to 25%, paste at the bottom below the rabbit.
Resize treat 4 to 13%, paste at the bottom by the teapot above the rabbit.
Resize treat 6 to 10%, paste at the bottom above the teapot.

Resize the hooka to 30%, paste on the right behind the rabbit.
Resize the watch to 20%, paste at the bottom above the rabbit.
Resize flower 11 to 10%, duplicate once and paste both behind the watch.
Resize bottle and bottle2 to 20%, paste at the bottom.

Resize flower 17 to 20%, duplicate a few times and paste them in different 
places above the frame behind the elements.
Resize the wordart to 35%, add a fat white gradient, paste on the right below the 
rabbit.

Add any other elements you would like, make it your own.
Crop your tag to be sure no shadows or lines are on the edges.
 Then add your copyright and name.
That's it

Hope you enjoyed doing my tut.   

Tuesday, February 21, 2023

PTU Lucky Charm


This tut was written February 21st, 2023 for those with a basic knowledge of psp. 

I am using the awesome artwork of ©Obrin
Tube is Adena
You need a license to use this tube, do not use without a license.
You can find this tube at PFD Store HERE

I used PSP2020...but any of them should work.
PTU Lucky Charm by Mythical Designs   HERE  HERE
Mask of Choice, I used RD Mask 737 HERE
Check out the rest of the blog HERE

Font of choice, I used Beautiful Kisses

Drop shadow is V -1 H -4, 50, 10, Black or use what you prefer.
Let's get started
*Remember to add your drop shadow as you go along*

Open a new image 800 x 800, select all, new layer, paste paper 9 into selection,
apply your mask.
Duplicate, change the blend mode to Hard Light, merge down.

Resize frame 5 to 70%, paste.
Resize element 8 to 85%, paste at the top above the frame.
Resize element 5 to 95%, paste, move up and a little to the left, duplicate, 
resize smaller to 85%, move down a little and to the right.
Resize element 69 to75%, paste between the cottages at the bottom of the
one in back, on the left, duplicate, mirror.

Resize your tube to 12%, paste at the bottom being on the top layer.

Resize element 41 to 30%, paste at the bottom right below the tube, duplicate, 
move a little more to the left, duplicate again, mirror, move by the tube to the left.
Resize element 69 to 50%, paste at the bottom left below the gold coins, duplicate,
mirror, place between the coins on the right.

Resize element 28 to 30%, paste at the left below the flowers, duplicate, mirror.
Resize element 33 to 30%, paste on the left behind the mushrooms, duplicate, mirror,
duplicate, move back by the tube.

Resize element 48 to 20%, paste at the bottom above the tube.
Resize element 52 to 20%, paste at the bottom behind the first cupcake.
Resize element 70 to 30%, free rotate to the left at 15, paste at the bottom behind 
the cupcake.
Resize element 37 to 35%, paste at the upper right, duplicate, mirror.
Resize element 29 to 50%, paste on one side of the cottage that is in the back,
duplicate, mirror.
Resize element 1 to 25%, duplicate 3 more times, paste where you like, mirror 
a couple of them.
Resize element 11 to 30%, paste on the left at the bottom.
Resize element 66 to 20%, paste by the gnome.
Resize element 57 to 25%, free rotate to the right at 20, paste at the lower right 
below the coins, duplicate, mirror, move below the coins by the gnome.
Resize element 63 to 50%, paste on the cottage roof.
Resize element 55 to 50%, paste at the bottom above the tube to the left, duplicate,
mirror.

Add any other elements you would like, make it your own.
Crop your tag to be sure no shadows or lines are on the edges.
 Then add your copyright and name.
That's it

Hope you enjoyed doing my tut.