Showing posts with label Exclusive kit for ATP. Show all posts

Saturday, November 27, 2021

Exclusive ATP Christmas


This tut was written November 27th, 2021 for those with a basic knowledge of psp. 

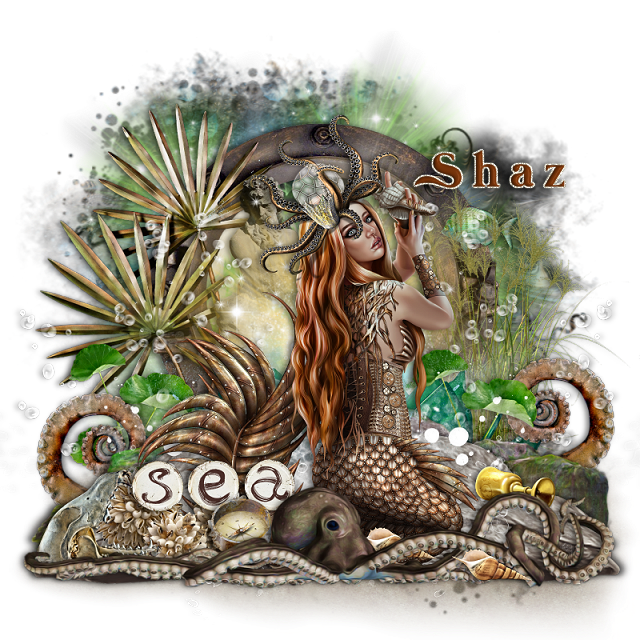
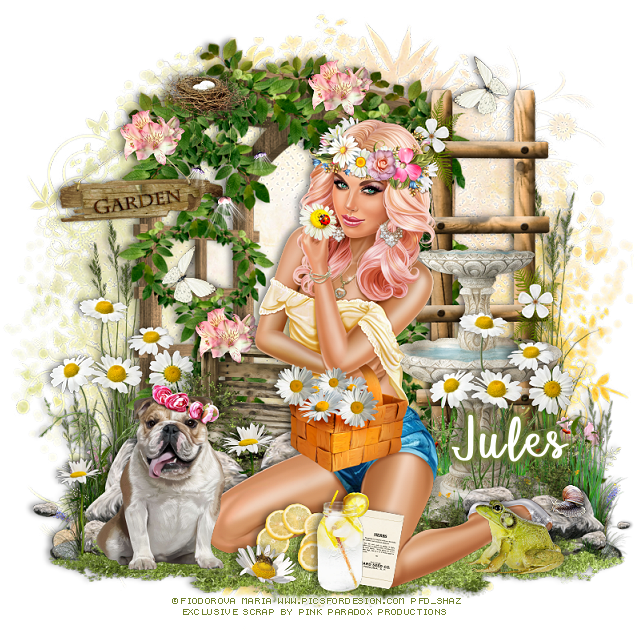
I am using the awesome artwork of Anna Liwanag
The tube is "131-2" 
You need a license to use this tube, do not use without a license.
You can find this tube at CDO store   HERE

I used PSP2020...but any of them should work.
Exclusive ATP Christmas by Designz by Shelly HERE
You can earn this kit at ATP by earning Gems.
RD Mask 827 HERE
Check out the rest of the Blog HERE
Filter
xero-Bad Dream
Mura Meister Copies-Encircle

Font of choice, I used Reindeer Christmas

Drop shadow is V -1 H -4, 40, 10, color Black or use what you prefer.
Let's get started
*Remember to add your drop shadow as you go along*

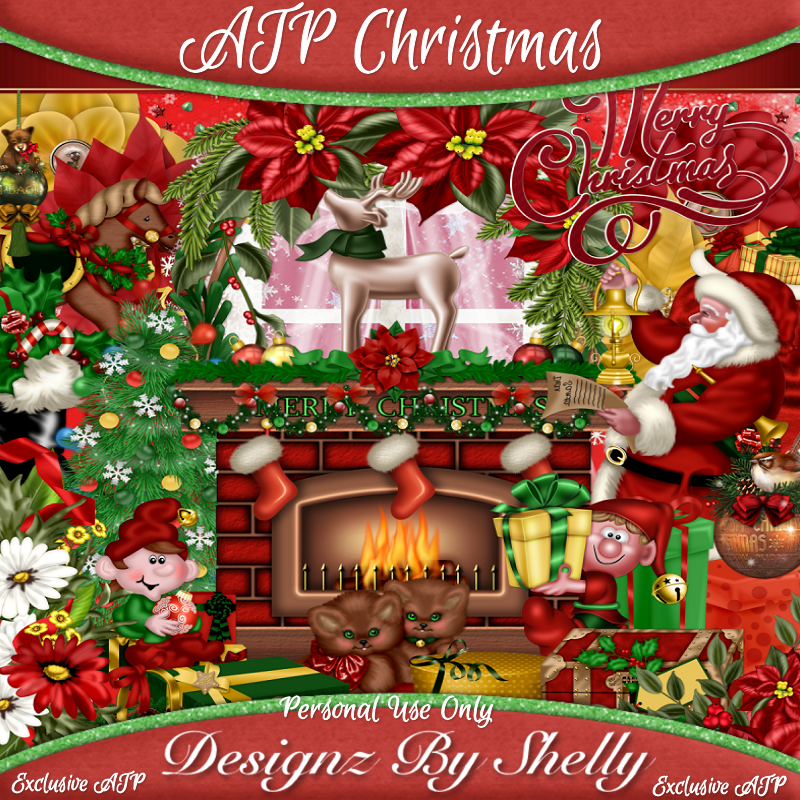
Open a new image 800 x 800, paste paper 32, apply your mask, delete, merge group.
Duplicate, mirror. adjust when finished with your tag.

Resize frame 3 to 75%, paste, flip, mirror.
Click inside the frame, expand by 5, paste paper 17 or one of choice, invert, delete,
keep selected.
Paste your tube, delete, select none.
(Optional) Apply the xero filter-Bad Dream to the tube.

Resize Christmas holly 1 to 30%, free rotate to the right at 90 degrees,
apply Mura Meister Copies-Encircle, first number on 26, the second two numbers 
on 48, move below the paper layer of the frame.
Paste wreath 4 below that circle, resize to 92%.
Paste wreath 1 below that wreath, resize to 95%, flip, erase the bow showing at 
the bottom.

Resize flower 2 to 5o%, paste on the frame on the left, duplicate, mirror.
Resize the Christmas Holly 1 to 50%, paste at the lower left below the flower, 
duplicate, mirror.
Resize the Christmas Holly 2 to 50%, paste below the first holly on the left, duplicate, 
mirror. move both down just a bit.
Resize candle 4 to 60%, being on the top layer paste center at the bottom.

Resize your tube to 40%, paste below the candle layer and then move the flower
vine below the tube.
Again (Optional) Apply the filter xero-Bad Dream to the tube.

Resize Candy Cane with Holly 3 to 35%, paste on the left below the candles,
duplicate, mirror, move down more on the right.
Resize the Christmas Rocking Bear to 25%, paste at the lower left being on the top layer.

Resize the Decorated Branch 2 to 30%, paste at the bottom below the other elements,
having the ornaments showing, duplicate, mirror.
Resize elf 2 to 25%, mirror, paste at the lower right being on the top layer.
Resize Christmas presents 2 to 40%, paste on the left above the frame, duplicate,
mirror, adjust behind the tube.

Resize sparkle 6 to 25%, paste on the first circle under the frame where you like, 
duplicate a couple of times or so and move around.

If you want to do an Avatar 
Open a new image 180 x 180, take the elements you want to use before you merge
your tag.
Resize around 70 to 75%, paste how you like, merge.

Add any other elements that you would like, make it your own.
Always readjust your mask and elements how you like them before you
 merge your tag, resize, sharpen.
Crop your tag to be sure no shadows or lines are on the edges.
 Then add your copyright and name.
That's it

Hope you enjoyed doing my tut.  

Monday, June 14, 2021

Exclusive Poseidon's Passion at ATP


This tut was written June 14th, 2021 for those with a basic knowledge of psp.

I am using the awesome artwork of  Sheokate
The tube is called "Eleanor" 
You need a license to use this tube, do not use without a license.
You can find this tube at Elegance Fly store  HERE

I used PSPX6...but any of them should work.

Exclusive kit Poseidon's Passion, by PPP, this kit is awesome. 
This kit is an Exclusive at ATP, you will have to join to be able to get the kit.
Artistic Tag Passions Forum HERE
Artistic Tag Passions Blog HERE
DFly Mask 0017 HERE 
Check out the rest of the blog HERE

Font of choice,  I used Mermaid Swash

Drop shadow is  V 0 H -4, 50, 10, or use what you prefer.
Let's get started
*Remember to add your drop shadow as you go along*

Open a new image 800 x 800 or a size you prefer, fill with white, can always resize later.
Select all, add a new layer, paste paper 55 into selection, select none.
Resize your mask larger to 125, paste, delete, merge group.
Paste element 66 on the mask layer.
Resize frame 11 to 45%, paste on the glow.

Paste element 67, move down a little.
Resize element 1 to 40%, paste on the right down some, duplicate, mirror,
move down a little more.
Resize element 103 to 85%, paste at the bottom.
Resize element 107 to 65%, paste at the bottom above the green rocks,
duplicate, move down and below the green rocks.
Resize element 170 to 75%, paste on the left below the the glowing element.
Resize element 21 to 50%, paste below the glowing element toward the left.
Resize element 159 to 60%, paste on the right.

Resize element 112 to 55%, being on the top layer, paste at the lower left, duplicate, mirror.

Resize your tube to 30%, paste above the brown rocks.

Resize element 14 to 95%, paste at the bottom above the tube.
Resize element 49 to 30%, paste on the lower left below the octopus.
Resize element 76 to 40%, paste at the lower left below the sea wordart.

Resize element 44 to 15%, paste below the octopus by the head.
Paste element 192 below the tube on the left, erase the blue frame part, duplicate, mirror.
Resize element 2 to 30%, paste at the lower left below the octopus.

Resize element 38 to 20%, paste at the lower right on the rock.
Resize element 73 to 20%, paste at the bottom right above the octopus, duplicate,
move below the octopus where ever you like.

Resize element 16 to 20%, paste on the right below the glow and grass elements.
Resize element 177 to 40%, paste on one side below the bubbles, duplicate, mirror.

Add any other elements that you would like, make it your own.
Always readjust your mask and elements how you like them before you
 merge your tag, resize, sharpen.

 Then add your copyright and name.
That's it

Hope you enjoyed doing my tut.   

Friday, May 7, 2021

Exclusive Passionate Patisserie at ATP


This tut was written May 7th, 2021 for those with a basic knowledge of psp.

I am using the awesome artwork of  Cuddly Rigor mortis
The tube is called "127-3" 
You need a license to use this tube, do not use without a license.
You can find this tube at CDO store  HERE

I used PSPX6...but any of them should work.

Exclusive kit Passionate  Patisserie, by PPP, this kit is awesome. 
This kit is an Exclusive at ATP, you will have to join to be able to get the kit.
Artistic Tag Passions Forum HERE
Artistic Tag Passions Blog HERE
DFly Mask 030 HERE 
Check out the rest of the blog HERE

Font of choice,  I used betterfly

Drop shadow is  V -1 H -5, 50, 10, or use what you prefer.
Let's get started
*Remember to add your drop shadow as you go along*

Open a new image 800 x 800 or a size you prefer, can always resize later.
Paste paper 41, apply your mask, delete, merge group.

Resize your tube to 50%, paste.

Resize element 20 to 40%, paste on the left below the tube.
Resize element 22 to 35%, paste below the tube on the right.
Resize element 107 to 55%, paste on the left behind the tube.
Resize element 73 to 40%, paste on the right behind the tube.

Resize element 30 to 30%, paste at the bottom above the tube.
Resize element 15 to 20%, paste at the bottom above the scoop of power.
Resize element 35 to 30%, paste at the bottom to the right more.

Resize element 36 to 30%, paste below the cup on the right.
Resize element 23 to 30%, paste above the milk bottle.
Resize element 31 to 35%, paste on the left above the tube.

Resize element 12 to 25%, paste on the left behind the scoop of coffee beans.
Resize element 13 to 30%, paste behind the cup you just pasted.
Resize element 160 to 20%, paste at the bottom right, duplicate, 
move to the left.

Resize element 25 to 20%, paste at the bottom on the left below the flower layer.
Resize element 24 to 50%, paste on the right above the clock layer.
Resize element 61 to 20%, paste on the left below the coffee beans.
Resize element 27 to 25%, paste at the bottom below the cup with the beans.
Resize element 182 to 50%, mirror, paste on the left above the donut sign.

Resize element 69 to 10%, paste at the bottom being on the top layer, duplicate,
move over a little.
Resize element 65 to 12%, paste by the beans.
Resize element 129 to 30%, paste behind the tube behind the legs.

Add any other elements that you would like, make it your own.
Always readjust your mask and elements how you like them before you
 merge your tag, resize, sharpen.

 Then add your copyright and name.
That's it

Hope you enjoyed doing my tut.   

Sunday, May 2, 2021

Exclusive Blossoming Artistry at ATP


This tut was written May 2nd, 2021 for those with a basic knowledge of psp.

I am using the awesome artwork of  Fiodorova Maria
The tube is called "Adeline" 
You need a license to use this tube, do not use without a license.
You can find this tube at PFD store  HERE

I used PSPX6...but any of them should work.

Exclusive kit Blossoming Artistry, by PPP, this kit is awesome. 
This kit is an Exclusive at ATP, you will have to join to be able to get the kit.
Artistic Tag Passions Forum HERE
Artistic Tag Passions Blog HERE
DD NFM_2015_2   HERE 
Check out the rest of the blog HERE

Font of choice,  I used betterfly

Drop shadow is  V -1 H -5, 50, 10, or use what you prefer.
Let's get started
*Remember to add your drop shadow as you go along*

Open a new image 800 x 800 or a size you prefer, can always resize later.
Paste paper 29, apply your mask, delete, merge group, duplicate, merge down.

Resize element 109 to 75%, paste off center to the left.
Resize element 111 to 55%, paste to the right.
Resize element 105 to 60%, paste at the lower left, duplicate, mirror, resize to 
50%, move below the tube on the right.

Resize your tube to 25%, paste above the rocks.

Resize element 115 to 85%, paste at the bottom below the tube.
Resize element 145 to 50%, paste on the right above the water fountain,
duplicate, mirror.
Resize element 28 to 20%, paste at the bottom above the tube.
Resize element 45 to 25%, paste by the lemon slices.

Resize element 6 to 25%, paste on the grass on the right.
Resize element 4 to 40%, paste on the left above the tube on the grass.

Resize element 103 to 75%, paste on the right behind the water fountain.
Resize element 104 to 75%, paste on the mask layer.
Resize element 99 to 30%, paste on the trellis on the left, erase a little bit of 
the string to make it look like it is hanging on it.

Resize element 3 to 10%, mirror, paste on the rocks on the right.
Resize element 173 to 25%, paste behind the tube by the left to the left, duplicate,
resize to 85%, move above the tube and to the left of the dog.
Resize element 72 to 20%, paste at the bottom below the drink bottle.
Resize element 88 to 25%, paste on the trellis at the top where you like.

Resize element 79 to 30%, paste behind the tube above the trellis layer.
Resize element 129 to 15%, paste at the bottom being on the top layer now.
Resize element 122 to 15%, paste on the string part of the garden sign, duplicate twice,
move one over more on the trellis and the other down on the boxes behind the tube.

Resize element 91 to 25%, paste on the trellis below the nest.
Resize element 14 to 15%, paste at the upper right, duplicate, mirror, move
down on the left.

Add any other elements that you would like, make it your own.
Always readjust your mask and elements how you like them before you
 merge your tag, resize, sharpen.

 Then add your copyright and name.
That's it

Hope you enjoyed doing my tut.   

Exclusive Artistic Automation at ATP


This tut was written May 2nd, 2021 for those with a basic knowledge of psp.

I am using the awesome artwork of  Amber
The tube is called "Althea" 
You need a license to use this tube, do not use without a license.
You can find this tube at VMA store  HERE

I used PSPX6...but any of them should work.

Exclusive kit Artistic Automation, by PPP, this kit is awesome. 
This kit is an Exclusive at ATP, you will have to join to be able to get the kit.
Artistic Tag Passions Forum HERE
Artistic Tag Passions Blog HERE
DFly Mask 012  HERE Scroll down
Check out the rest of the blog HERE

Font of choice,  I used Ballerina Script

Drop shadow is  V -1 H -5, 50, 10, or use what you prefer.
Let's get started
*Remember to add your drop shadow as you go along*

Open a new image 800 x 800 or a size you prefer, can always resize later.
Select all, add a new layer, paste paper 34 into selection, select none.
Apply your mask, delete, merge group, mirror.

Resize element 190 to 55%, paste on the mask on one side, duplicate, mirror.

Resize element 119 to 65%, paste on the left.
Resize element 120 to 70%, paste on the right, duplicate, mirror, move below
the door on the left.

Resize your tube to 35%, paste to the right of the door.

Resize element 162 to 30%, free rotate to the left at 25 degrees, paste on the
stair rail on the right, erase the stem part.
Duplicate, mirror, move on the rail on the left.
Resize element 147 to 25%, paste on the right below the tube layer, duplicate, 
move up behind the head of the tube, flip, duplicate, mirror.

Resize element 10 to 25%, paste behind the flower on the right, duplicate, move
down more, duplicate again move to the top below the flower, duplicate, mirror.
Duplicate again, resize smaller to 75%, move more to the center, 
duplicate, mirror.
Resize element 146 to 25%, paste on the right below all the other flowers.


Resize elements 32, 49 and 60 to 20%, paste at the bottom above the tube.
Resize element 28 to 20%, paste at the bottom below the bottles.
Resize element 51 to 30%, paste at the lower right below the bottles.
Resize element 59 to 25%, paste between the bottles at the bottom.

Resize element 99 to 25%, paste on the lower right below the flowers
and berries.
Resize element 34 to 30%, paste on the right below the lantern.
Resize element 137 to 35%, paste on the door below the tube.
Resize element 50 to 40%, paste at the lower left.
Resize element 174 to 25%, paste at the lower left behind the record player.

Resize element 95 to 25%, paste at the lower left above the mask layer.
Resize element 46 to 25%, paste above the record player at the bottom.

Resize element 108 to 25%, paste below the tube to the left.
Resize element 110 to 20%, paste above the element you just pasted.
Resize element 66 to 30%, paste above the letter.
Resize element 88 to 20%, paste at the lower left below the urn.

Resize element 136 to 15%, paste at the bottom being on the top layer,
duplicate, move to the left below the player.
Resize element 144 to 25%, paste above the tube at the bottom.
Resize element 13 to 10%, paste at the bottom being on the top layer, duplicate,
move down a little.
Resize element 8 to 12%, paste at the lower left.
Paste element 193 on the mask layer so some of the sparkles shows thru the 
door window at the top, duplicate, mirror.
You might want to fill with a dark color behind to make sure the sparkles are to 
far out, if so just erase them.

Add any other elements that you would like, make it your own.
Always readjust your mask and elements how you like them before you
 merge your tag, resize, sharpen.

 Then add your copyright and name.
That's it

Hope you enjoyed doing my tut.