Showing posts with label Alec_Rud. Show all posts

Sunday, May 26, 2024

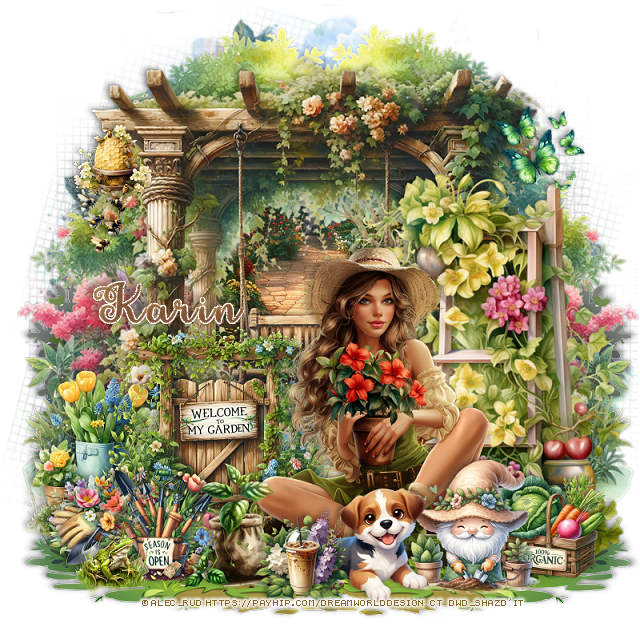
PTU Backyard Oasis


 This tut was written May 26th, 2024 for those with a basic knowledge of psp. 

I am using a beautiful tube by ©Alec_Rud

The tube is included
You need a license to use this tube, please do not use without a license

I used PSP2020...but any of them should work.
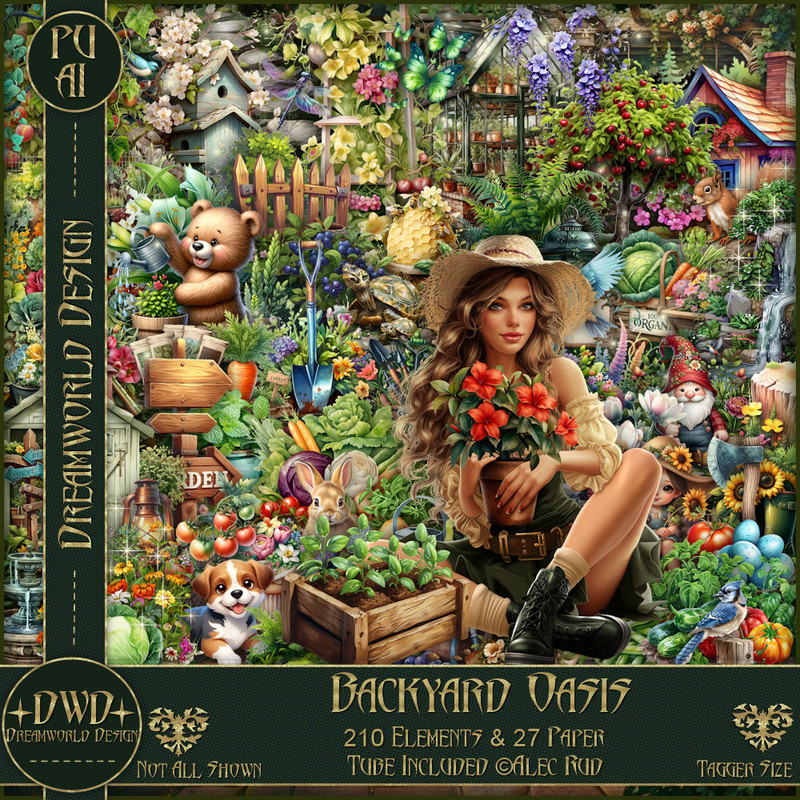
PTU Scrap Backyard Oasis by DWD  HERE
Beautiful kit with 210 elements and 27 papers, and tube. 
You can find all Dreamworld Design kits  HERE
Mask of choice, I used Miz Teeques Mask 84 HERE
Check out the rest of the blog HERE

Font of choice, I used Pretty Summer

Drop shadow as you go is V -2 H -4, 40, 10, or use what you prefer.
Let's get started
*Remember to add your drop shadow as you go along*

Open a new image 800 x 800, paste paper 2, apply your mask.

Paste element 59 on the upper left, duplicate, mirror.
Resize element 126 to 85%, paste at the top, erase some of the trees
and fence showing in the back.
Resize paper 10 to 50%, paste so the path shows, erase the outer parts
of the papers.

Resize element 155 to 85%, paste on the right.
Resize element 48 to 50%, paste on the left below the tube.
Resize element 18 to 40%, paste on the left below the gate.
Resize element 60 to 40%, paste above the gate.

Resize the tube to 45%, paste at the bottom.

Resize element 38 to 30%, paste on the bottom left.
Resize element 37 to 35%, paste at the bottom above the tube.
Resize element 27 to 30%, paste on the bottom right.
Resize element 44 to 35%, paste at the bottom right.
Resize element 82 to 20%, paste at the upper left.
Resize element 198 to 35%, paste at the bottom above the tube.
Resize element 171 to 25%, paste at the bottom above the dog.
Resize element 197 to 20%, paste at the upper left.

Paste element 110 on the bottom layer at the bottom left, duplicate, mirror.
Resize element 100 to 25%, mirror, paste at the bottom left.
Resize element 5 to 25%, mirror, paste at the upper right.

Add any other elements that you would like, make it your own.
Always readjust your mask and elements how you like them before you
 merge your tag, resize, sharpen.

Crop your tag to be sure no shadows or lines are on the edges.
 Then add your copyright and name.
That's it

Hope you enjoyed doing my tut 

Tag for Vi Nina

Friday, April 26, 2024

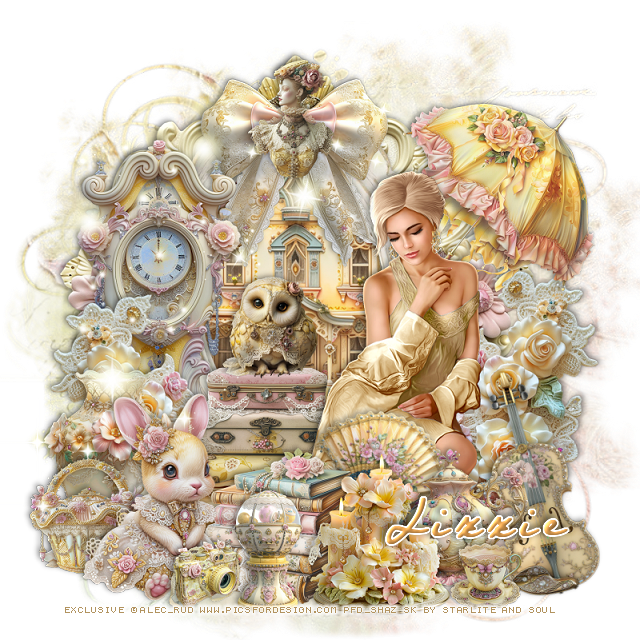
PTU Vintage Sunshine


This tut was written  April 26th, 2024 for those with a basic knowledge of psp. 

I am using the awesome tube by ©Alec_Rud
The tube is an Exclusive called Virgo
You need a license to use this tube, please do not use without a license
You can find the tube at PFD HERE

I used PSP2020...but any of them should work.
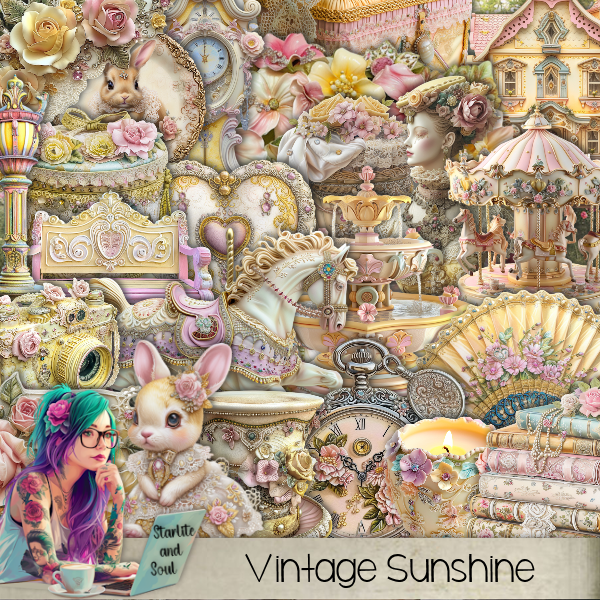
PTU Scrap Vintage Sunshine by Starlite and Soul  HERE
Check her store out to see all her other kits HERE
Mask of choice I used Miz Teeques Mask 56 HERE
Check out the rest of the blog HERE

 Font of choice, I used Night Wind Sent

Drop shadow as you go is V -2 H -4, 40, 10, or use what you prefer.
Let's get started
*Remember to add your drop shadow as you go along*

Open a new image 800 x 800, paste paper 9, apply your mask.

Resize frame 17 to 75%, paste to the left, click inside with the magic wand,
resize paper 11 to 75%, paste, invert, delete, keep selected, resize 
element 70 to 75%, paste in the frame, delete, select none.
Paste element 30 below the frame.
Resize element 99 to 65%, paste on the frame on the left, duplicate,
mirror.

Resize your tube  to 30%, paste above the frame to the right.

Resize element 35 to 35%, paste behind the tube to the left.
Resize element 6 to 30%, paste at the bottom above the tube.
Resize element 22 to 30%, paste at the bottom right below the candles.
Resize element 8 to 15%, paste at the bottom right.
Resize element 27 to 35%, paste at the bottom above the tube.
Resize element 132 to 25%, paste at the top on the frame.

Resize element 24 to 35%, paste on the left above the frame.
Resize element 2 to 30%, mirror, paste at the bottom left, being on the 
top layer.
Resize element 4 to 20%, paste on the suitcases.
Resize element 13 to 30%, free rotate to the right at 25, paste above the
tube behind the books.
Resize element 57 to 30%, paste on the left behind the rabbit.
Resize element 93 to 40%, paste at the upper right.
Resize element 52 to 20%, free rotate to the left at 15, paste behind the teapot.
Resize element 39 to 25%, paste at the top on the bow.
Resize element 38 to 15%, paste at the bottom.
Resize element 32 to 25%, paste behind the rabbit.
Resize element 26 to 15%, paste at the bottom.
Paste element 163 on the left, move the owl above the sparkles.

Add any other elements that you would like, make it your own.
Always readjust your mask and elements how you like them before you
 merge your tag, resize, sharpen.

Crop your tag to be sure no shadows or lines are on the edges.
 Then add your copyright and name.
That's it

Hope you enjoyed doing my tut.    

Thursday, October 26, 2023

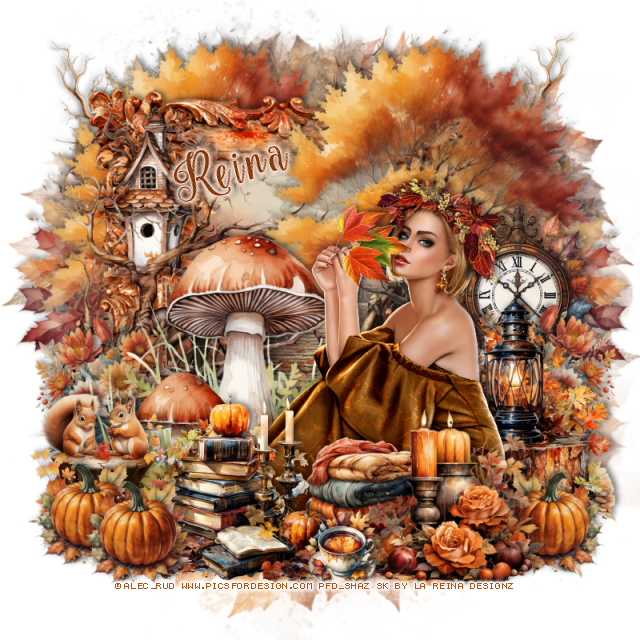
PTU Vintage Fall


This tut was written October 26th, 2023 for those with a basic knowledge of psp. 

Awesome tube used is by ©Alec_Rud
The tube is called Elis
You need a license to use this tube, please do not use without a license
You can find the tube at PFD HERE

I used PSP2020...but any of them should work.
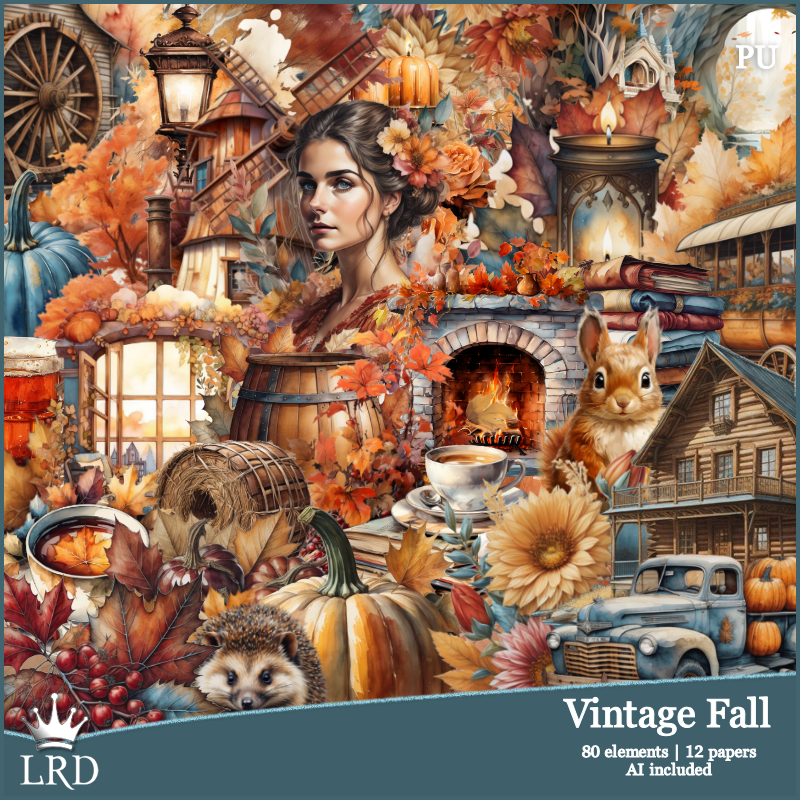
PTU Vintage Fall kit by La Reina Designz  HERE  HERE
Awesome kit with 80 elements and 12 papers 
Mask of choice, I used RD Mask 683 HERE
Check out the rest of the blog HERE

Font of choice, I used Nouradilla

Drop shadow is V -1 H -10, 50, 10, color Black or use what you prefer.
Let's get started
*Remember to add your drop shadow as you go along*

Open a new image 800 x 800. paste paper 6, apply your mask.

Paste element 2 on the upper right.
Resize frame 4 to 75%, paste behind the tree to the left, click inside
with the magic wand, resize paper 9 to 50%, paste, invert, delete.
Duplicate the tree, move to the left behind the frame, erase the bottom 
part showing.

Resize your tube to 30%, paste to the right.

Paste element 74 behind the tube to the left.
Resize element 31 to 50%, paste at the bottom right above the tube.
Resize element 53 to 35%, paste behind the candles.
Resize element 71 to 50%, paste at the bottom.
Resize element 22 to 23%, paste at the bottom above the candles.
Resize element 39 to 35%, paste on the bottom left behind the tube.

Resize element 46 to 40%, mirror, paste behind the tube on the right.
Resize element 68 to 40%, paste on the stump behind the tube.
Resize element 18 to 50%, paste on the right behind the lantern.
Paste element 11 above the frame how you like, duplicate, mirror, move
below the trees to the top left, duplicate, mirror.

Resize element 47 to 40%, paste on the left below the mushroom layer
behind the stump with the squirrels, duplicate, mirror.
Paste element 49 on the left below the other trees, duplicate, mirror.
Resize element 67 to 50%, paste on the left below the branch.
Resize element 52 to 30%, paste at the bottom left, duplicate, move over, 
duplicate again, mirror, move below the candles on the right.

Add any other elements you would like, make it your own.
Crop your tag to be sure no shadows or lines are on the edges.
 Then add your copyright and name.
That's it

Hope you enjoyed doing my tut.    

Wednesday, July 7, 2021

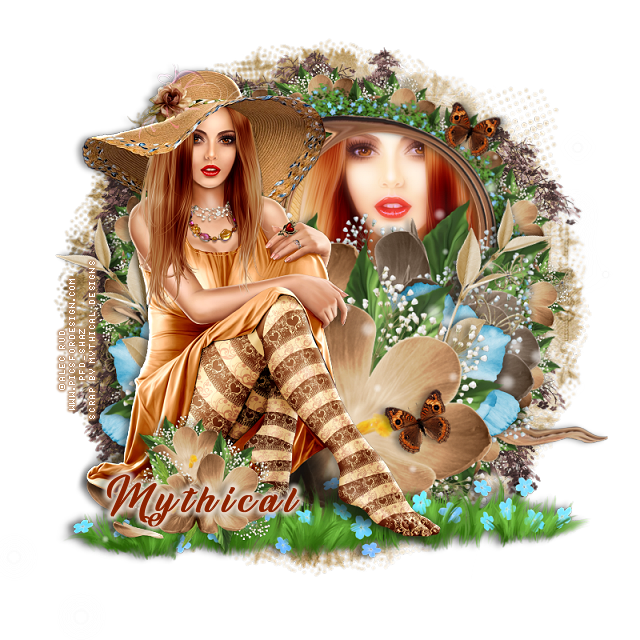
FTU Taya Beauty


  This tut was written July 6th, 2021 for those with a basic knowledge of psp.

I am using the awesome artwork of  Alec Rud
The tube is called "Taya" 
You need a license to use this tube, do not use without a license.
You can find this tube at PFD store  HERE

I used PSPX6...but any of them should work.
FTU kit  Simply May by Mythical Designs HERE
Check out the rest of the blog HERE
DD Mask NFM_2015_3 HERE
Check out to e rest of the blog HERE
Filters
xero-Porcelain
Mura Meister Copies-Encircle

Font of choice,  I used  Sunrise Place

Drop shadow is  V -2 H 4, 50, 10, or use what you prefer.
Let's get started
*Remember to add your drop shadow as you go along*

Open a new image 800 x 800 or a size you prefer, can always resize later.
Paste paper 8, apply your mask, delete, merge group, duplicate, merge down.

Paste element 15, resize to 90%, move to up and to the right a little.
Click inside with your magic wand, expand by 5, paste paper 2, invert, delete, 
keep selected.
Resize your tube to 65%, paste in the frame, delete, select none.
Duplicate the tube, go to Adjust, Blur, Gaussian blur, number on 5, change the blend
mode to Screen. 
Apply the xero filter, Porcelain to both tubes, merge down.

Paste element 14, resize to 90%, move to the left and down a little.

Resize element 2 to 40%, paste between the two flower layers, duplicate, mirror.

Resize element 20 to 30%, apply Mura Meister Copies-Encircle, first number on 14,
move below the frame layer and to the left a bit.
Resize element 14 to 35%, apply Mura Meister Copies-Encircle, first number on 16,
change the next two numbers to 52 move below the first circle.

Resize your tube to 35%, mirror, paste on the top layer to the left.

Resize element 35 to 35%,  duplicate, free rotate to the right at 20 degrees,
 move below the top flower on the right, duplicate, mirror.
Resize element 14 to 35%, paste at the lower left above the tube.

Resize element 26 to 15%, free rotate to the left at 15 degrees, duplicate, mirror,
resize to 85%, move to the upper right.
Paste element 11 above the mask, erase the trunk part at the bottom.
Resize element 21 to 70%, paste at the bottom below the tube.
Mirror element 25, paste below the tube layer.

Add any other elements that you would like, make it your own.
Always readjust your mask and elements how you like them before you
 merge your tag, resize, sharpen.

 Then add your copyright and name.
That's it

Hope you enjoyed doing my tut.   

Tag for Mythical


Wednesday, September 30, 2020

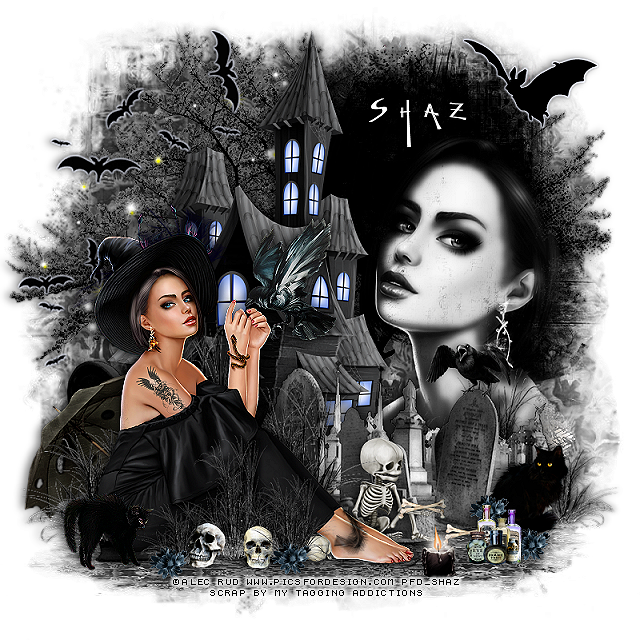
FTU Darkness


This tut was written September 30th, 2020 for those with a basic knowlewdge of psp.
I am using the awesome artwork of Alec Rud
The tube is called "Elis"
You need a license to use this tube, do not use without a license.
You can find this tube at PFD store  HERE

I used PSPX...but any of them should work.
FTU kit Darkness by  My Tagging Addictions HERE
Check out the rest of the blog HERE
Mask of choice, I used MizTeeques Mask 284  HERE
Check out the rest of the blog HERE
Filters
xero-Radiance
Font of choice,  I used The Worst
On this font I got it when they offered it as free for a short time.

Drop shadow is  V-0 H-5 Black, 50, 15, use what you prefer.
Let's get started
*Remember to add your drop shadow as you go along*

Open a new image 800 x 800 or a size you prefer.
Paste paper 2, apply your mask, delete, merge group, duplicate, 
change the blend mode to Multiply, merge down.
Duplicate, take your Pick tool, hold the shift key and drag the top square down
on one side then the other until as flat as you like.

Resize the scary house to 50%, paste to the left a bit.

Resize your tube to 27%, mirror, move to the left above the house.
Go back to the original tube, resize to 75%, place on the mask on the right,
change the blend mode to Luminance(L). 
Being on the mask, select all, float, defloat, invert, now being on the 
tube, hit delete, select none.
Apply the xero filter-Radiance.

Paste tree 1 on the mask to the left, go to Adjust, Hue and Saturation,
Colorize, both numbers on 0, duplicate, move to the right more and below the 
first tree.
Paste the tombstones below the tube, mirror.
Resize cat 1 to 40%, mirror, paste on the lower right.
Resize the skeleton to 20%, paste below the tube by her feet.
Resize element 3 to 20%, paste in the skeleton's hand, duplicate, move down
on the ground.

Mirror the bats and paste on the upper left, add a gradient glow so they will
show up more if you like.
Resize the skull grass to 70%, paste behind the tube, erase any skulls showing,
duplicate, merge down.
Duplicate again, resize to 70%, mirror, move below the tombstones on the right.
Go back to the original skulls and grasses, resize to 40%, paste at the bottom
above the tube.

Resize cat 2 to 40%, paste at the lower left above the skulls and grass, 
sharpen a couple of times.
Resize the umbrella to 50%, paste behind the grass layer on the left behind the tube.
Resize element 5 to 25%, paste at the bottom being on the top layer by the 
skeleton.

Resize the bat to 25%, mirror, add a gradient glow if you like, paste at 
the upper right.
Resize the feather to 20%, paste on the foot of the tube.
Resize element 8 to 25%, paste at the bottom to the right.
Resize the flower to 10%, free rotate to the left at 90 degrees, duplicate 
a couple of times or so and place where you like.
Paste the sparkles on the tree on the left.
Resize the raven to 15%, paste on top of the tombstones on the right.

Add any other elements that you would like, make it your own.
Always readjust your mask and elements how you like them before you
 merge your tag, sharpen once.
Crop your tag to make sure no shadows or anything on the edges

 Then add your copyright and name.

That's it

Hope you enjoyed doing my tut.