Showing posts with label Music. Show all posts

Monday, June 15, 2026

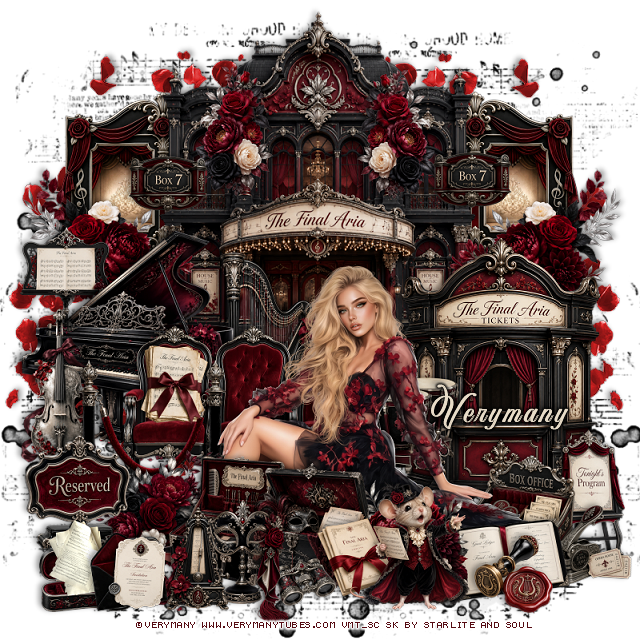
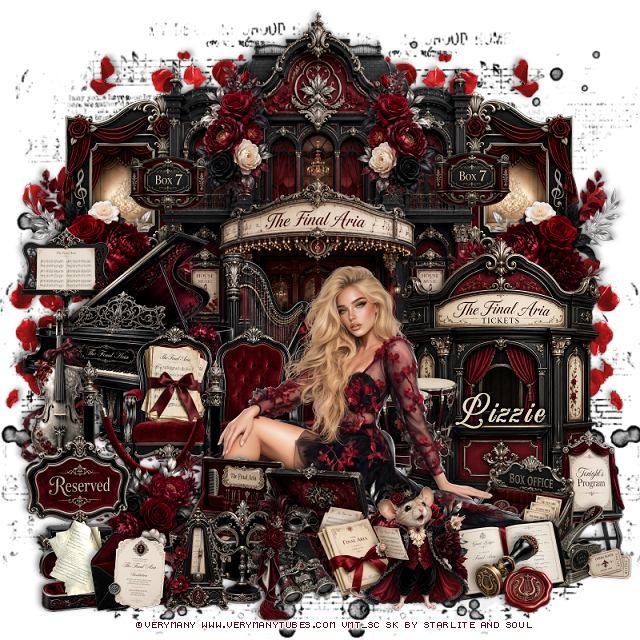
PTU The Final Aria


 This tut was written June 15th, 2026 for those with a basic knowledge of psp. 

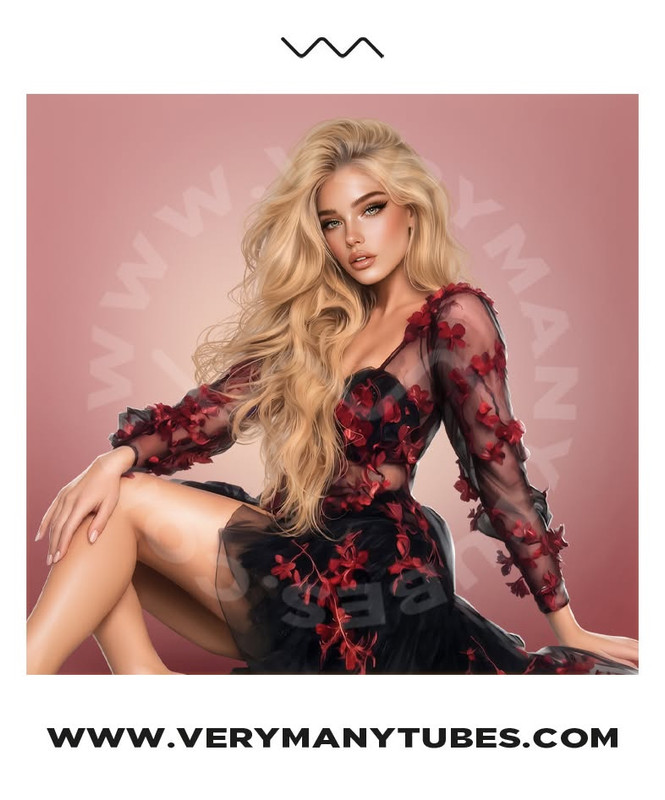
I am using the beautiful tube by © Verymany

Tube is called Crimson Petals
Tube is NOT included
You need a license to use this tube, please do not use without a license
You can find this tube at Verymany store HERE

I used PSP2020...but any of them should work.
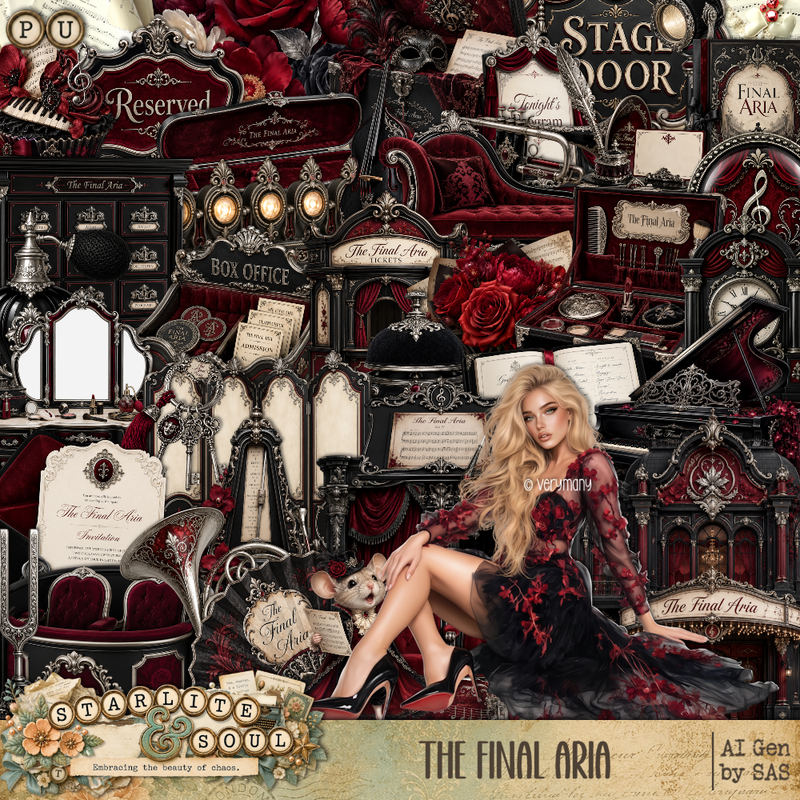
PTU Scrap The Final Aria by Starlite and Soul  HERE
You can find all Starlite and Soul kits  HERE 

Font of choice, I used Aurethia

Drop shadow as you go is V -2 H 4, 50, 10, or use what you prefer.
Let's get started
*Remember to add your drop shadow as you go along*

Open a new image 800 x 800, paste 161 at the upper left, duplicate, merge down,
duplicate, move to the right, duplicate both, move to the bottom, merge
all together, duplicate, merge down.
Paste 92 on the right, duplicate, mirror.

Resize 1 to 65%, paste at the top.
Resize frame 6 to 40%, paste below the building on the left, duplicate,
mirror, click inside both, resize paper 9 to 30%, paste so the light
shows, invert, delete.
Resize 17 to 50%, paste on the bottom right.
Resize 125 to 33%, paste on the left at the bottom of the window,
duplicate, mirror.
Resize 45 to 50%, paste at the bottom of the building.

Resize the tube to 28%, paste at the bottom above the seats.

Resize 5 to 45%, paste on the left below the seats.
Resize 53 to 22%, paste on the bottom left.
Resize 44 to 35%, paste on the bottom left below the tube and sign.
Resize 68 to 35%, paste below the seats behind the tube.
Resize 54 to 25%, paste on the bottom right below the tube layer,
by the ticket booth.
Resize 41 to 20%, paste on the bottom right.
Resize 25 to 15%, paste at the bottom right.
Resize 11 to 30%, paste on the left below the piano.

Resize 12 to 25%, paste at the bottom above the tube.
Resize 6 to 30%, paste on the left above the piano.
Resize 40 to 15%, paste at the bottom by the box.
Resize 7 to 15%, paste at the bottom.
Resize 14 to 40%, paste below the piano by the tube.
Resize 24 to 15%, paste on the seat.
Resize 48 to 23%, paste at the bottom right.
Resize 39 to 15%, paste at the bottom on the book.
Resize 124 to 25%, paste at the bottom below box, move the book above.
Resize 123 to 25%, paste at the bottom below the tube by her feet.
Resize 59 to 25%, paste at the bottom above the tube by the legs.
Resize 49 to 20%, paste at the bottom.
Resize 16 to 20%, paste at the bottom left.
Resize 74 to 25%, paste at the bottom left.
Resize 129 to 25%, paste at the top on the building, duplicate, mirror.

Resize 34 to 15%, paste at the top left, duplicate, move to the right.
Resize 99 to 17%, paste at the bottom left.
Resize 43 to 15%, paste at the bottom left.
Resize 2 to 25%, paste at the bottom.

Add any other elements that you would like, make it your own.
Always readjust your mask and elements how you like them before you
 merge your tag, resize, sharpen.

Crop your tag to be sure no shadows or lines are on the edges.
 Then add your copyright and name.
That's it

Hope you enjoyed doing my tut

Tag for Lizzie  


Thursday, May 28, 2026

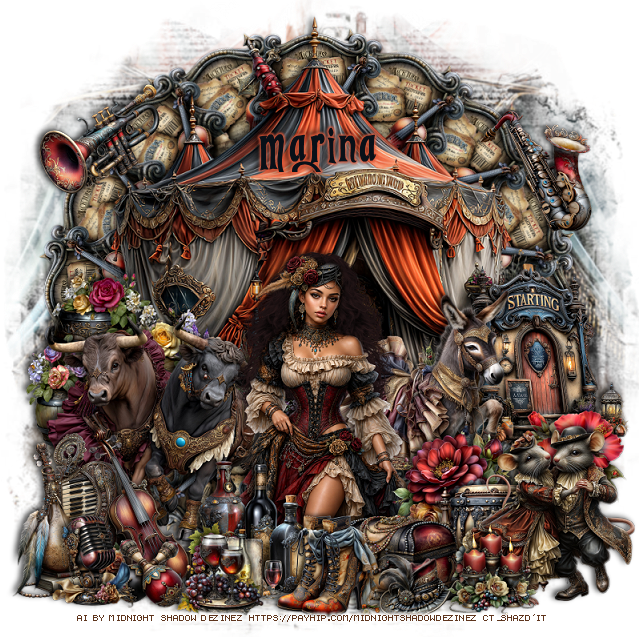
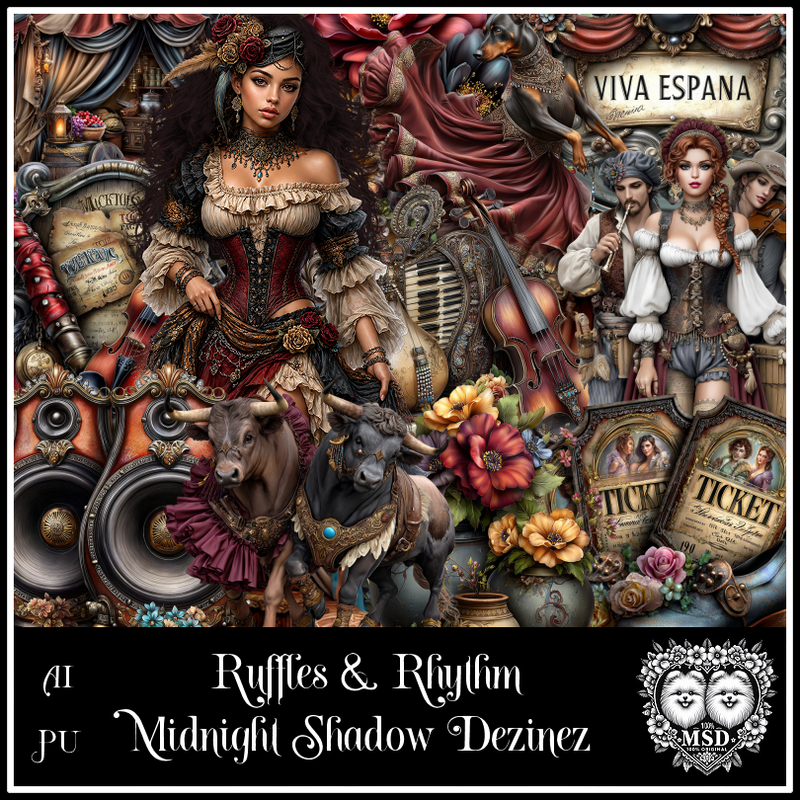
PTU Ruffles and Rhythm


 This tut was written May 28th, 2026 for those with a basic knowledge of psp. 

Awesome AI kit and tube by Midnight Shadow Dezinez

Everything is included in the kit
Read the TOU on how to credit your tags

I used PSP2020...but any of them should work.
PTU Scrap Ruffles and Rhythm by Midnight Shadow Dezinez  HERE
You can find all Midnight Shadow Dezinez kits HERE
Miz Teeques Mask 245 HERE
Check the blog out HERE

Font of choice, I used Tangled

Drop shadow as you go is V -2 H -4, 50, 10, or use what you prefer.
Let's get started
*Remember to add your drop shadow as you go along*

Open a new image 800 x 800, resize paper 8 to 80%, apply your mask,

Resize 22 to 75%, paste at the top.
Resize 23 to 25%, apply Mura Meister Copies-Encircle, first 
3 numbers on 16, 60, 60, paste below the tent.
Resize 2 to 40%, paste on the bottom left.
Resize 25 to 45%, paste above the bulls.
Resize 1 to 30%, paste on the left below the bulls.
Resize 4 to 23%, paste at the bottom above the tube.
Resize 15 to 18%, paste at the bottom above the bottles.
Resize 11 to 20%, paste at the bottom below the shoes.

Resize 20 to 30%, paste on the right by the tent.
Resize 33 to 30%, paste at the bottom left above the bottles.
Resize 17 to 35%, paste on the right below the tube.
Resize 21 to 20%, paste at the bottom right below the chest.
Resize 26 to 25%, paste above the tube behind the drum.
Resize 14 to 30%, paste at the bottom right above the drum.

Resize 56 to 20%, paste at the bottom below the donkey on the right.
Resize 13 to 13%, paste at the bottom right above the chest.
Resize 30 to 12%, paste at the bottom right above the chest.
Resize 12 to 20%, paste at the upper left.
Resize 39 to 20%, paste at the upper right.
Resize 7 to 15%, paste at the bottom right.
Resize 18 and 31 to 15%, paste at the bottom left.

Add any other elements that you would like, make it your own.
Always readjust your mask and elements how you like them before you
 merge your tag, resize, sharpen.

Crop your tag to be sure no shadows or lines are on the edges.
 Then add your copyright and name.
That's it

                 Hope you enjoyed doing my tut                    

Friday, January 23, 2026

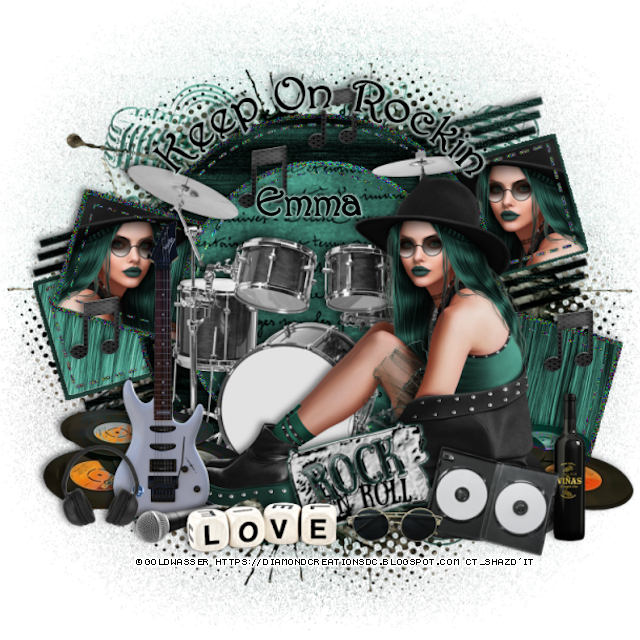
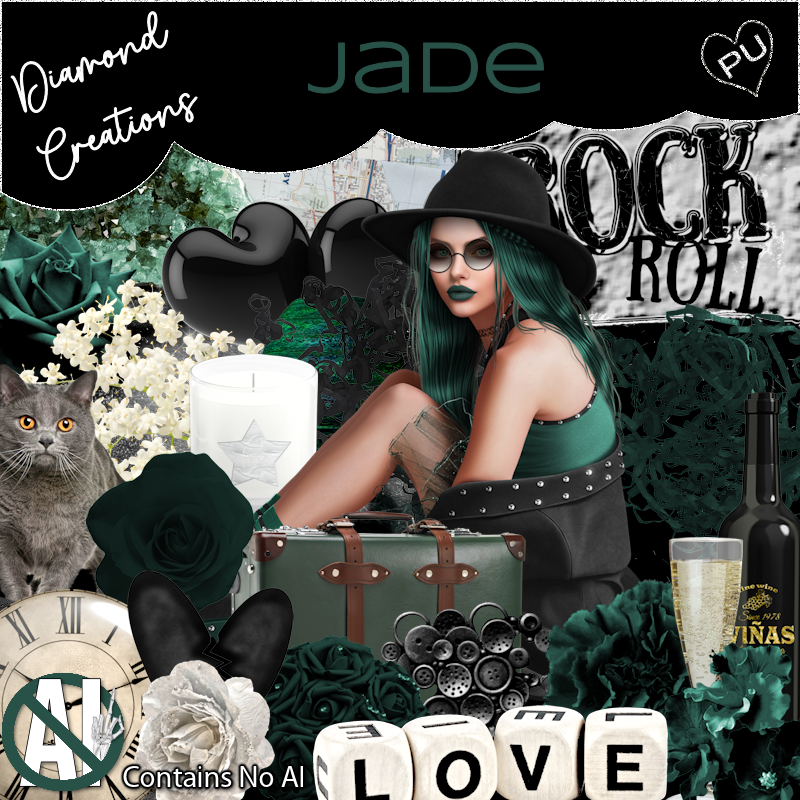
PTU Jade


 This tut was written January 23rd, 2026 for those with a basic knowledge of psp. 

Awesome tube used ©Goldwasser

The tube is included in the kit, this contains "NO Al"
Everything used is included in the kit
Read the TOU on how to credit your tags

I used PSP2020...but any of them should work.
PTU Scrap Jade "NO Al" by Diamond Creations  HERE
You can find all Diamond Creations  kits HERE
Template 369 by Donna's Designz HERE
Check out the rest of the blog HERE
Mask of choice, I used MizTeeques 87 HERE
Check out the rest of the blog HERE

Font of choice, I used Harrington

Drop shadow as you go is V -2 H -4, 50, 10, or use what you prefer.
Let's get started
*Remember to add your drop shadow as you go along*

Open the template, resize all layers to 125%, then Canvas size 800 x 800.
Delete the credits.

Paste paper 20, apply your mask, move to the bottom layer.
Merge copy of layer 10 with layer 10, select all, float, defloat, paste paper 16,
invert, delete, delete the template.

Click layer 5 with the magic wand in the white area, paste paper 4, 
invert, delete, keep selected, resize the tube to 55%, paste, delete, select none.
Now click the border part, fill with #214138.

Layer 9, paste paper 14, invert, delete, add noise at 100.
Click layer 2 on the white part, resize paper 16 to 60%, paste, invert, delete.
Now click the border part, fill with #214138.
Layer 6, select all, float, defloat, fill with #214138.

Layer 4, paste paper 4, invert, delete, keep selected, resize 
the tube to 55%, paste, delete, select none.
Now click the border part, fill with #214138.
Layer 9, new layer, fill with #214138, add noise at 100.
Layer 7, paste paper 4, invert, delete, add noise.
Resize 13 to 60%, paste above the circle, go to Adjust, Hue and
Saturation, colorize, both numbers on 0.

Resize the tube to 55%, paste at the bottom right.

Resize 12 to 45%, paste at the bottom left under the tube, change
the blend mode to Luminance (L), duplicate, mirror.
Resize 33 to 38%, paste at the bottom above the tube.
Resize 16 to 50%, paste on the left above the tube.
Resize 3 to 30%, paste on the left above the guitar.
Resize 15 to 30%, paste on the left above the guitar.
Resize 18 to 20%, paste on the right above the tube, free rotate to 
the right at 13.

Resize 92 to 50%, paste at the bottom.
Resize 17 to 30%, free rotate to the left at 15, paste below the love word,
add a dark green glow.
Resize 27 to 30%, paste on the right below the disc.
Resize 8 to 60%, duplicate, change the blend mode to Multiply, merge 
down, duplicate 2 or 3 times and move where you like.
Add any wordart you like, I took the ellipse tool, line on 3, draw out
a circle to fit a little wider than the circle template, add a new layer,
select the Text tool and when you see the curve with the a on the circle,
type out what you want your tag to say.
Paste element 4 above the mask at the top, change the blend mode to
Luminance (L), mirror, duplicate, flip, move 
to the bottom, duplicate, move up on the right and out, duplicate,
mirror.

Add any other elements that you would like, make it your own.
Always readjust your mask and elements how you like them before you
 merge your tag, resize, sharpen.

Crop your tag to be sure no shadows or lines are on the edges.
 Then add your copyright and name.
That's it

Hope you enjoyed doing my tut          

Saturday, October 18, 2025

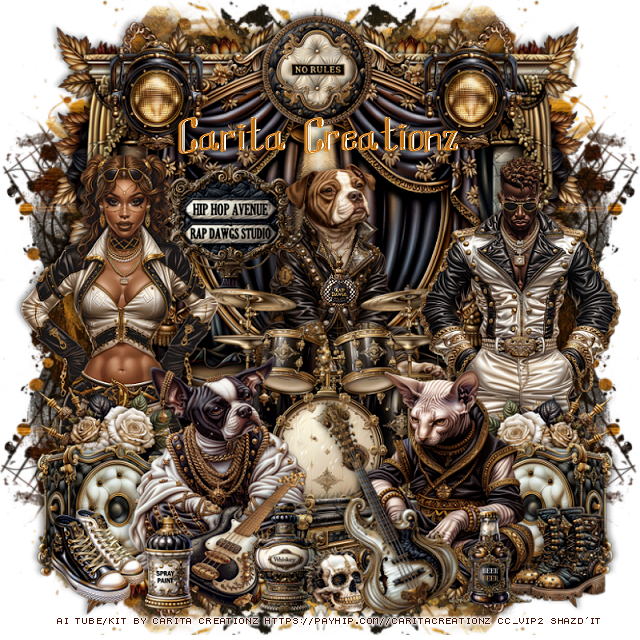
PTU Hip Hop Avenue


This tut was written October 18th, 2025 for those with a basic knowledge of psp. 

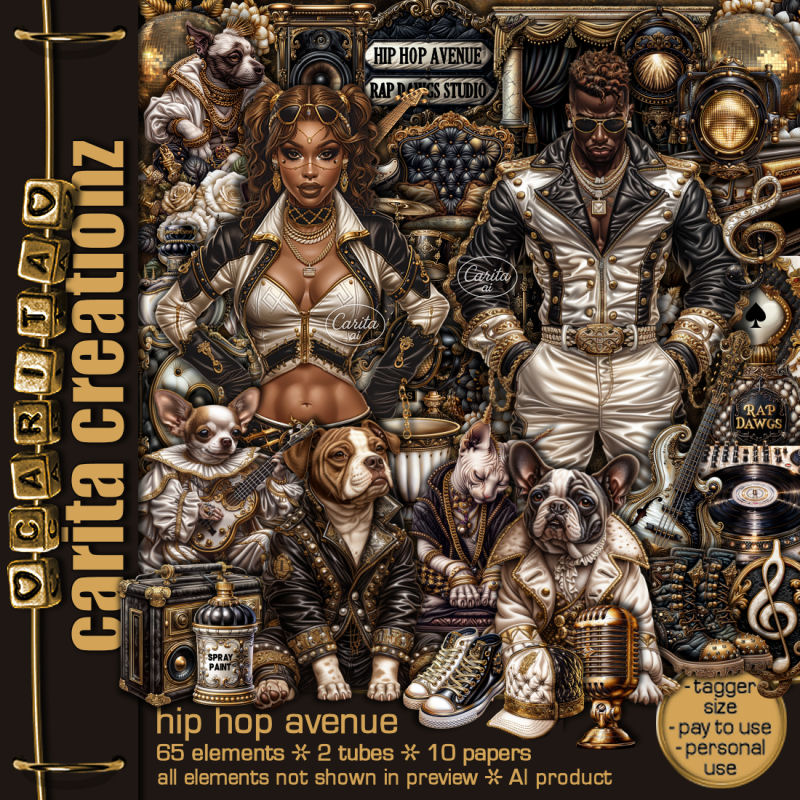
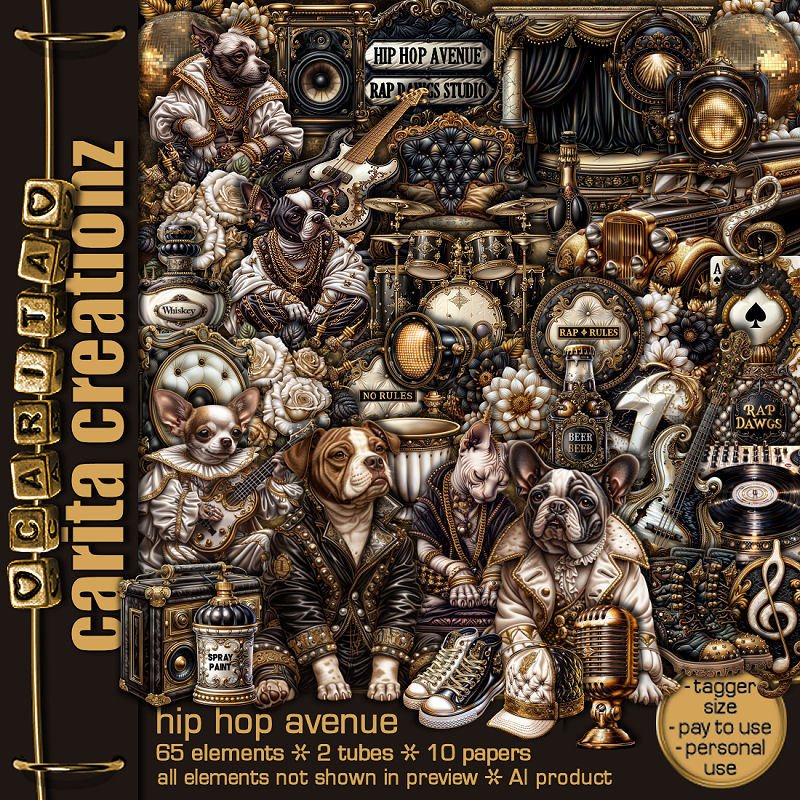
I am using the Awesome Al kit by Carita Creationz
Tube is included
Read the TOU how to credit your tags.

I used PSP2020...but any of them should work.
PTU Scrap Hip Hop Avenue kit by Carita Creationz  HERE
Kit has 65 elements, 10 papers and 2 tube
Check her store out to see all her other kits and tubes HERE
Mask of choice, I used RD Mask 897 HERE
Check out the rest of the blog HERE

Font of choice, I used Musical Tone

Drop shadow as you go is V -2 H 4, 50, 10, or use what you prefer.
Let's get started
*Remember to add your drop shadow as you go along*

Open a new image 800 x 800, paste paper 10, apply your mask,
duplicate, mirror, adjust to fit your tag, merge together, duplicate, 
flip, erase any that you don't want.

Resize element 41 to 85%, paste at the top.
Resize element 26 to 65%, paste above the stage.
Resize element 3 to 40%, paste center.
Resize element 21 to 45%, paste above the dog.
Resize element 54 to 35%, paste below the dog with the drums,
erase a little of the bottom.

Resize tubes 1 and 2 to 40%, paste on each side.

Resize element 5 and 7 to 40%, paste at the bottom on each side of the drums.
Resize element 23 to 25%, paste at the bottom left below the dog, 
duplicate, mirror, move behind the cat.
Resize element 18 to 25%, paste at the bottom left above the dog.
Resize element 16 to 25%, paste below the speaker on the left, duplicate,
mirror, move above the tube.
Resize element 36 to 50%, paste at the bottom on the bottom layer to the left,
duplicate, mirror, duplicate both, flip, move to the top.
Resize element 51 to 17%, paste at the bottom left.
Resize element 11 to 17%, mirror, paste at the bottom right.

Resize element 47 to 20%, paste at the bottom center above the animals.
Resize element 20 to 20%, paste at the bottom.
Resize element 53 to 17%, paste at the bottom.
Resize element 34 to 20%, paste at the top left on the scroll, duplicate, mirror.
Resize element 9 to 40%, free rotate to the left at 25, paste on
the bottom right above the radio.
Resize element 13 to 17%, paste at the bottom left.
Resize element 59 to 15%, paste on the dog behind the drums, sharpen a 
couple of times.
Resize element 10 to 12%, paste at the bottom.
Resize element 28 to 20%, paste at the top.

Add any other elements that you would like, make it your own.
Always readjust your mask and elements how you like them before you
 merge your tag, resize, sharpen.
Crop your tag to be sure no shadows or lines are on the edges.
 Then add your copyright and name.
That's it

Hope you enjoyed doing my tut.        

Thursday, April 17, 2025

PTU Adrienne's Designs

  **ღ** Adrienne's Designs **ღ*

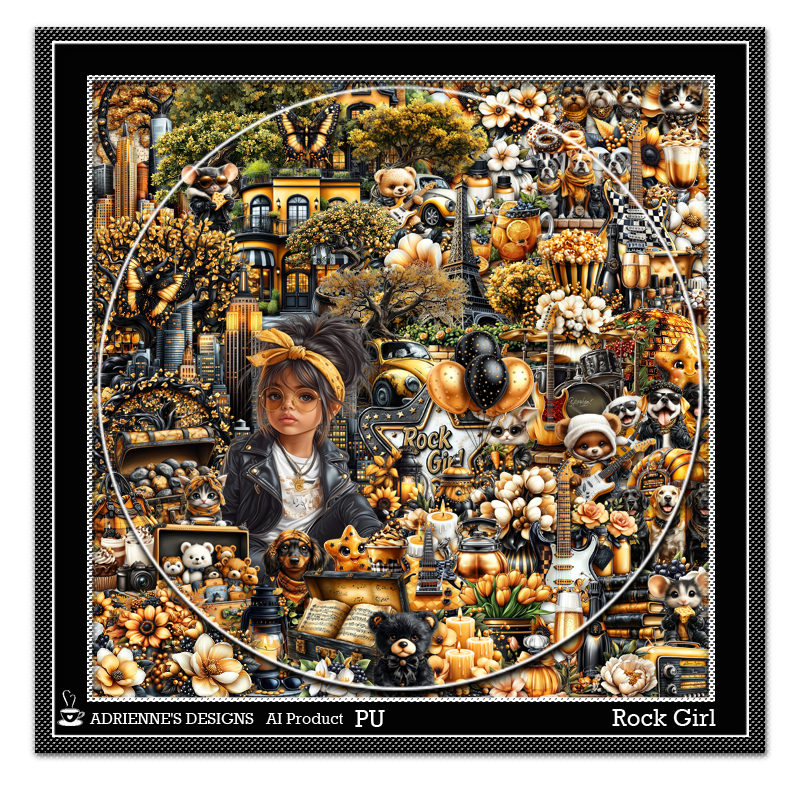
I used the Awesome "Rock Girl" Kit
You can find this kit at her Store HERE
Check out the rest of her store HERE
Or 
you can find all her kits on her blog HERE

Here is a tag I made with the kit   


Saturday, March 29, 2025

PTU Zoe


  This tut was written March 26th, 2025 for those with a basic knowledge of psp. 

I am using the Awesome tube by ©MaryArt

Tube is called Zoe
You need a license to use this tube, please do not use without a license
You can find the tube at VMA  HERE


I used PSP2020...but any of them should work.
PTU Scrap Music To My Ears by Wicked Princess Scraps HERE
You can find all Wicked Princess Scraps kits  HERE
Miz Teeques's Mask 54 HERE
Check the rest of the blog HERE

Font of choice, I used Beauty Mountains

Drop shadow as you go is V -2 H 4, 40, 10, or use what you prefer.
Let's get started
*Remember to add your drop shadow as you go along*

Open a new image 800 x 800, paste paper 14, apply your mask.

Paste element 57, then paste element 58.
Resize element 82 to 75%, paste on the bottom left.
Resize element 4 to 25%. paste at the top on the flowers on the curtain in
the center, duplicate, move to the left, duplicate, mirror.
Resize element 41 to 60%, paste to the right above the piano.
Resize element 18 to 60%, paste behind the chair below the piano.
Resize element 1 to 65%, paste on the right above the curtains.
Resize element 2 to 65%, paste on the left above the curtains.

Resize the tube to 25%, mirror, paste on the chair.

Resize element 99 to 40%, paste on the bottom right above the tube.
Resize element 100 to 35%, paste at the bottom right.
Resize element 98 to 25%, paste on the table.
Resize element 20 to 25%, paste at the bottom right above the tube.
Resize element 164 to 25%, paste at the bottom left.
Resize element 27 to 25%, paste at the bottom left above the flowers.
Resize element 73 to 30%, free rotate to the right at 25, paste at the bottom left 
above the basket.
Resize element 55 to 25%, paste at the bottom left above the basket.

Resize element 2 to 50%, paste on the left below the piano, duplicate, mirror.
Resize element 31 to 25%, paste at the bottom below the purse.
Resize element 92 to 30%, mirror, paste on the upper left.
Resize element 62 to 30%, paste at the top.
Resize element 21, 22 and 23 to 15%, paste on the table.
Resize element 24 to 12%, paste on the arm of the chair on the left below the tube.
Resize element 162 to 17%, paste at the bottom above the tube, duplicate, 
move over.
Resize element 77 to 20%, paste at the bottom below the dog.
Resize element 80 to 15%, paste at the bottom.
Resize element 35 to 20%, free rotate to the left at 25, paste on the upper right.
Resize element 63 to 25%, mirror, paste on the upper right.

Add any other elements that you would like, make it your own.
Always readjust your mask and elements how you like them before you
 merge your tag, resize, sharpen.

Crop your tag to be sure no shadows or lines are on the edges.
 Then add your copyright and name.
That's it

Hope you enjoyed doing my tut 

Tag for Shani


Wednesday, February 19, 2025

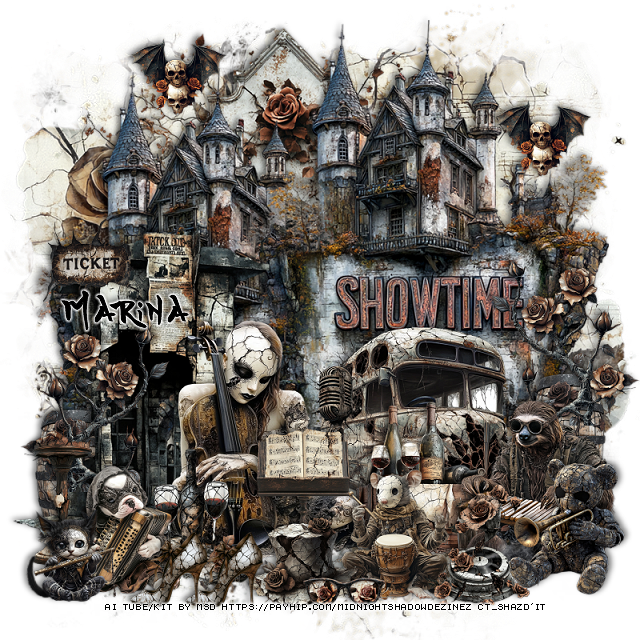
PTU Broken Artistry


 This tut was written February 19th, 2025 for those with a basic knowledge of psp. 

Awesome AI kit and tube by Midnight Shadow Dezinez

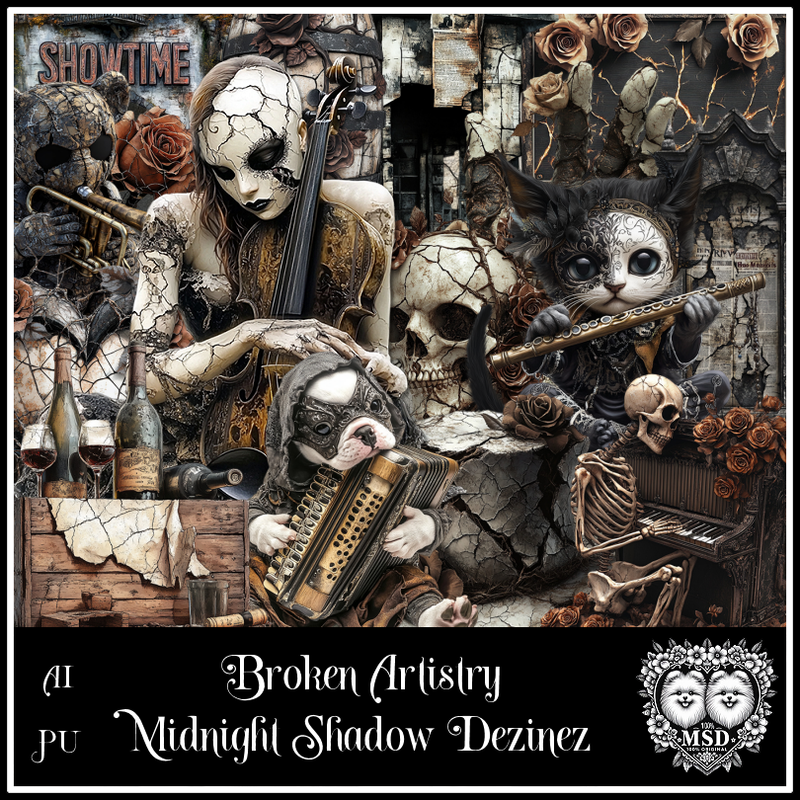
Everything used is included in the kit
Read the TOU on how to credit your tags

I used PSP2020...but any of them should work.
PTU Scrap Broken Artistry by Midnight Shadow Dezinez  HERE
Everything used is included in the kit
You can find all Midnight Shadow Dezinez kits  HERE
 RD Mask 717 HERE
Check the rest of the blog HERE

Font of choice, I used Yozakura

Drop shadow as you go is V -2 H -4, 40, 10, or use what you prefer.
Let's get started
*Remember to add your drop shadow as you go along*

Open a new image 800 x 800, resize paper 3 to 85%, paste, apply 
your mask.

Resize element 49 to 85%, paste at the upper right, duplicate, move below and
to the left.
Resize element 27 to 85%, paste at the top on the bottom layer.
Resize element 53 to 65%, paste on the bottom left.
Resize element 29 to 50%, mirror, paste at the bottom right.
Resize element 38 to 50%, mirror, paste at the bottom.
Resize element 57 to 40%, paste at the bottom.
Resize element 20 to 25%, paste below the music stand.
Resize element 55 to 30%, paste on the bottom left.

Resize element 33 to 35%, paste at the bottom above the bus.
Resize element 18 to 35%, mirror, paste at the bottom right.
Resize element 44 to 35%, paste below the water stand on the left,
duplicate, mirror, 
Resize element 19 to 30%, mirror, paste on the bottom right.
Resize element 16 to 30%, paste at the bottom right.
Resize element 32 to 30%, paste at the bottom to the left.
Resize element 7 to 25%, paste at the bottom right above the bear.
Resize element 17 to 30%, paste on the bottom left.
Resize element 11 to 20%, paste at the bottom, duplicate, move over.
Resize element 10 to 25%, paste at the bottom.
Resize element 43 to 18%, paste at the bottom by the hat.
Resize element 28 to 20%, paste on the left on the burnt booth.
Resize element 37 to 20%, paste at the upper left, duplicate, move to the right.
Resize element 14 to 20%, paste at the bottom left.
Resize element 50 to 30%, paste below the flowers on the right, duplicate, 
mirror, move below the burnt booth.

Add any other elements that you would like, make it your own.
Always readjust your mask and elements how you like them before you
 merge your tag, resize, sharpen.

Crop your tag to be sure no shadows or lines are on the edges.
 Then add your copyright and name.
That's it

Hope you enjoyed doing my tut