Showing posts with label No Al. Show all posts

Thursday, September 10, 2026

FTU Falling Leaves

  This tut was written September 10, 2026 for those with a basic knowledge of psp. 

Awesome tube used ©Misticheskaya

The tube is called Carmelia and Evening Tea
The tube is "NOT" included
You need a license to use this tube, please do not use without a license
You can find the tube at Misticheskaya Store HERE

I used PSP2020...but any of them should work.
FTU Scrap Falling Leaves "NO Al" by Diamond Creations  HERE
You can find all Diamond Creations  kits HERE
RD Mask 683 HERE
Check the blog out HERE

Font of choice, I used Lovely Butterfly

Drop shadow as you go is V -2 H -4, 40, 10, or use what you prefer.
Let's get started
*Remember to add your drop shadow as you go along*

Open a new image 800 x 800, paste paper 3, apply your mask, adjust.

Resize frame 3 to 50%, click inside, paste paper 3, invert, delete,
keep selected, resize the tube to 75%, paste, delete, select none.
Change the blend mode on the tube to Screen.
Resize 40 to 45%, paste on the upper right on the frame, duplicate, move to
the left below the frame.
Resize 45 to 75%, paste on the upper left below the clock, duplicate,
mirror, move down some on the right.

Resize the tube to 30%, paste on the right above the clock.

Resize 93 to 50%, paste at the bottom above the tube.
Resize 17 to 25%, paste at the upper left on the frame.
Resize 19 to 35%, paste on the bottom left.
Resize 16 to 25%, paste at the bottom left below the scare crow, duplicate, mirror.
Resize 75 to 25%, paste on the left below the scare crow, duplicate,
mirror, move above the leaves on the right.
Resize 38 to 25%, paste on the canister on the right, duplicate, move to 
the one on the left.
Resize 88 to 25%, paste at the bottom below the scare crow, 
duplicate, mirror.

Resize 73 to 20%, paste at the bottom left above the scare crow,
duplicate, mirror.
Resize 13 to 25%, paste at the bottom.
Resize 72 to 15%, duplicate 3 times for a total of 4, paste at the bottom
where you like.
Resize 69 to 40%, paste behind the sign.
Resize 47 to 25%, paste at the bottom.

Add any other elements that you would like, make it your own.
Always readjust your mask and elements how you like them before you
 merge your tag, resize, sharpen.

Crop your tag to be sure no shadows or lines are on the edges.
 Then add your copyright and name.
That's it

Hope you enjoyed doing my tut            

Wednesday, August 5, 2026

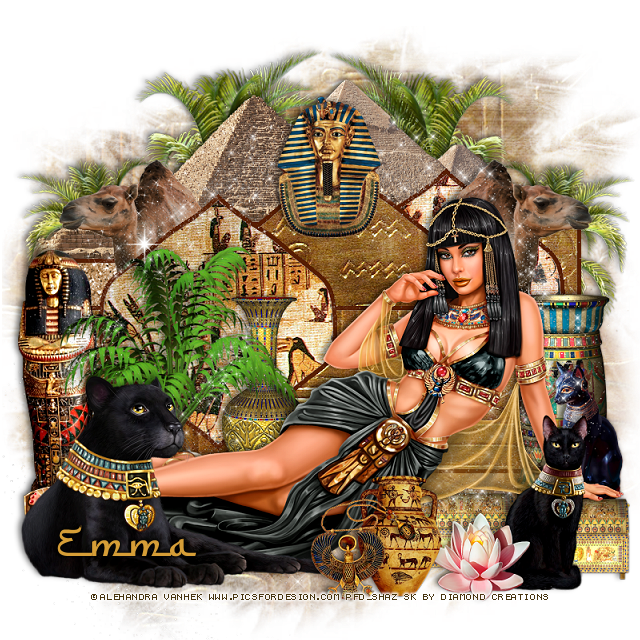
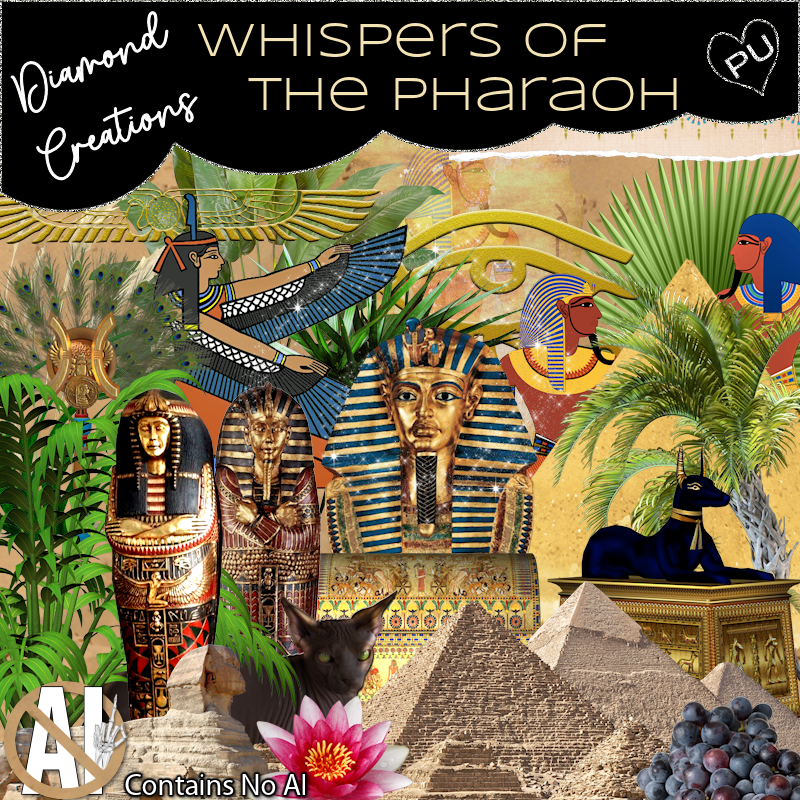
PTU Whispers of the Pharaoh


 This tut was written August 5, 2026 for those with a basic knowledge of psp. 

Awesome tube used ©Alehandra Vanhek

Tube is not included 
I bought this tube when they were at PFD still
I am not sure where they are selling at now
You need a license to use this tube, please do not use without a license.

I used PSP2020...but any of them should work.
FTU Scrap Whispers of the Pharaoh "NO Al" by Diamond Creations  HERE
You can find all Diamond Creations  kits HERE
Donna's Template 601 HERE 
Check the rest of the blog HERE
Miz Teeques Mask 40 HERE 
Check the rest of the blog HERE

Font of choice, I used Furgan

Drop shadow as you go is V -2 H -4, 40, 10, or use what you prefer.
Let's get started
*Remember to add your drop shadow as you go along*

Open the template, delete the credits, go to Image, resize to 125%,
 all layers checked, then Canvas size 800 x 800.
Paste paper 18, apply your mask on the bottom layer.
Delete raster 6 and 7, copy of raster 6 and 7.
Delete all the dotted lines unless you want to keep them.

Select the gray area of raster 2 with your magic wand, paste paper 18,
invert, delete, then click on the white part, fill with color #581e02.

Select the gray area of raster 3, paste element 98, invert, delete, click on the 
white part, fill with the same color as before.

Copy of raster 2, click on the gray area, paste paper 11, invert, delete,
click on the white part, fill with the same color as before.

Select copy of raster 3, click in the gray area, paste paper 18, invert, delete, 
click on the white part, fill with the same color as before.

Copy 2 of raster 2, click on the gray, paste paper18, invert, delete, click 
on the white, fill with the same color as before.
Copy 2 of raster 3, click on the gray, paste element 98, invert, delete, click 
on the white, fill with the same color as before.

Resize 20 to 45%, paste on the bottom layer on the right, duplicate, mirror.
Resize 60 to 50%, paste at the top above the trees, erase the little bit showing 
on each side.
Resize 95 to 50%, paste on the right below the center triangle of the template,
duplicate, mirror.
Resize 65 to 30%, paste at the top above the center triangle of the template.

Resize the tube to 40%, paste at the bottom.

Resize 81 to 45%, paste on the right below the tube.
Resize 63 to 42%, paste on the left below the tube.
Resize 80 to 50%, paste below the tube by the knees.
Resize 22 to 30%, paste below the tube to the left.
Resize 77 to 40%, paste on the right below the tube by the vase.
Resize 72 to 28%, paste on the bottom right below the hand of the tube,
duplicate, move over to the left more.
Resize 88 to 30%, paste at the bottom above the tube by the flower.
Resize 91 to 30%, paste at the bottom by the pot.
Paste sparkle 2 below the tube where you like.

Add any other elements that you would like, make it your own.
Always readjust your mask and elements how you like them before you
 merge your tag, resize, sharpen.

Crop your tag to be sure no shadows or lines are on the edges.
 Then add your copyright and name.
That's it

Hope you enjoyed doing my tut             
Sunday, July 19, 2026

PTU Amber Breeze


  This tut was written July 19th, 2026, 2026 for those with a basic knowledge of psp. 

Awesome tube used ©Goldwasser 

1tube included in the kit
Read the TOU on how to credit your tags

I used PSP2020...but any of them should work.
FTU Scrap Amber Breeze "NO Al" by Diamond Creations  HERE
You can find all Diamond Creations  kits HERE
RD Mask 683 HERE 
Check the rest of the blog HERE
Filter
Mura Meister Copies-Encircle

Font of choice, I used Autumn in November

Drop shadow as you go is V -2 H -4, 40, 10, or use what you prefer.
Let's get started
*Remember to add your drop shadow as you go along*

Open a ne layer 800 x 800, paste paper 6, apply your mask

Resize 56 to 20%, flip, apply Mura Meister Copies-Encircle, first
3 numbers on 20, 66, 66, paste.
Click inside, paste paper 1, move how you want, invert, delete.
Resize 65 to 20%, apply Mura Meister Copies-Encircle, first
3 numbers on 16, 62, 62, paste.
Resize 114 to 65%, paste on the circle.

Resize your tube to 45%, paste above the frames.

Resize wordart 4 to 75%, paste on the right below the tube, 
duplicate, change the blend mode to Multiply, merge down,
duplicate again, mirror, move below the frames.
Resize 63 to 30%, paste at the bottom left above the tube, duplicate, mirror.
Resize 92 to 40%, paste on the left below the tube.
Resize 70 to 25%, paste at the bottom left.
Resize 69 to 25%, paste at the bottom below the pumpkin, duplicate, 
mirror.
Resize 67 to 40%, paste on the left above the frame.
Resize 57 to 30%, paste at the bottom below the pumpkin.
Resize 56 to 25%, mirror, paste at the bottom right below the bottles.
Resize 49 to 25%, paste at the bottom left above the pumpkin, duplicate, mirror.
Resize 52 to 25%, paste at the bottom to one side of the bottles,
duplicate, move to the right.
Resize 80 to 25%, paste on the bottom right below the flower.
Resize 47 to 15%, paste at the bottom right above the flower,
duplicate, mirror.

Add any other elements that you would like, make it your own.
Always readjust your mask and elements how you like them before you
 merge your tag, resize, sharpen.

Crop your tag to be sure no shadows or lines are on the edges.
 Then add your copyright and name.
That's it

Hope you enjoyed doing my tut             
Thursday, July 9, 2026

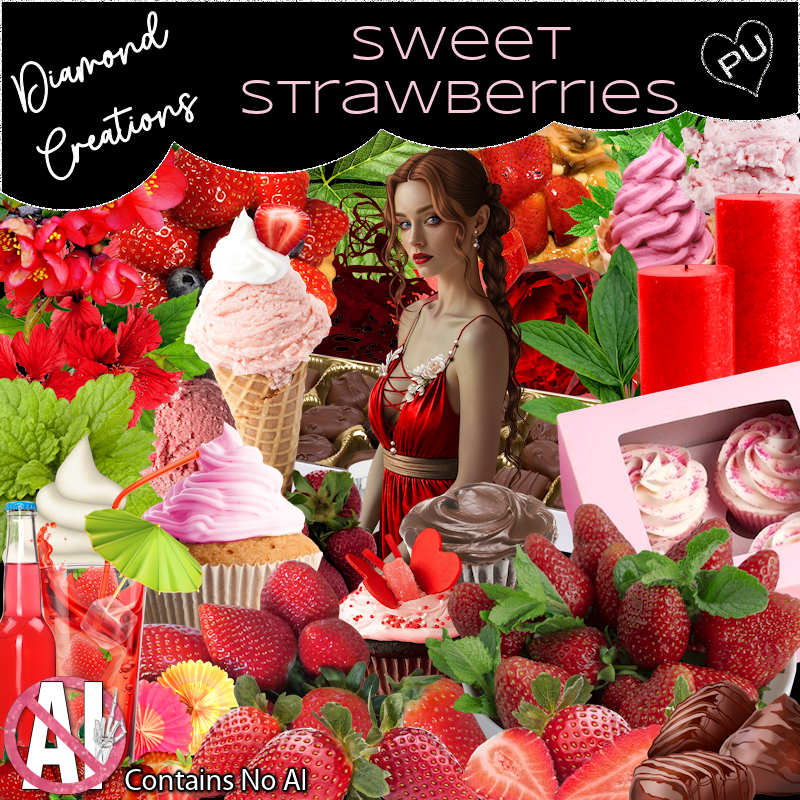
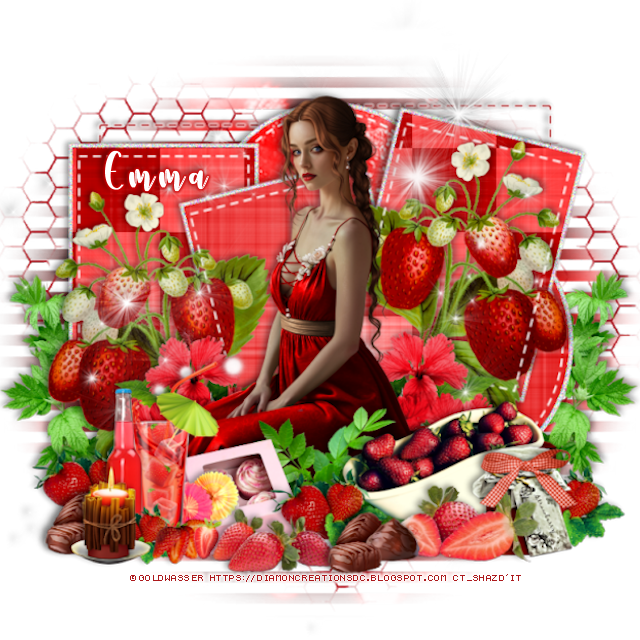
PTU Sweet Strawberries


 This tut was written July 9th, 2026, 2026 for those with a basic knowledge of psp. 

Awesome tube used ©Goldwasser 

1tube included in the kit
Read the TOU on how to credit your tags

I used PSP2020...but any of them should work.
FTU Scrap Sweet  Strawberries "NO Al" by Diamond Creations  HERE
You can find all Diamond Creations  kits HERE
Template 525 by Donna Designz HERE
Check the rest of the blog HERE
Monti's Blinds Mask 1 HERE 
Check the rest of the blog HERE
Filter
Layout Tools

Font of choice, I used Strawberry

Drop shadow as you go is V -2 H -4, 40, 10, or use what you prefer.
Let's get started
*Remember to add your drop shadow as you go along*

Open the template, delete the credits, go to Image, resize, all layers checked,
resize larger to 125, then Canvas size 800 x 800.
I like room to work lol
Paste paper 20 on the bottom layer, apply your mask.

Click on raster 4 with your magic wand paste paper 12, invert, delete.
Copy of raster 4, click on, paste paper 12, invert, delete.
Next copy of raster 4, paste paper 12, invert, delete.

Raster 2, click with the magic wand, paste paper 18, invert, delete,
apply Layout Tools, Contrast Checkers with these settings, 8, 39, 0.
Copy of raster 2, do the same with the middle one just don't apply the filter.
The next Copy of raster 2, apply the paper and add the filter.
Click on the white frame layers on each, add noise at 100.
Go back to each of the raster 2 and copies, click on the white part, add noise
at 100.

Select raster 6, new layer, fill with #ad191c, delete the template layer,
add a white gradient glow.
Merge copy of layer 7 down with layer 7, does the same with this layer as 
the last layer.
Paste 90 on the bottom layer.

Resize the tube to 30%, paste in the center.

Resize 4 to 40%, paste on the left below the white dotted line of
the center square, duplicate, mirror, move into the right square.
Resize 62 to 40%, paste on the left below the tube, duplicate, mirror.
Resize 51 to 30%, paste at the bottom left above the tube.
Resize 36 to 20%, paste at the bottom below the drinks.
Resize 6 to 25%, paste at the bottom.
Resize 9 to 25%, paste at the bottom left below the drinks, duplicate, 
move to the right by the box.
Resize 21 to 25%, paste on the bottom right, duplicate, move to the 
left below the drinks.

Resize 1 to 30%, paste on the bottom right above the tube.
Resize 74 to 40%, paste on the bottom left below the template layer,
duplicate, mirror.
Resize 7 to 30%, paste at the bottom right above the tub.
Resize 37 to 23%, paste at the bottom right above the tub.
Resize 73 to 35%, paste at the bottom above the tube.
Resize 86 to 20%, paste at the bottom left.
Resize 94 to 25%, paste on the jar.
Paste 96 below the tube where you like.

Add any other elements that you would like, make it your own.
Always readjust your mask and elements how you like them before you
 merge your tag, resize, sharpen.

Crop your tag to be sure no shadows or lines are on the edges.
 Then add your copyright and name.
That's it

Hope you enjoyed doing my tut             

Monday, June 15, 2026

PTU Seashell Wishes


 This tut was written June 15, 2026, 2026 for those with a basic knowledge of psp. 

Awesome tubes used ©Goldwasser 

2 tubes included in the kit
Read the TOU on how to credit your tags

I used PSP2020...but any of them should work.
FTU Scrap Seashell Wishes "NO Al" by Diamond Creations  HERE
You can find all Diamond Creations  kits HERE
Template 604 by Donna Designz HERE
Check the rest of the blog HERE
Miz Teeque Mask 63 HERE 
Check the rest of the blog HERE

Font of choice, I used Vacation in Paradise

Drop shadow as you go is V -2 H -4, 40, 10, or use what you prefer.
Let's get started
*Remember to add your drop shadow as you go along*

Open the template, delete the credits, go to Image, resize, all layers checked,
resize larger to 125, then Canvas size 800 x 800.
I like room to work lol
Paste paper 3 on the bottom layer, apply your mask.

Click on raster 11, select all, float, defloat, add a new layer, fill with #ae7346
or color of choice, delete the template layer.
Delete each layer of the template as you go along.

Merge copy of raster 6 down with 6, select all, float, defloat, new layer,
fill with the same color or your choice, delete the template layer.

Select raster 2, paste element 65, invert, delete.
Raster 10, new layer, fill with #ae7346.

Raster 5, click with your magic wand on the white part, paste paper 11,
move how you like, invert, delete, duplicate, mirror, erase one side so 
they both are the same.
Click on the solid black frame, add a color of choice and noise at 50%.
Raster 8, change the color to your choice.

 Raster 3, tap it, change color and fill with a color of choice, I used #ae7346.
Leave raster 9 as is.
Raster 4, click with your magic wand, paste paper 14, move where 
you like, invert, delete.
Raster 7 new layer, fill with white.
Cope of Raster 4, click on the white part with the magic wand, paste paper 14,
invert, delete.
Cope of raster 7 new layer, fill with white.
Click on the black frames, fill with a color of choice.

Resize 8 to 50%, paste on the bottom layer on the left, duplicate, mirror.
Resize 96 to 55%, paste at the bottom being on the top layer.
Resize the tube to 45%, paste on the right.
Resize 90 to 30%, paste at the bottom right above the tube.
Resize 23 to 30%, paste at the bottom below the tube.
Resize 24 to 20%, paste at the bottom above the purse.
Resize 44 to 25%, paste on the bottom above the coconut, duplicate, mirror.

Resize 40 to 40%, paste at the bottom.
Resize 7 to 30%, paste at the top to the left.
Paste wordart 4 at the top.
Paste 74 at the bottom above the chair, duplicate, mirror, move below the chair.
Resize 65 to 30%, free rotate to the left at 20, paste at the bottom left below the 
driftwood.
Resize 45 to 30%, paste at the bottom left below the shells, 
duplicate, mirror, adjust behind the purse.
Resize 4 to 18%, paste at the bottom right.
Resize 10 to 35%, paste at the bottom left below the sign, duplicate, mirror.
Resize 3 to 17%, paste at the bottom to the left.
Resize 60 to 25%, free rotate to the right at 20, paste on the right,
below the greenery.
Resize 61 to 20%, paste on the left above the sign.
Resize 64 to 35%, paste on the left below the greenery.

Add any other elements that you would like, make it your own.
Always readjust your mask and elements how you like them before you
 merge your tag, resize, sharpen.

Crop your tag to be sure no shadows or lines are on the edges.
 Then add your copyright and name.
That's it

Hope you enjoyed doing my tut            

Wednesday, April 22, 2026

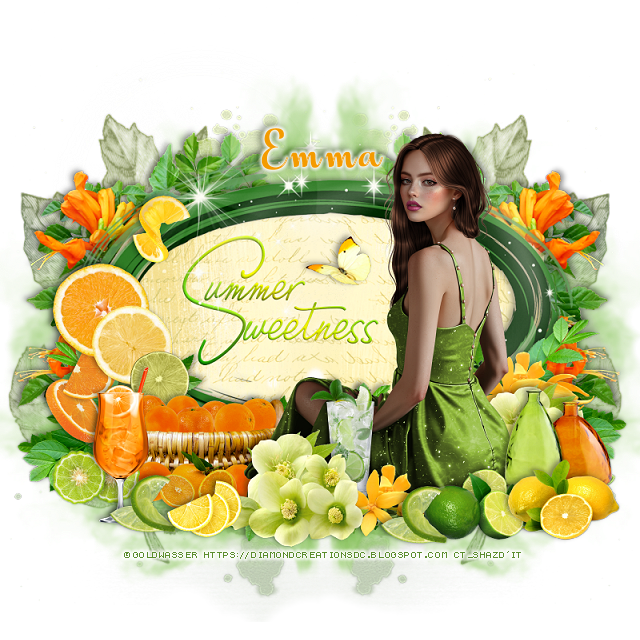
PTU Sweet Citrus


  This tut was written April 22nd, 2026 for those with a basic knowledge of psp. 

Awesome tube used ©Goldwasser 

The tube in 3 colors is included in the kit
Read the TOU on how to credit your tags

I used PSP2020...but any of them should work.
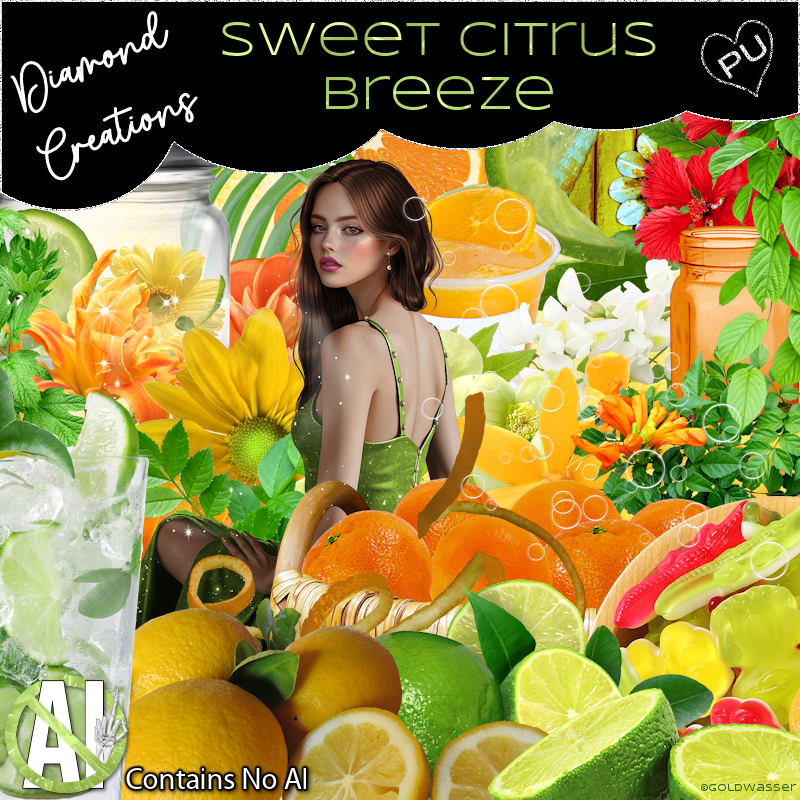
FTU Scrap Sweet Citrus Breeze "NO Al" by Diamond Creations  HERE
You can find all Diamond Creations  kits HERE

Font of choice, I used Auylars

Drop shadow as you go is V -2 H -4, 40, 10, or use what you prefer.
Let's get started
*Remember to add your drop shadow as you go along*

Open a new image 800 x 800, paste 88 on the right, duplicate, mirror.
Resize 107 to 95%, change the color to match your tag, duplicate,
change the blend mode to Multiply, merge down, paste above the leaf layers,
erase some of the edges on the sides.

Resize frame 8 to 85%, paste, click inside, paste paper 2, invert,
delete, keep selected, paste 87 to the left so the words shows, 
delete, duplicate, mirror.
Resize wordart 1 to 35%, paste in the frame, I added a white drop shadow.

Resize 50 to 65%, paste below the paper layer of the frame on
the left, duplicate, mirror.
Resize 45 to 35%, paste at the bottom of the frame, duplicate, move
to the right, duplicate, mirror.

Resize your tube to 30%, paste on the right.

Resize 103 to 90%, paste below the tube on the right.
Resize 35 to 25%, paste on the left above the greenery.
Resize 12 to 20%, paste on the left below the slices of citrus.
Resize 9 to 18%, paste on the bottom left below the tube.
Resize 36 to 20%, paste on the bottom left above the basket.
Resize 64 to 30%, paste at the bottom right below the tube, duplicate,
move above the tube.
Resize 59 to 20%, paste on the right below the flower, duplicate, 
move above the tube below the green flower.
Resize 40 to 15%, paste on the bottom below the flowers.

Resize 15 to 20%, paste on the upper left on the frame.
Resize 27 to 15%, paste at the bottom left below the drink.
Resize 17 to 15%, paste at the bottom left.
Resize 28 to 20%, paste on the bottom above the tube.
Resize 29 to 20%, paste at the bottom by the lime, duplicate, move
to the left by the drink.
Resize 73 to 25%, paste on the bottom right below the limes.
Resize 14 to 15%, paste on the bottom right.
Resize 83 to 25%, paste by the wordart in the frame.

Add any other elements that you would like, make it your own.
Always readjust your mask and elements how you like them before you
 merge your tag, resize, sharpen.

Crop your tag to be sure no shadows or lines are on the edges.
 Then add your copyright and name.
That's it

Hope you enjoyed doing my tut            
Sunday, April 12, 2026

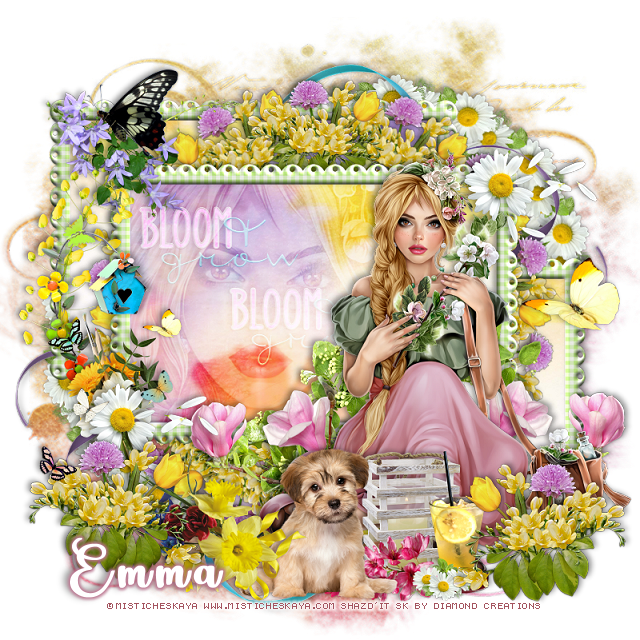
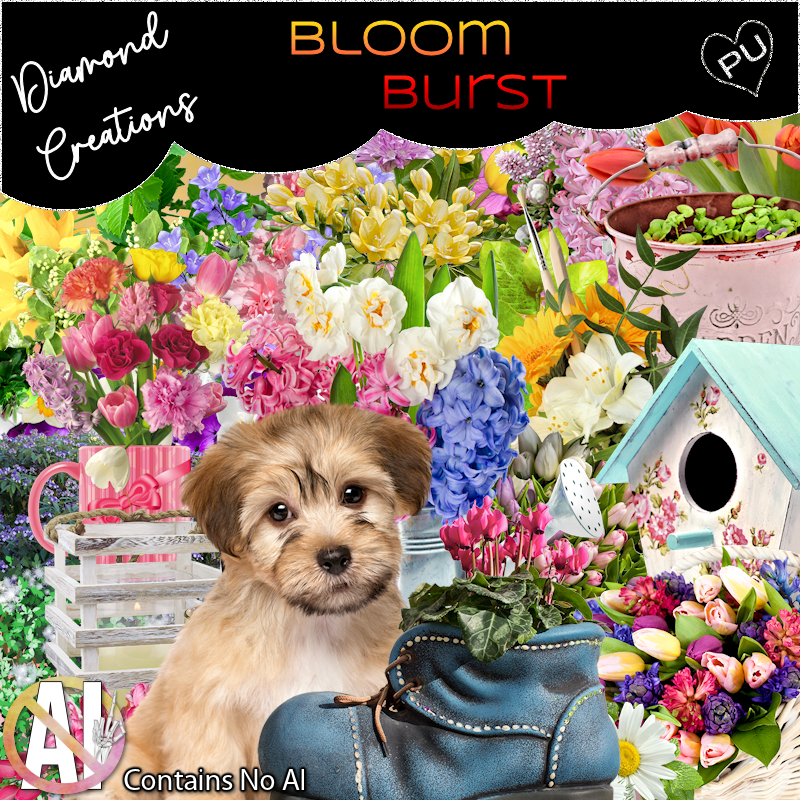
FTU Bloom Burst


 This tut was written April 12th, 2026 for those with a basic knowledge of psp. 

Awesome tube used ©Misticheskaya

The tube is called Daisy
The tube is "NOT" included
You need a license to use this tube, please do not use without a license
You can find the tube at Misticheskaya Store HERE

I used PSP2020...but any of them should work.
FTU Scrap Bloom Burst "NO Al" by Diamond Creations  HERE
You can find all Diamond Creations  kits HERE
Miz Teeques Mask 56 HERE
Check the blog out HERE
Filters
Mura Meister Copies-Encircle

Font of choice, I used Lovely Butterfly

Drop shadow as you go is V -2 H -4, 40, 10, or use what you prefer.
Let's get started
*Remember to add your drop shadow as you go along*

Open a new image 800 x 800, paste paper 7, apply your mask, adjust.

Resize frame 5 to 65%, paste in the center, click inside, paste paper 6,
move how you like, invert, delete, keep selected, paste your tube, delete,
select none. 
Change the blend mode to Soft Light.
Resize the wordart to 50%, paste on the tube, change the blend mode to Overlay.
Duplicate the frame, move to the upper left below the paper layer, duplicate,
mirror, move down on the lower right.
Duplicate the paper twice, move below the other frames.
Resize 44 to 30%, apply Mura Meister Copies-Encircle, first 3 numbers
on 14, 55, 55, paste below the top frame and paper.
Resize 42 to 28%, flip, apply Mura Meister Copies-Encircle, first 3 numbers
on 14, 50, 50, paste below the frames on the upper right, duplicate, mirror,
move down on the lower left.

Resize the tube to 30%, paste above the frames on the right.

Resize 79 to 30%, paste at the bottom above the tube.
Resize 59 to 50%, paste behind the tube.
Resize 31 to 30%, paste below the tube, duplicate, mirror, adjust on the right.
Resize 9 to 40%, paste on the left above the frames.
Resize 4 to 40%, paste on the upper left on the frame.
Resize 9 to 40%, paste at the upper right, duplicate, move down to the left 
on the corner of the frame.
Resize 47 to 25%, paste behind the daisy.
Resize 88 to 30%, mirror, paste on the left below the daisy, erase the bottom
part of the stand.
Resize 44 to 35%, paste on the bottom left above the daisy, duplicate, mirror.
Resize 41 to 30%, paste at the bottom below the flower.
Resize 93 to 22%, paste at the bottom below the flower.
Resize 72 to 30%, paste on the lower left.
Resize 68 to 30%, paste on the right.
Resize 97 to 75%, paste at the upper right above the daisy circle, duplicate,
mirror, flip, adjust at the bottom left.

Add any other elements that you would like, make it your own.
Always readjust your mask and elements how you like them before you
 merge your tag, resize, sharpen.

Crop your tag to be sure no shadows or lines are on the edges.
 Then add your copyright and name.
That's it

Hope you enjoyed doing my tut