Showing posts with label Irish Princess Designs. Show all posts

Thursday, January 23, 2020

PTU Amore


This tut was written Jan 23rd, 2020 for those with a basic knowledge of psp.
I am using the awesome artwork of  Fiodorava_Maria
The tube is  "Bride
You need a license to use this tube, do not use without a license.
You can find this art at VMArtists Store  HERE

I used PSPX...but any of them should work.
PTU Amore by Irish Princess Designs HERE or HERE or HERE
DD_SM_8 HERE
Check out the rest of the blog HERE

Font of choice,  I used Hai Butterfly

Drop shadow is usually V-2 H-2 Black, 50, 5, use what you prefer.
Let's get started
*Remember to add your drop shadow as you go along*

Open a new layer 800 x 800
Resize paper 20 to 80%, paste, apply your mask, delete, merge group,
duplicate, move down.

Resize element 7 to 75%, paste to the left.
Resize frame 4 to 75%, paste to the right, click inside with your magic wand,
expand by 5, resize paper 18 to 75%, paste, invert, delete, keep selected.
Resize your tube to 35%, paste inside the frame to the right more, delete,
select none. Change the blend mode to Overlay or one you prefer.

Mirror the tube and move above the frame to the left.
Draw a line across the tube at the bottom even with the window that
is to the left, delete the bottom part of the tube.

Paste element 50 above the mask and move to the top, take your 
Pick tool and stretch it out to the bottom, duplicate, merge down.

Resize element 39 to 30%, paste at the bottom above the tube on 
the left, duplicate, mirror.
Resize element 98 to 35%, paste on the window frame on the upper left,
duplicate, move to the lower right, below the flower.

Resize element 85 to 40%, paste on the frame on the right, duplicate,
mirror, move behind the tube.
Resize element 42 to 40%, paste on the right below the top flower.
Resize element 135 to 40%, paste on the left below the top flower.
Resize element 37 to 25%, paste at the bottom being on the top layer,
duplicate, mirror.
Resize element 10 to 20%, paste at the lower left, duplicate, mirror, 
duplicate, move to the center.

Resize element 8 to 30%, paste at the bottom below the top center flower, 
duplicate, mirror.
Resize element 158 to 25%, paste on the left between the flowers, duplicate,
mirror, move up between the flowers.

Resize element 159 to 15%, free rotate to the left at 15 degrees, paste above the 
tube on the left down in the flowers a little.
Resize element 157 to 30%, paste above the card.

Resize element 4 to 20%, paste at the bottom below the center flower.
Resize element 25 to 10%, paste at the bottom below the flower.
Resize element 26 to 15%, paste at the bottom being on the top layer.
Resize element 1 to 10%, paste at the bottom by the glass.
Resize element 6 to 10%, paste at the bottom below the lock.

Resize element 41 to 80%, paste below the window layer
and move to the top so the tip of the tower shows.

Resize element 49 to 25%, paste at the lower right below the flowers.
Resize element 53 to 10%, free rotate to the left at 15 degrees, paste
on the book.
Resize element 36 to 25%, mirror, paste above the tube behind the flowers
how you like.
Resize element 48 to 10%, paste on the cage.
Resize element 67 to 25%, paste above the flowers where you like, 
duplicate, mirror, move to the upper right.
Resize element 105 to 25%, paste above the book on the right.
Resize element 120 to 15%, paste at the bottom above the heart.
Being on the top layer paste element 74 how you like.

Add any other elements that you like, make your own.
Adjust all the elements before merging your tag.

Once happy, close off any background you had.
 Crop your tag to get rid of any stray edges, merge visible.
Resize, sharpen, add your Copyright and name.

That's it
Hope you enjoyed doing my tut.

Friday, January 17, 2020

PTU The Sweetest Day


This tut was written Jan 17th, 2020 for those with a basic knowledge of psp.
I am using the awesome artwork of  Laguna
The tube is  "Teddy Bear with Heart Shape Cushion
You need a license to use this tube, do not use without a license.
You can find this art at PFD Store  HERE

I used PSPX...but any of them should work.
PTU Sweetest Day by Irish Princess Designs HERE or HERE or HERE
WSL Mask 105 HERE

Font of choice,  I used Yessy font

Drop shadow is usually V-2 H-2 Black, 50, 5, use what you prefer.
Let's get started
*Remember to add your drop shadow as you go along*

Open a new layer 800 x 800
Resize paper 2 to 83%, paste, apply your mask, delete, merge group.

Resize element 34 to 65%, paste, click inside with your magic wand,
expand by 5, paste paper 19, invert, delete.
Resize element 60 to 75%, paste below the paper layer of the frame.

Resize your tube to 32%, paste on the frame.

Resize element 63 to 40%, paste on the right below the tube.
Resize element 5 to 35%, paste on the upper left below the tube.
Resize element 62 to 40%, paste at the lower left above the tube.
Resize element 78 to 25%, paste at the lower right above the tube.
Resize element 2 to 20%, paste at the bottom to the right.

Resize element 67 to 25%, paste at the bottom above the calendar.
Resize element 28 to 20%, paste at the lower right.
Resize element 51 to 15%, paste at the lower right, duplicate, resize to 
75%, move over a little.

Resize element 20 to 15%, paste on the left above the wordart.
Resize element 86 to 15%, paste at the lower right.
Resize element 27 to 15%, paste at the bottom above the phone.
Resize element 21 to 15%, paste on top of the calendar.

Resize element 80 to 25%, paste at the lower left on the love wordart.
Resize element 136 to 20%, paste at the bottom above the wordart to the left
of the other jar.
Resize element 61 to 20%, paste on the left above the frame.
Resize element 41 to 10%, paste at the bottom to the left of the jars.
Resize element 43 to 10%, paste at the lower right.

Resize element 131 to 5%, paste on the left by the leaves, duplicate, move down 
a little, duplicate, free rotate to the left at 90 degrees, paste at 
the lower left below the jar layers.

Resize element 125 to 25%, paste at the upper left, add a fat white
gradient glow.
Paste element 163 being on the top layer how you like.

Add any other elements that you like, make your own.
Adjust all the elements before merging your tag.

Once happy, close off any background you had.
 Crop your tag to get rid of any stray edges, merge visible.
Resize, sharpen, add your Copyright and name.

That's it
Hope you enjoyed doing my tut.

Wednesday, January 15, 2020

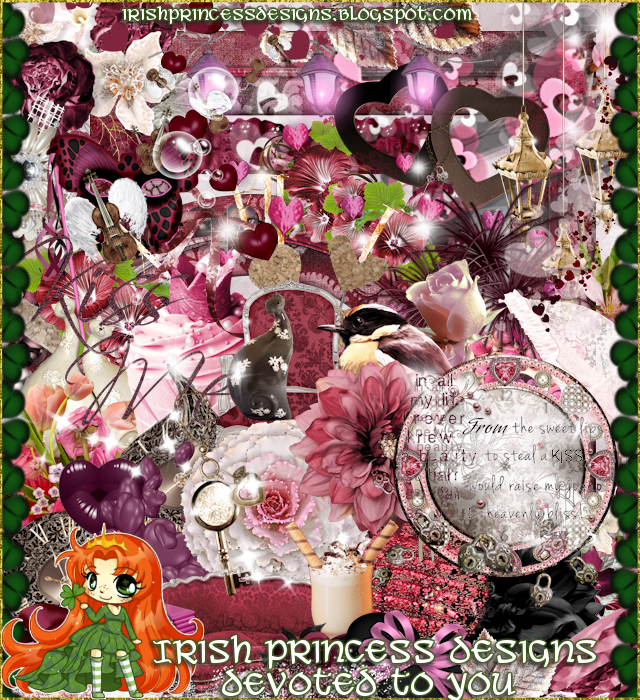
PTU Devoted To You


This tut was written Jan 15th, 2020 for those with a basic knowledge of psp.
I am using the awesome artwork of  Zindy Nielsen
The tube is  "Amethyst
You need a license to use this tube, do not use without a license.
You find this tube at Zindy's Store  HERE

I used PSPX...but any of them should work.
I paired it with a PTU kit Devoted To You by Irish Princess Designs  
   HERE 
Mask of choice, I used WSL_Mask 170  HERE

Font of choice,  I used Pictorial Signature

Drop shadow is usually V-2 H-2 Black, 50, 5, use what you prefer.
Let's get started
*Remember to add your drop shadow as you go along*

Open a new layer 800 x 800
Resize paper 13 to 82%, apply your mask, delete, merge group.

Resize element 82 to 75%, mirror, paste, click inside with your 
magic wand, expand by 5, paste your close up, paste, invert, delete, 
paste paper 16 below the tube, delete, select none.
Change the blend mode of the tube to Overlay.
Click on the frame where you like to add a little noise at about 50%.

Duplicate the frame, move below the paper layer and to the left and 
down more, click inside with the magic wand, paste the same paper as in
the top frame, delete, select none.

Paste your tube on the right above the frame.

Paste element 83 on the mask layer and move up to the left more.
Resize element 20 to 85%, free rotate to the left at 50 degrees, move below 
the paper layer of the frame behind the tube on the right.
Resize element 12 to 50%, paste on the left on the frame.

Resize element 59 to 35%, paste behind the tube on the right, duplicate, move
to the left.
Resize element 40 to 45%, paste at the lower left above the tube.
Resize element 48 to 35%, paste at the lower left above the heart box.

Resize element 73 to 40%, paste at the lower left above the heart box,
duplicate, free rotate to the left at 40 degrees, move to the right above the tube.
Resize element 95 to 40%, paste at the bottom being on the top layer.

Resize element 13 to 50%, paste on the left below the flower on the frame.
Resize element 19 to 20%, paste at the lower right being on the top layer,
duplicate, move over a little.

Paste element 57 at the bottom below the tube layer.
Resize element 65 to 15%, paste at the bottom being on the top layer.
Resize element 14 to 15%, mirror, paste on the box on the left.
Resize element 54 to 15%, paste on the coffee cup.

Resize element 62 to 15%, paste at the lower left.
Resize element 86 to 20%, free rotate to the left at 90 degrees, paste at 
the bottom by the cup.
Resize element 99 to 75%, paste on the right on the mask layer behind
the tube.
Resize element 90 to 35%, paste below the tube layer to the left,
add a fat white gradient glow.

Add any other elements that you like, make your own.
Remember to always adjust all the elements how you like on your tag,
then resize your mask if needed before merging your tag.

Once happy, close off any background you had.
 Crop your tag to get rid of any stray edges, merge visible.
Resize, sharpen, add your Copyright and name.

That's it
Hope you enjoyed doing my tut.

Wednesday, December 4, 2019

PTU Dear Santa


This tut was written Dec 4th, 2019 for those with a basic knowledge of psp.
I am using the awesome artwork of  Laguna
The tube is  "Christmas Elf and Snowman
You need a license to use this tube, do not use without a license.
You find this tube at PFD Store  HERE

I used PSPX...but any of them should work.
PTU kit Dear Santa by Irish Princess Designs  HERE  HERE or HERE 
WSL_Mask 522  HERE

Font of choice,  I used DK Southside Fizz

Drop shadow is usually V-2 H-2 Black, 50, 5, use what you prefer.
Let's get started
*Remember to add your drop shadow as you go along*

Open a new layer 800 x 800
Add a new layer, paste paper 19, into selection, apply your mask, delete,
 merge group.
Add a new raster layer, select all, paste paper 8 into selection, apply 
the same mask, delete, merge group, then merge down.

Resize element 122 to 60%, paste a little to the right.
Resize element 120 to 70%, paste on the left above the fireplace.
Resize element 9 to 25%, paste on the tree, duplicate, move down.
Select the tree, float, defloat, paste element 15 on the tree, move how
you like, invert, delete.

Resize your tube to 20%, paste on the left above the tree.

Resize element 142 to 35%, paste at the bottom above the tube.
Resize element 118 to 15%, paste on the sled.
Resize element 115 to 40%, mirror, paste on the left above the tree.
Resize element 8 to 15%, paste at the bottom above the sled layer.

Resize element 75 to 13%, paste on the left by the gifts and snowman.
Resize element 76 to 15%, paste by the glass of milk.
Resize element 96 to 20%, paste on the lower left below the drink and cookies.
Resize element 104 to 20%, paste at the bottom above the sled.
Resize element 116 to 15%, paste at the bottom to the right below the sled.

Resize element 35 to 40%, paste on the left above the tree.
Resize element 36 to 45%, paste on the fireplace.
Resize element 159 to 23%, paste on the fireplace on the right.
Resize element 158 to 25%, paste at the top above the fireplace.
Resize element 12 to 25%, paste at the lower right below above the sign.

Resize element 1 to 18%, paste at the lower right.
Resize element 23 and 24 to 5%, paste at the bottom by the sled,
duplicate both, move to the left more.
Resize element 33 to 25%, paste at the lower right below the shoes.
Resize element 47 to 50%, paste at the upper right on the mask layer,
duplicate, mirror.
Resize element 154 to 15%, paste at the bottom below the shoes.

Add any other elements that you like, make your own.
Remember to always adjust all the elements how you like on your tag,
then resize your mask if needed before merging your tag.

Once happy, close off any background you had.
 Crop your tag to get rid of any stray edges, merge visible.
Resize, sharpen, add your Copyright and name.

That's it
Hope you enjoyed doing my tut.