Showing posts with label Chris Pastel. Show all posts

Saturday, September 16, 2023

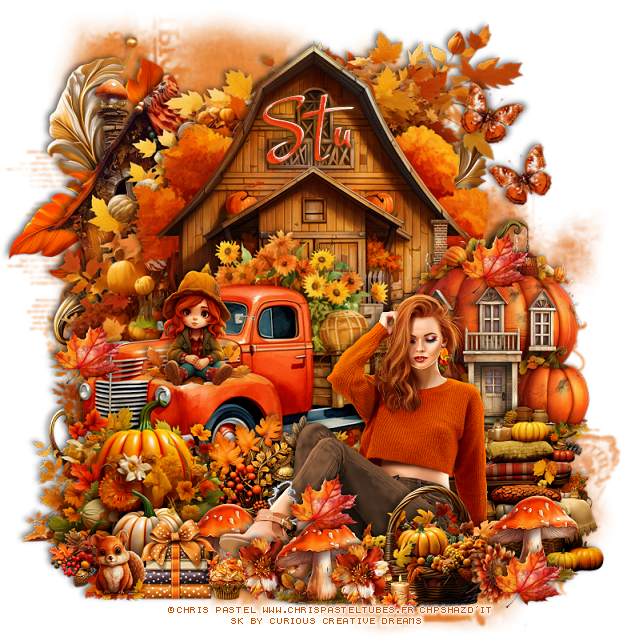
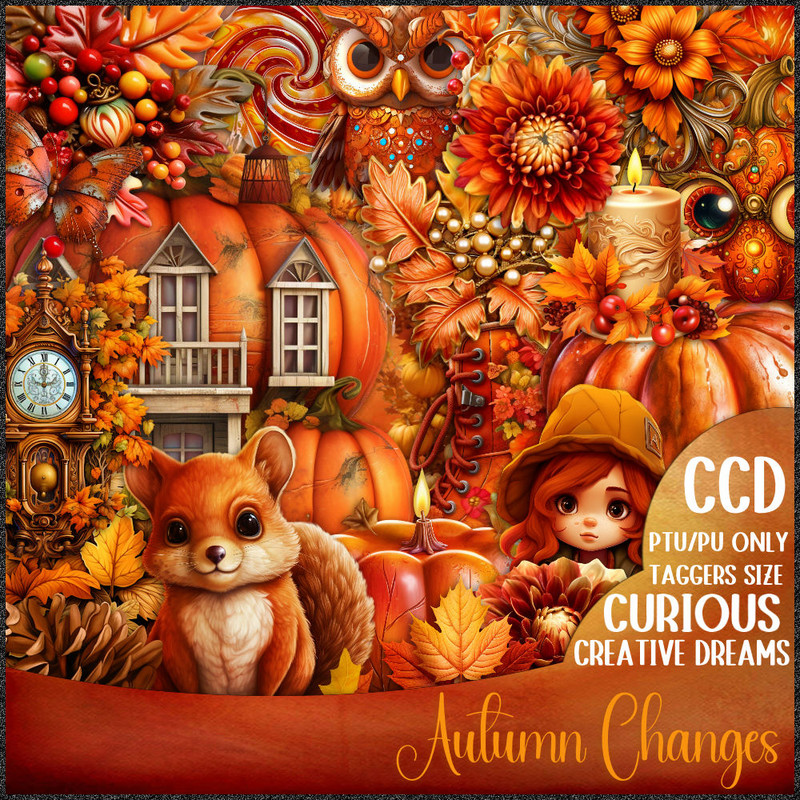
PTU Autumn Changes


This tut was written  September 16th, 2023 for those with a basic knowledge of psp. 

I am using the awesome tube by © Chris Pastel

The tube is called AUTUMNIA2
You need a license to use this tube, please do not use without a license.
You can find the tube at Chris Pastel Store HERE

I used PSP2020...but any of them should work.
PTU Scrap Autumn Changes  by Curious Creative Dreams  HERE
"Tube is NOT included"
You can find all Curious Creative Dreams kits HERE
Mask of choice, I used Vivienne's Digital Tagging Mask 12 HERE
Check out the rest of the blog HERE

 Font of choice, I used StarmiX

Drop shadow as you go is V -2 H -4, 50, 10, or use what you prefer.
Let's get started
*Remember to add your drop shadow as you go along*

Open a new image 800 x 800, paste paper 7, apply your mask.

Paste element 54 to the left a bit.
Resize element 26 to 40%, paste on the upper left behind the ladder element.
Resize element 34 to 60%, paste at the top.
Resize element 20 to 30%, paste on the right.
Resize element 52 to 75%, mirror, paste on the left.
Resize element 44 to 35%, paste at the bottom left.

Resize your tube to 25%, mirror, paste at the bottom.

Resize element 40 to 25%, paste behind the tube.
Resize element 37 to 30%, paste behind the tube on the right.
Resize element 42 to 25%, paste at the bottom above the tube.
Resize element 5 to 15%, paste behind the shoes of the tube, duplicate, move
above the tube, duplicate again, move to the right.

Resize element 4 and 11 to 10%, paste at the bottom left.
Resize element 73 to 10%, paste at the bottom above the basket, duplicate,
move over below the mushroom.
Resize element 69 to 8%, free rotate to the right at 45, paste at the bottom right
above the basket.
Resize element 13 to 10%, free rotate to the left at 25, paste at the upper right,
duplicate, mirror, move back to the right.
Resize element 3 to 15%, paste on the fender of the truck.
Resize element 48 to 20%, paste at the bottom left below the squirrel.
Resize element 28 to 10%, paste at the bottom.
Resize element 92 to 10%, duplicate 2 or 3 times and move around how you like.
Paste element 30 on the mask layer at the top, mirror.
Resize element 49 to 10%, paste at the bottom above the basket.

Add any other elements that you would like, make it your own.
Always readjust your mask and elements how you like them before you
 merge your tag, resize, sharpen.

Crop your tag to be sure no shadows or lines are on the edges.
 Then add your copyright and name.
That's it

Hope you enjoyed doing my tut.   


Wednesday, August 9, 2023

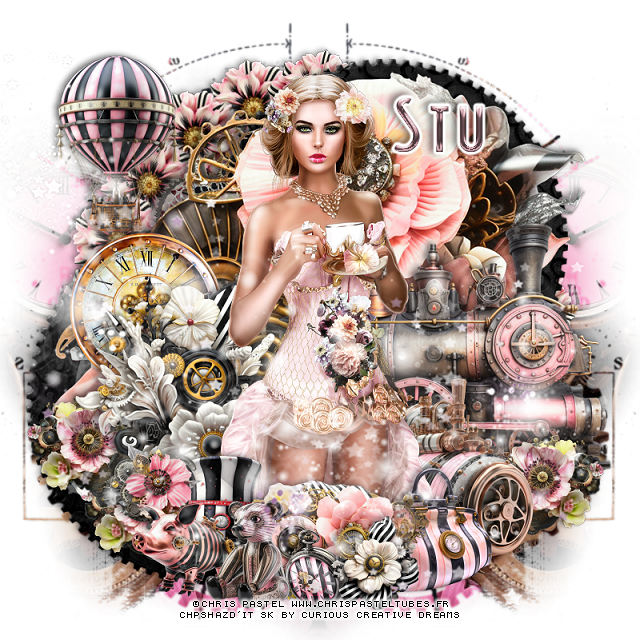
PTU Delicate Steam


This tut was written  August 9th, 2023 for those with a basic knowledge of psp. 

I am using the awesome tube by ©Verymany

The tube is called Steampunk 13
You need a license to use this tube, please do not use without a license.
You can find the tube at Chris Pastel store HERE

I used PSP2020...but any of them should work.
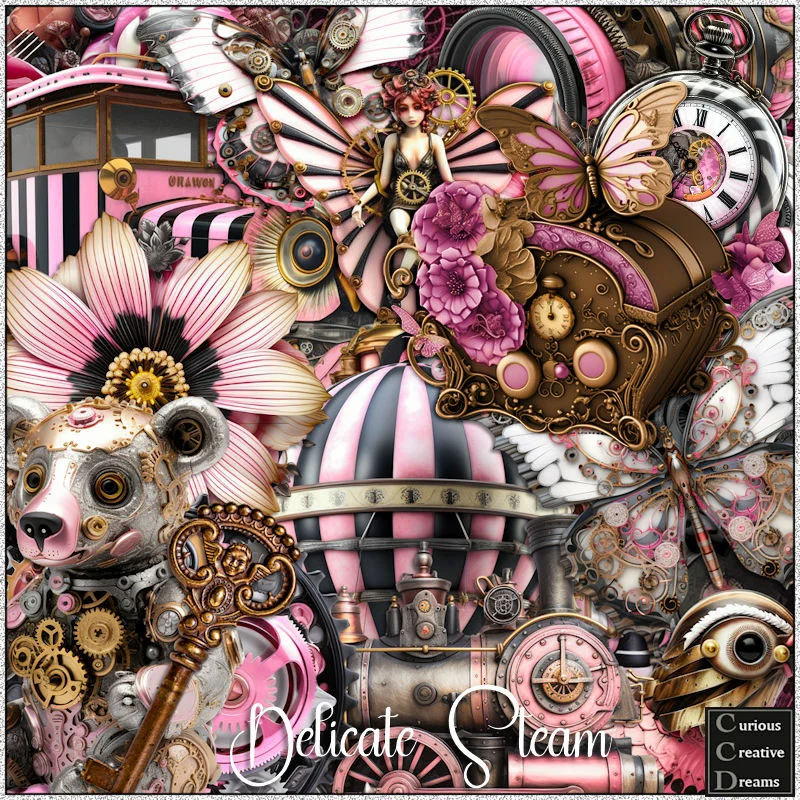
PTU Scrap Delicate Steam  by Curious Creative Dreams  HERE
"Tube is NOT included"
You can find all Curious Creative Dreams kits HERE
 Mask of choice, I used Vivienne's Digital Tagging Mask 6 HERE
Check out the rest of the blog HERE
Filter
Mura Meister Copies-Encircle

 Font of choice, I used Grenadier NF 

Drop shadow as you go is V -2 H -4, 50, 10, or use what you prefer.
Let's get started
*Remember to add your drop shadow as you go along*

Open a new image 800 x 800, paste paper 15, apply your mask, delete, 
duplicate, mirror, merge.
Resize element 65 to 17%, apply Mura Meister Copies-Encircle, first 
3 numbers on 20, 65, 65, paste.

Resize frame 6 to 70%, paste at the upper right, click inside with the magic wand,
expand, paste paper 6, invert, delete, merge the frame and paper together,
duplicate, move down on the left.

Resize your tube to 40%, paste above the frames.

Paste element 35 behind the tube and up a bit.
Resize element 123 to 40%, paste behind the tube on the left.
Resize element 96 to 30%, paste on the left below the flower.
Resize element 24 to 60%, paste behind the tube on the right.
Resize element 23 to 40%, paste behind the tube on the right.
Resize element 14 to 35%, paste at the bottom above the tube.

Resize element 10 to 20%, paste at the lower right above the train, duplicate, mirror,
duplicate, move down a little.
Resize element 1 to 25%, paste at the bottom right below the flower.

Resize element 125 to 20%, paste at the bottom by the purse.
Resize element 124 to 20%, paste at the bottom left behind the tube.
Resize element 41 to 20%, paste on the left above the hat.
Resize element 29 to 15%, paste at the bottom below the flower.
Resize element 21 to 20%, mirror, paste at the lower left.
Resize element 3 to 20%, paste at the lower left.
Resize element 2 to 30%, paste at the upper left.
Paste element 86 at the bottom being on the top layer.

Add any other elements that you would like, make it your own.
Always readjust your mask and elements how you like them before you
 merge your tag, resize, sharpen.

Crop your tag to be sure no shadows or lines are on the edges.
 Then add your copyright and name.
That's it

Hope you enjoyed doing my tut.   
Wednesday, February 1, 2023

FTU Memories


 This tut was written February 1st, 2023 for those with a basic knowledge of psp. 

I am using the awesome artwork of ©Chris Pastel
Tube is Kim
You need a license to use this tube, do not use without a license.
You can find this tube at her Store HERE

I used PSP2020...but any of them should work.
FTU Potpourri by Charlottes Web  HERE  
Check out the rest of the blog HERE
Mask of Choice, I used Miz Teeques Mask 354 HERE
Check out the rest of the blog HERE

Font of choice, I used Boutique Free

Drop shadow is V -1 H -4, 40, 10, Black or use what you prefer.
Let's get started
*Remember to add your drop shadow as you go along*

Open a new image 800 x 800, select all, add a new layer, paste paper 1
into selection, apply your mask.

Resize element 17 to 85%, paste, erase the tag part hanging at the bottom.
Take your free hand tool, draw around the post card frame,
paste paper 6, invert, delete, move below the post card, keep selected,
mirror your tube, paste, delete, select none.
Duplicate the tube, go to Adjust, Blur, Gaussian blur, number on 5, 
change the blend mode to Darken or one you prefer.

Resize element 16 to 70%, paste at the upper left below the paper layer, duplicate,
mirror, move down to the lower right.
Paste paper 6 in both those frames, keep selected and paste your tube, 
mirror one of them.
Duplicate the tube and do the same as with the other tube.
Watch for shadows on the edges to erase.

Resize your tube to 45%, mirror, paste at the bottom left.
Paste element 13 below the tube to the right.

Resize element 14 to 75%, paste on the upper right above the past, duplicate,
Blur, Gaussian blur, number on 5, change the blend mode to Darken, merge down.
Resize element 15 to 50%, free rotate to the left at 25, paste behind the tube on 
the left. 
Write something on it if you like before you rotate and merge them together.
Resize element 7 to 85%, paste on the left behind the tube, duplicate, mirror,
resize to 75%, move down on the right, erase some of the strings over the wordart.

Resize element 5 to 50%, paste below the tube, erase the strings below.
Paste element 21 on the mask layer to the right, duplicate, move to the left and up.
Resize element 1 to 60%, paste above the tube where you like.

Add any other elements you would like, make it your own.
Crop your tag to be sure no shadows or lines are on the edges.
 Then add your copyright and name.
That's it

Hope you enjoyed doing my tut.     
Friday, July 23, 2021

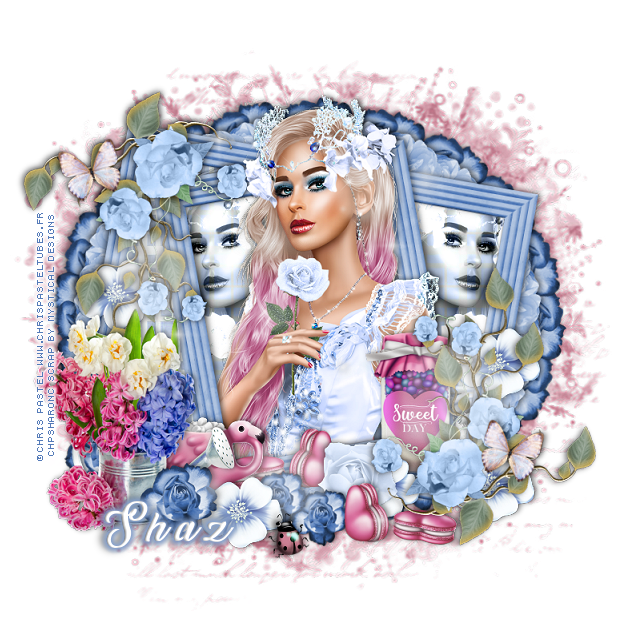
FTU Sweet Day


 This tut was written July 23rd, 2021 for those with a basic knowledge of psp.

I am using the awesome artwork of  Chris Pastel
The tube is called "Snow Queen 3" 
You need a license to use this tube, do not use without a license.
You can find this tube at her store  HERE

I used PSPX6...but any of them should work.
FTU kit  Sweet July SYHO July 21 by Mythical Designs HERE
Check out the rest of the blog HERE
DD Mask NFM_2020_1 HERE
Check out to e rest of the blog HERE
Filters
Mura Meister Copies-Encircle
xero-Bad Dream

Font of choice,  I used  Sunrise Place

Drop shadow is  V -1 H 3, 50, 10, or use what you prefer.
Let's get started
*Remember to add your drop shadow as you go along*

Open a new image 800 x 800 or a size you prefer, can always resize later.
Select all, new layer, paste paper 1, apply your mask, delete, merge group.

Resize Frame 1 to 50%, paste, duplicate one more times, free rotate the bottom one
 to the right 
at 10 degrees, move to the right, duplicate, move to the left.
On the top one free rotate to the left at 10 degrees.
Move the two bottoms ones how you like, erase the frame parts showing in the 
top frame.
Take your free hand tool, draw around all the frames, paste paper 3, invert, 
delete, select none.
Resize element 12 to 25%, apply Mura Meister Copies-Encircle, first number 
on 20, next number on 65, and the next one on 53, move below the paper layer of 
the frames.
Resize element 11 to 20%, apply Mura Meister Copies-Encircles with
the first 3 number at 26, 62, 52, move above the dark flower circle.

Resize element 13 to 50%, paste on the frame on the upper left, duplicate, mirror, 
flip, move to the lower right on the frame.

Resize your tube to 60%, paste below the center frame, duplicate, move above the 
frame, erase the parts you don't want showing.
Duplicate your tube, move below the frame behind the top tube, duplicate, mirror,
move in the right frame, change the blend mode on both to Luminance(L).
Apply the xero filter, Bad Dream to those two tubes.

Resize element 2 to 35%, paste below the flowers on the right.
Resize element 4 to 40%, paste on the left being on the top layer.

Resize element 12 to 20%, paste at the lower left above the watering can.
Resize element 1 to 20%, paste at the lower right below the flower vine.
Resize element 16 to 20%, paste at the bottom below the dark flower, duplicate, 
move to the right below the pink hearts, duplicate a couple more times, move below 
the flower vines where you like.

Resize element 3 to 20%, paste below the watering can.
Resize element 29 to 20%, paste below the pink hearts at the bottom.
Duplicate the hearts, mirror, move to the left of the white flower and below it.
Go back to the dark blue flower, duplicate, resize it to 75%, move to the right below
the top pink hearts, duplicate again, move over to the left a little.
Paste element 23 on the top layer how you like.
Resize element 17 to 10%, paste at the bottom on the flowers.
Resize element 26 to 15%, free rotate to the left at 15 degrees, paste at the upper
left, duplicate, mirror, move down on the right.

Add any other elements that you would like, make it your own.
Always readjust your mask and elements how you like them before you
 merge your tag, resize, sharpen.

 Then add your copyright and name.
That's it

Hope you enjoyed doing my tut.  

Tag for Mystical


Tuesday, August 20, 2019

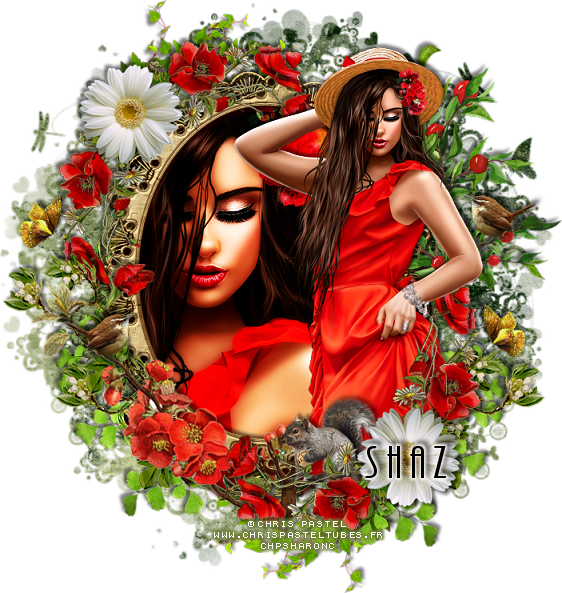
FTU Red Mystery Beauty-3 Piece Set


This tut was written August 20th, 2019 for those with a basic knowledge of psp.
I am using the awesome artwork of  Chris Pastel
The tube is called "Gypsie 2" 
You need a license to use this tube, do not use without a license.
You can find this tube at their store  HERE

I used PSPX...but any of them should work.
FTU kit Mystery of the Woods by With a Russian Heart Design
There are 2 parts to download  HERE and HERE
Check out the rest of the blog HERE
DD_Mask V7 HERE
Check out the rest of the blog HERE
Filter
AAA Frames-Foto Frame

Font of choice,  I used AR Bonnie

Drop shadow is usually V-2 H-2 Black, 50, 5, use what you prefer.
Let's get started
*Remember to add your drop shadow as you go along*

Open a new image 800 x 800 or a size you prefer.
Resize paper 9 to 20%, paste, apply your mask, delete, merge group.

Resize frame 2 to 25%, paste, click inside with your magic wand,
expand by 10, resize paper 1 to 22%, paste, invert, delete, keep selected.
Paste your tube and move to the left how you like, delete, select none.

Duplicate the tube, go to Adjust, Blur, Gaussian blur, number on 4,
change the blend mode to one you like, I used Hard Light, merge down.
Resize frame 3 to 27%, paste on the other frame.

Resize your tube to 40%, paste on the right on the frame.

Resize element 10 to 25%, paste on the frame at the upper left, duplicate, 
mirror, flip, move to the lower right above the tube.
Duplicate the tube, move above the flowers, erase the part over the flowers.
Resize element 11 to 25%, mirror, paste at the lower left above the tube layer,
erase some of the brown wood part.

Resize element 8 to 25%, paste on the right behind the tube.
Resize element 23 to 8%, paste on the right below the tube layer on the plant,
erase the wood part under the bird, duplicate, mirror, move down on the left.

Resize element 14 to 15%, mirror, paste on the left below the branch the 
bird is on, duplicate, move up more, duplicate, mirror.
Resize element 18 to 20%, paste at the lower right below the tube, duplicate,
mirror, move below the paper layer of the frame.

Resize element 19 to 20%, paste at the bottom below the paper layer of the frame,
duplicate, mirror, flip, adjust at the upper left.
Resize element 26 to 5%, mirror, paste on the left, duplicate, mirror.
Resize element 27 to 10%, mirror, paste at the lower right above the tube layer.

Do not merge yet if you would like to do a
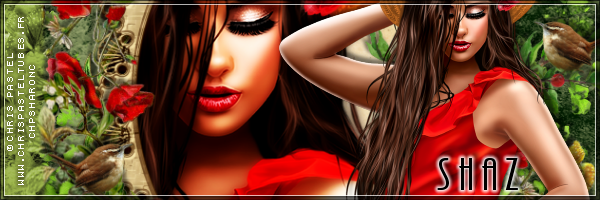
Signature tag
Open a new image, 600 x 200
Resize paper 9 to 20%, paste.
Close off your tube on the tag and the bird on the right, copy merged, paste,
resize to 95%.
Go back and open the tube, copy and paste and move how you like,
Open the bird and past on the right below the tube.
Go back and copy one of the light green leaves that is at the bottom left and
right, paste one below the tag on to left, duplicate, mirror.
You might want to close off the tag to arrange them better, then reopen it.
Once happy, merge and add a frame of choice.
I used AAA Frames-Foto Frame, width on 3, Matt2 1, opacity on 70.

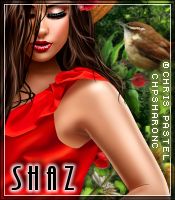
Avator, size of choice
I did mine 175 x 200
Copy merged your signature tag, adjust how you like.
Add the same frame as before.

Add any other elements that you would like, make it your own.
Always readjust your mask and elements how you like them before you merge your tag.

Once happy with your tag, close off any background used, 
crop your tag to make sure no shadows or anything on the edges, merge visible.
Resize your tag first, then add your copyright and name.

That's it
Hope you enjoyed doing my tut.

Wednesday, August 9, 2017

PTU Autumn Love


This tut was written August 9th, 2017 for those with a basic knowledge of psp.
I am using the awesome artwork of  Chris Pastel
Tube is called "Cowgirl 2"
You need a license to use this art work. Please do not use without a license.
 You can find this art at Chris Pastel store  HERE

Supplies Needed
I used PSPX...but any of them should work.
PTU Autumn Blessings by Purple Dreams Scraps HERE
Check out her blog HERE
Template 789 by Millie's PSP Madness  HERE
Check out the rest of the blog HERE
Angie Tagged Me Mask 19 HERE
Check out the rest of the blog HERE

Font of Choice, I used Frosting for Breakfast

Drop shadow is usually V-2 H-2 Black, 50, 5, use what you prefer.
Let's get started
*Remember to add your drop shadow as you go along*


Open the template, hold the shift key and hit the letter d to duplicate,
close the original, delete the credits.
Go to Image, Canvas size, 800 x 800
Paste paper 7, apply your mask, delete, merge group, move to just above the
white background layer.

Select layer 1, float, defloat, paste paper 1, invert, delete, select none.
Delete the template layer also.
Go to Effects, Inner Bevel with these settings
Bevel Shape 2, Width 2
18, 2, 9, 10
50, 50, 30
Color White
Layer 2, paste paper 3, keep selected, paste your close up tube, delete,
select none.
Duplicate your tube, go to Adjust, Blur, Gaussian Blur, number on 4,
Change the blend mode to Screen, merge down, then merge down with the
last layer and apply the same bevel to this as you did with layer 1.
Then apply the xero filter-Soft Vignette with these settings
Have your foreground color set to this #833119.
Elliptical, Foreground Color,
Diagonal dots
1, 1, 1, 255

Delete layer 3, unless you prefer to keep the heart.

Select layer 4, paste paper 7, invert, delete, do the same bevel as before.
Select layer 5, paste paper 11, invert, delete, same bevel again.
Select layer 6, paste paper 11, invert, delete, same bevel.

Close off the wordart for now, we will come back to that.

Resize your tube to 43%, mirror, place on the right side.

Paste element 6 on the mask layer at the upper left, duplicate, mirror, flip.
Paste element 29 behind your tube.

Resize element 46 to 45%, paste below the tube layer by her knee.
Resize element 16 to 45%, paste behind the tube on the right.
Resize element 42 to 45%, paste behind the empty barrels on the right.
Resize element 32 to 35%, paste below the bale of hay at the bottom.
Resize element 41 to 50%, place on the log to the left, duplicate, move to
the right and above the bale of hay.

Resize element 9 to 30%, paste on the right.
Resize element 11 to 35%, paste to the left of the tube more.

Resize element 37 to 25%, paste below the leaves and a little behind the bale of hay.
Resize element 17 to 20%, mirror, place by the jars at the bottom.
Paste  element 10 above the big flower on the left and move down
more, erase the stem showing below, duplicate, mirror, adjust so just a little of
the orange is showing on the right.
Resize element 14 to 50%, mirror, paste on the left below the log layer.

Open up your wordart you closed earlier, move the word Autumn to the
upper left, take your magic wand, click inside each letter, paste paper 12 or
one you prefer, select none, apply the same bevel setting to this, recolor the
template wordart underneath with this color and also the wordart love #df6835.
I moved both to the upper left area.

Add any other elements that you would like.

Once happy with your tag, close off any background you might have used.
Crop your tag to be sure no stray shadows are on the edges,  merge visible.
Resize first, add your copyright and name.

Hope you enjoyed doing my tut.