Showing posts with label Zindy Nielsen. Show all posts

Thursday, December 7, 2023

FTU There's Snow One Like You


This tut was written December 7th, 2023 for those with a basic knowledge of psp.

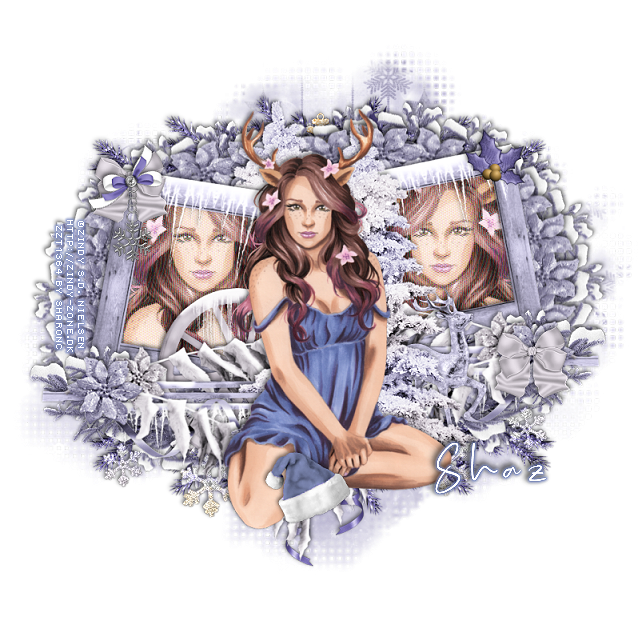
I am using the awesome artwork of ©Zindy S.D. Nielsen
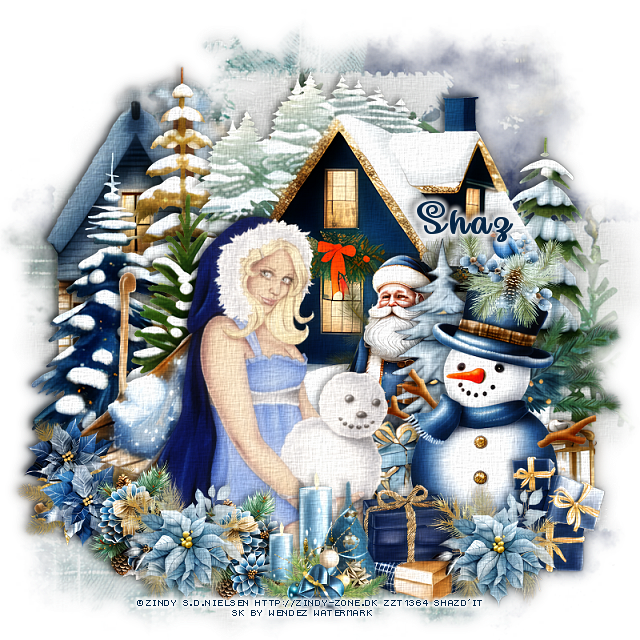
The tube is called There's Snow One Like You
You need a license to use this tube, please do not use without a license.
You can find this tube at Zindy's store HERE

I used PSP2020...but any of them should work.
FTU Scrap Blue Gold Christmas by Wendez Watermark HERE  
Check out the rest of her blog HERE
Mask of choice, I used LLM  Mask 1230  HERE
Check out the rest of the blog HERE

Font of choice I used Make Magic Happen

Drop shadow is V -2 H -4, 50, 10, Black or use what you prefer.
Let's get started
*Remember to add your drop shadow as you go along*

"This is a Quickie"
 
Open a new image, size 800 x 800, paste paper 2, apply your mask.
Paste element 38 on the left.
Paste element 5 to the right.
Resize element 12 to 85%, paste behind the trees on the left.

Resize your tube to 85%, paste at the bottom.

Resize element 11 to 65%, paste behind the tube to the left.
Resize element 29 to 50%, paste behind the tube on the right.
Resize element 105 to 60%, paste on the right below the tube layer.
Resize element 76 and 78 to 30%, paste at the bottom right above
 the snowman.
Resize element 96 to 25%, paste on the snowman's hat.

Resize element 89 to 30%, paste at the bottom above the gifts,
duplicate, move to the left by the sled.
Resize element 69 to 30%, paste on the left below the flower.
Resize element 31 to 30%, paste at the bottom above the tube.
Resize element 37 to 25%, paste between the flowers at the lower left,
duplicate, move by the candles.
Resize element 102 to 45%, paste behind the trees in front of the house.
 (Optional)
Once happy with your tag, merge visible,
duplicate, go to Adjust, Blur, Gaussian blur, number on 8,
change the blend mode to Soft Light.
On the bottom tag, go to Effects, Texture Effects, Texture with
these numbers 
I used Canvas Coarse, 60%
1, 1, 2, 0
315, 50, 30, color white, merge the two tags together.

Add any other elements you like, once happy, add your name
and copyright.
Crop your tag to be sure no stray shadows or lines or on the edges.

That's it

Hope you enjoyed doing my tut.    

Saturday, December 19, 2020

FTU Christmas is Coming


This tut was written December 19th, 2020 for those with a basic knowledge of psp.

I am using the awesome artwork of  Zindy S.D. Nielsen
The tube is called "A Warm and Fuzzy Christmas"
It is a Free gift tube.
You need a license to use this tube, do not use without a license.
You can find this tube at Zindy Nielsen store  HERE

I used PSPX...but any of them should work.
Dee is now offering this kit for free in memory of Tonya aka PinyT
She was a wonderful person and loved by many in the PSP World
She passed away Dec 3, 2020
FTU kit Tonays Gift by Deedles Dun It  HERE
Check out the rest of the blog HERE
Mask of choice, I used MizTeeques Mask 288 HERE
Check out the rest of the blog HERE
Filters
Mura Meister Copies-Encircle

Font of choice,  I used Angel Signature

Drop shadow is  V-1 H-5 Black, 35, 10, use what you prefer.
Let's get started
*Remember to add your drop shadow as you go along*

Open a new image 800 x 800 or a size you prefer.
I always fill with white and delete the white layer at the end. 

Paste paper 1, apply your mask, delete, merge group.
Resize smaller to 90%, move to one side, duplicate, mirror.

Resize frame 8b to 75%, paste, click inside with your magic wand, expand by 5,
paste paper 14, invert, delete, keep selected.
Paste the close up on the right, delete, select none. 
Change the opacity to what you like, I left mine at the 40%.

Resize your tube to 85%, paste on the left above the frame.

Paste element 61b below the paper layer of the frame on the left, duplicate,
mirror, duplicate the right one and move down to the bottom center, 
duplicate, flip, adjust at the top.

Resize element 63 to 45%, apply Mura Meister Copies-Encircle,
change the first 3 numbers to 20, 64, 46, move below the paper layer of 
the frame.
Resize element 31 to 40%, apply Mura Meister Copies-Encircle, 
change the first 3 numbers to 20, 68, 50m move to just above the mask layer.

Resize element 15 to 50%, paste on the frame on the left below the tube,
duplicate, mirror.
Duplicate twice more, move to the bottom above the mask layer.
Resize element 68 to 50%, paste above the branch on one side, duplicate, mirror.

Resize element 35 to 40%, paste behind the tube on the left.
Resize element 38c to 50%, paste at the bottom below the tube by the knee,
duplicate, mirror, adjust behind the tube.

Resize element 49 to 45%, mirror, paste below the flower on the right,
duplicate, mirror, move above the stocking on the left.

Resize element 35 to 50%, paste on the left below the leaves, duplicate, mirror.
Resize element 41a to 40%, paste on the right below some of the elements.
Resize element 62 to 40%, paste at the bottom above the tube.
Resize element 2 to 35%, paste at the bottom below the candy.

Resize element 4 to 35%, mirror, paste on the candy at the bottom.
Resize element 28 to 40%, paste below the flowers on the left, duplicate, move
to the right below the lantern.

Resize element 10 to 20%, free rotate to the left at 20 degrees, paste below the 
stocking on the left, duplicate, mirror, move back by the first one.
Resize element 5 to 40%, paste by the box, duplicate, move over a little.

Resize element 32 to 40%, paste at the upper right above the frame.
Resize element 41 to 35%, mirror, paste behind the lantern, erase any stem showing.
Resize element 16 to 25%, paste at the bottom above the box.
Resize element 48 to 75%, mirror, paste at the bottom above the box.
Resize spray 7 to 85%, flip, paste on the mask layer on one side, duplicate, 
mirror, add a lighter drop shadow.

Resize element 54 to 60%, paste on the right being on the top layer, add a 
fat white gradient glow.

Add any other elements that you would like, make it your own.
Always readjust your mask and elements how you like them before you
 merge your tag, sharpen once.
Crop your tag to make sure no shadows or anything on the edges

 Then add your copyright and name.
That's it

Hope you enjoyed doing my tut.      

Wednesday, January 15, 2020

PTU Devoted To You


This tut was written Jan 15th, 2020 for those with a basic knowledge of psp.
I am using the awesome artwork of  Zindy Nielsen
The tube is  "Amethyst
You need a license to use this tube, do not use without a license.
You find this tube at Zindy's Store  HERE

I used PSPX...but any of them should work.
I paired it with a PTU kit Devoted To You by Irish Princess Designs  
   HERE 
Mask of choice, I used WSL_Mask 170  HERE

Font of choice,  I used Pictorial Signature

Drop shadow is usually V-2 H-2 Black, 50, 5, use what you prefer.
Let's get started
*Remember to add your drop shadow as you go along*

Open a new layer 800 x 800
Resize paper 13 to 82%, apply your mask, delete, merge group.

Resize element 82 to 75%, mirror, paste, click inside with your 
magic wand, expand by 5, paste your close up, paste, invert, delete, 
paste paper 16 below the tube, delete, select none.
Change the blend mode of the tube to Overlay.
Click on the frame where you like to add a little noise at about 50%.

Duplicate the frame, move below the paper layer and to the left and 
down more, click inside with the magic wand, paste the same paper as in
the top frame, delete, select none.

Paste your tube on the right above the frame.

Paste element 83 on the mask layer and move up to the left more.
Resize element 20 to 85%, free rotate to the left at 50 degrees, move below 
the paper layer of the frame behind the tube on the right.
Resize element 12 to 50%, paste on the left on the frame.

Resize element 59 to 35%, paste behind the tube on the right, duplicate, move
to the left.
Resize element 40 to 45%, paste at the lower left above the tube.
Resize element 48 to 35%, paste at the lower left above the heart box.

Resize element 73 to 40%, paste at the lower left above the heart box,
duplicate, free rotate to the left at 40 degrees, move to the right above the tube.
Resize element 95 to 40%, paste at the bottom being on the top layer.

Resize element 13 to 50%, paste on the left below the flower on the frame.
Resize element 19 to 20%, paste at the lower right being on the top layer,
duplicate, move over a little.

Paste element 57 at the bottom below the tube layer.
Resize element 65 to 15%, paste at the bottom being on the top layer.
Resize element 14 to 15%, mirror, paste on the box on the left.
Resize element 54 to 15%, paste on the coffee cup.

Resize element 62 to 15%, paste at the lower left.
Resize element 86 to 20%, free rotate to the left at 90 degrees, paste at 
the bottom by the cup.
Resize element 99 to 75%, paste on the right on the mask layer behind
the tube.
Resize element 90 to 35%, paste below the tube layer to the left,
add a fat white gradient glow.

Add any other elements that you like, make your own.
Remember to always adjust all the elements how you like on your tag,
then resize your mask if needed before merging your tag.

Once happy, close off any background you had.
 Crop your tag to get rid of any stray edges, merge visible.
Resize, sharpen, add your Copyright and name.

That's it
Hope you enjoyed doing my tut.

Wednesday, December 4, 2019

FTU Deer Cutie


This tut was written Dec 3rd, 2019 for those with a basic knowledge of psp.
I am using the awesome artwork of  Zindy Nielsen
The tube is called "Deer Pinup"
You need a license to use this tube, do not use without a license.
You can find this tube at her store  HERE

I used PSPX...but any of them should work.
FTU kit O'Scrap Blogtrain December Train FTU, Designs by LK  HERE
Check out the rest of the blog HERE
Mask of choice, I used DD_Assorted Mask_4  HERE
Check out the rest of the blog HERE
Filters
Mura Meister Copies-Encircle
Mezzy-Interlace

Font of choice,  I used Real Kindly Bold

Drop shadow is usually V-2 H-2 Black, 50, 5, use what you prefer.
Let's get started
*Remember to add your drop shadow as you go along*

Open a new image, 800 x 800
Paste paper 7, apply your mask, delete, merge group, duplicate,
merge down.

Paste frame 2, resize to 85%, click inside with your magic wand,
expand by 5, paste paper 8, invert, delete, keep selected.
Paste your tube on one side, mirror, paste in the other frame, delete,
select none, merge tubes together.

Duplicate, go to Adjust, Blur, Gaussian blur, number on 4, change the blend
mode to Screen or one you prefer.
Apply the Mezzy filter-Interlace with these numbers
125, 50, merge down.

Paste the tree above the frame about center.
Resize your tube to 75%, paste above the tree on the left.

Resize flower 2 to 40%, apply the Mura Meister Copies-Encircle, 
first number on 20, then take your Pick tool to fit behind the frame, move 
below the paper layer of the frame, duplicate, mirror.

Resize the frosted branch to 40%, apply Mura Meister Copies, change the
first number to 18, move below the first circle, take your 
Pick tool again to fit better, duplicate, mirror.

Resize the cluster to 90%, paste on the bottom of the frame on the right,
duplicate, mirror.
Resize the frosted branch to 40%, paste on one side below the cluster, 
duplicate, mirror.

Resize deer 1 to 60%, paste on the right below the tree.
Duplicate the tree, move below the paper layer of the frames to the left.
Resize the ice wheel to 70%, paste below the cluster layer on the left behind 
the tube.

Resize the hanging snowflakes to 75%, free rotate to the left at 5 degrees,
paste at the bottom below the other elements, change the blend mode
to Luminance(L). Add noise at 50%.

Resize bow 1 to 30%, paste on the frame at the upper left, duplicate, move
to the lower right.
Resize charm 1 to 45%, paste on the top bow at the upper left.

Resize the hollyberries to 30%, mirror, paste on the frame at the upper right.
Resize Santa's hat to 30%, paste at the bottom above the tube, click 
the color part with your magic wand a few times, then change the 
color to match your tube better.
Paste wreath 1 on the bottom on the mask layer, duplicate, move to the top.

Add any other elements that you would like, make it your own.
Always readjust your mask and elements how you like them before you
 merge your tag.
Sharpen once.

Crop your tag to make sure no shadows or anything on the edges, merge visible.
 Then add your copyright and name.

That's it
Hope you enjoyed doing my tut.

Friday, February 2, 2018

PTU Wedded Bliss


This tut was written Feb 2nd, 2018 for those with a basic knowledge of psp.
I am using the awesome artwork of  Zindy  S. D. Nielsen.
Tube is called "Midnight Love"
You need a license to use this art work. Please do not use without a license.
 You can find this art at her store  HERE 

I used PSPX...but any of them should work.
PTU kit Wedded Bliss by Bits N Bobs  HERE
Check out her blog HERE
RD Mask_709 and Mask_711  HERE
Check out the rest of the blog HERE

Font of choice,  I used Libertinage

Drop shadow is usually V-2 H-2 Black, 50, 5, use what you prefer.
Let's get started
*Remember to add your drop shadow as you go along*

Open a new image 800 x 800
Paste paper 8, apply  mask 711, delete, merge group.
Paste paper 9, apply mask 709, delete, merge group, merge down, resize
to 95%.

Resize element 34 to 95%, paste, click inside with your magic wand, expand
by 5, paste paper 5, invert, delete, select none.

Paste your tube below the frame, resize to 95%, adjust how you like,
duplicate, move above the frame, erase some of the hands on the right,
erase the arm and shoulder part on the left.

Resize element 69 to 90%, paste on the right behind the tube on the frame,
duplicate, resize to 65%, move to the left and down on the frame.

Resize element 73 to 70%, paste at the lower right above the tube layer.
Resize element 72 to 70%, paste above the book on the right and to hide
some of the hand's edge.

Resize element 56 to 70%, paste at the bottom below the bottle layer, select all,
float, defloat, expand by 2, add a new layer, fill with a darker brown, move below.
Resize element  to 30%, paste on the bottle.
Paste element 68 on the mask layer at the upper left, duplicate, mirror, flip,
adjust at the lower right.
Resize element 48 to 25%, paste on the bottle at the bottom.
Paste element 77 on the mask layer, duplicate a couple of times, move how you like,
erasing the parts you don't want to show.

Add any other elements that you would like, make it your own.

Once happy with your tag, close off any background, crop your tag to make
sure there are no stray edges, merge visible, resize first.
Add your copyrights and name.

That's it
Hope you enjoyed doing my tut.