Showing posts with label FTU. Show all posts

Thursday, October 29, 2026

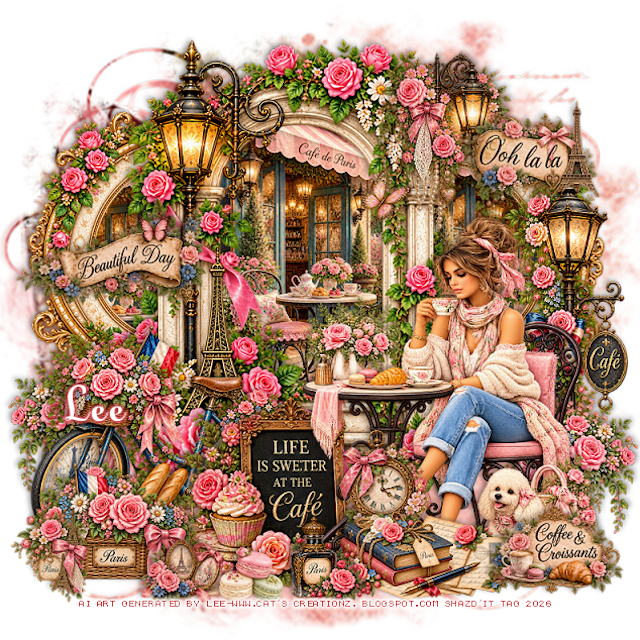
FTU A Little Cafe In Paris

   This tut was written October 29th, 2026 for those with a basic knowledge of psp. 

I am using the awesome Al kit by Cat's Creationz
Everything is included in the kit
Please read the TOU on how to credit your tags.

I used PSP2020...but any of them should work.
FTU Scrap A Little Cafe In Paris by Cat's Creationz  HERE
Check the rest of her blog HERE
Mizteeques Mask 56 HERE
Check the rest of the blog HERE

Font of choice, I used Aulyars

Drop shadow as you go is V -2 H 4, 50, 10, or use what you prefer.
Let's get started
*Remember to add your drop shadow as you go along*

Open a new image 800 x 800, resize paper 14, Dusty Rose to 65%, paste
apply your mask

Resize Stone Arch Roses Lantern to 40%, paste, click inside,
resize Paris Cafe Shopfront to 40%, paste, invert, delete.
Resize Oval Gold Roses Paris Medallion to 35%, paste on the right
below the window, duplicate, mirror.
Click inside these frames, paste the paper from the center frame into 
these frames how you like, invert, delete each one.

Resize Seated Paris Sitting Lady to 33%, mirror, paste
at the bottom right.
Resize Paris Floral 1 Rose Lantern and Eiffel Charm to 40%, mirror,
paste on the upper right above the window.
Resize Life is Sweeter sign to 65%, paste below the table on the left.
Antique books, Paris letters, resize to 13%, paste at the bottom above the tube.
Resize French Floral Light post to 25%, paste on the right below the lady.
Flower Basket Paris Bicycle, resize to 25%, paste on the bottom left below
the cafe sign.

Paris Flower basket resize to 15%, paste on the bottom left.
Resize the Eiffel Flora jug to 15%, paste below the bicycle on the left,
duplicate, mirror, adjust behind the lady.
Resize the Paris Vintage Floral Locket to 30%, paste at the bottom left.
Resize Beautiful Day to 50%, erase the lantern, paste on the left 
on the light post.
Resize Coffee and Croissants sign to 20%, paste at the bottom right.
Resize Paris Floral 2, Flora Eiffel Tower Corner to 25%, paste at 
the bottom left.
Resize Paris Perfume Rose bottle to 25%, paste at the bottom by the books.
Resize Paris Floral 3 vintage watch to 50%, paste at the bottom behind the books.
Resize Pastel Macaroons to 7%, paste at the bottom.
Resize Ooh la la sign to 40%, paste at the upper right.

Add any other elements that you would like, make it your own.
Always readjust your mask and elements how you like them before you
 merge your tag, resize, sharpen.
Crop your tag to be sure no shadows or lines are on the edges.
 Then add your copyright and name.
That's it

Hope you enjoyed doing my tut.        

Saturday, September 19, 2026

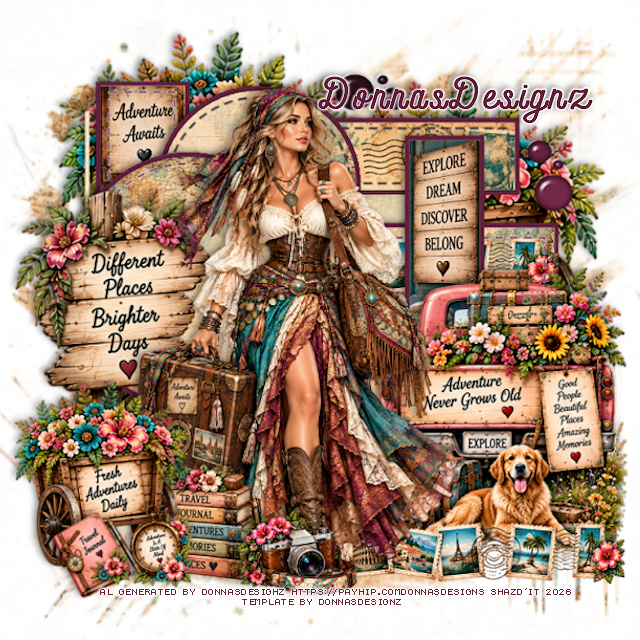
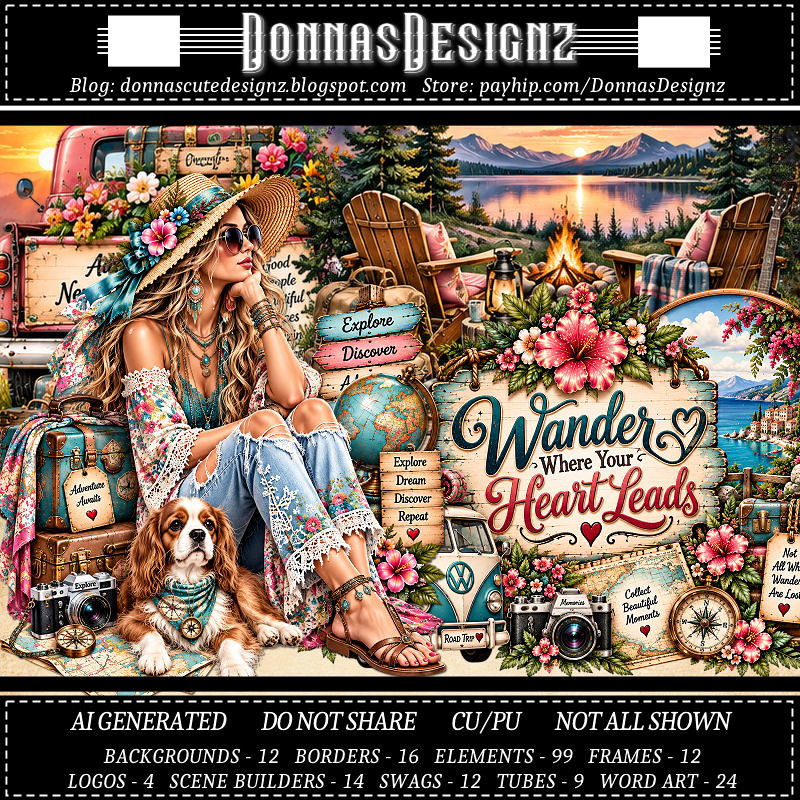
FTU Wander Where Your Heart Leads


This tut was written September 19th, 2026 for those with a basic knowledge of psp. 

I am using the Awesome Al kit/Tubes by Donna Designz
Everything used is included in the kit
Please read the TOU on how to credit your tags

I used PSP2020...but any of them should work.
FTU Scrap Wander Where Your Heart Leads by Donnas Designz  HERE
Check her store out to see all her other kits and tubes HERE
Donnas Designz Template 680 HERE
Check the rest of her blog HERE
Donnas Shape Up 4, Mask 4 Here

Font of choice, I used Andara Script

Drop shadow as you go is V -2 H 4, 50, 10, or use what you prefer.
Let's get started
*Remember to add your drop shadow as you go along*

Open the template, go to Image, resize to 125, all layers checked, then
Canvas 800 x 800, delete the credits.
Resize paper 5 to 80%, paste above the white background, apply your mask, 
resize to fit your tag.

On each template layer, you will click the gray area first to fill or 
paste your paper, then click on the white frame part and fill.
I filled the frame part with #62223c on all of them.
I will not repeat this on each one, so when I say select raster #, do that 
each time.
Dotted lines your choice if you want to keep them or not.

Copy of Raster 4, select, resize paper 9 to 50%, paste, invert, delete.

Raster 2, resize paper 2 to 50%, paste so the word part shows, invert, 
delete, do the frame.
Merge Copy of Raster 11 down with Raster 11, resize paper 4
to 40%, paste, invert, delete, do the frame.
Copy of Raster 2, resize paper 5 to 40%, paste, move how you like,
invert, delete.
Resize border 4 to 50%, paste on the paper.

Raster 3, resize paper 5 to 40%, paste, invert, delete.
Do the same with Copy of Raster 3.

Raster 5, resize paper 2 to 50%, paste so the words shows at the top.
Raster 4, resize paper 5 to 50%, paste, move to your liking, invert, delete.
Raster 16, paste paper 8, invert, delete.
Merge all the circles together, select all, float, defloat, fill with a color
or paste a paper.
Add Eye Candy 4000, Glass with these settings
Bevel Width 8.98
Smoothness 45
30, 35, 50, 0, 50
Lighting 135, 45

Resize 14 to 75%, paste on the bottom right.
Resize tube 3 to 38%, paste to the left of the truck.
Resize border 4 to 50%, paste at the bottom below the tube to the right.
Resize 83 to 45%, paste at the bottom above the tube.
Resize 51 to 95%, paste on the left below the tube.
Resize 42 to 50%, paste at the bottom below the camera on the left.
Resize 15 to 65%, paste on the bottom left.
Resize 2 to 35%, paste on the bottom left.
Resize 12 to 35%, free rotate to the left at 20, paste at the bottom left.
Resize 15 to 115%, paste at the upper left below the template layers, 
duplicate, move to the right and down.

Add any other elements that you would like, make it your own.
Always readjust your mask and elements how you like them before you
 merge your tag, resize, sharpen.
Crop your tag to be sure no shadows or lines are on the edges.
 Then add your copyright and name.
That's it

Hope you enjoyed doing my tut.    
Thursday, September 10, 2026

FTU Falling Leaves

  This tut was written September 10, 2026 for those with a basic knowledge of psp. 

Awesome tube used ©Misticheskaya

The tube is called Carmelia and Evening Tea
The tube is "NOT" included
You need a license to use this tube, please do not use without a license
You can find the tube at Misticheskaya Store HERE

I used PSP2020...but any of them should work.
FTU Scrap Falling Leaves "NO Al" by Diamond Creations  HERE
You can find all Diamond Creations  kits HERE
RD Mask 683 HERE
Check the blog out HERE

Font of choice, I used Lovely Butterfly

Drop shadow as you go is V -2 H -4, 40, 10, or use what you prefer.
Let's get started
*Remember to add your drop shadow as you go along*

Open a new image 800 x 800, paste paper 3, apply your mask, adjust.

Resize frame 3 to 50%, click inside, paste paper 3, invert, delete,
keep selected, resize the tube to 75%, paste, delete, select none.
Change the blend mode on the tube to Screen.
Resize 40 to 45%, paste on the upper right on the frame, duplicate, move to
the left below the frame.
Resize 45 to 75%, paste on the upper left below the clock, duplicate,
mirror, move down some on the right.

Resize the tube to 30%, paste on the right above the clock.

Resize 93 to 50%, paste at the bottom above the tube.
Resize 17 to 25%, paste at the upper left on the frame.
Resize 19 to 35%, paste on the bottom left.
Resize 16 to 25%, paste at the bottom left below the scare crow, duplicate, mirror.
Resize 75 to 25%, paste on the left below the scare crow, duplicate,
mirror, move above the leaves on the right.
Resize 38 to 25%, paste on the canister on the right, duplicate, move to 
the one on the left.
Resize 88 to 25%, paste at the bottom below the scare crow, 
duplicate, mirror.

Resize 73 to 20%, paste at the bottom left above the scare crow,
duplicate, mirror.
Resize 13 to 25%, paste at the bottom.
Resize 72 to 15%, duplicate 3 times for a total of 4, paste at the bottom
where you like.
Resize 69 to 40%, paste behind the sign.
Resize 47 to 25%, paste at the bottom.

Add any other elements that you would like, make it your own.
Always readjust your mask and elements how you like them before you
 merge your tag, resize, sharpen.

Crop your tag to be sure no shadows or lines are on the edges.
 Then add your copyright and name.
That's it

Hope you enjoyed doing my tut            

Saturday, September 5, 2026

FTU Velvet Marmalade

  This tut was written September 5th, 2026 for those with a basic knowledge of psp. 

I am using the awesome Al kit by Bie Designz
Everything is included in the kit
Please read the TOU on how to credit your tags.

I used PSP2020...but any of them should work.
FTU Scrap Velvet Marmalade by Bie Designz  HERE
Check the rest of her blog HERE
Mizteeques Mask 54 HERE
RD Mask 827 HERE

Font of choice, I used Ants Valley

Drop shadow as you go is V -2 H 4, 50, 10, or use what you prefer.
Let's get started
*Remember to add your drop shadow as you go along*

Open a new image 800 x 800, resize paper 9 to 65%, apply mask 54 first,
delete, paste paper 9 again, apply mask 827, delete.

Resize frame 1 to 65%, paste, click inside, resize paper 15, to 40%, 
paste, invert, delete.
Resize 6 to 50%, paste on the upper left below the frame, duplicate, mirror.
Resize 57 to 50%, paste on the upper right above the frame.
Resize 64 to 40%, paste on the left.

Resize tube 8 to 35%, paste above the piano.

Resize 113 to 35%, paste on the right above the bar.
Resize 2 to 35%, paste on the bottom right.
Resize 128 to 25%, paste at the bottom below the flowers.
Resize cluster 2 to 27%, paste at the bottom by the tray.
Resize 60 to 20%, paste at the bottom.
Resize 125 to 20%, paste at the bottom left above the piano.
Resize 73 to 20%, paste on the bottom right.
Resize 38 to 17%, paste at the bottom.
Resize 74 to 20%, free rotate to the left at 20, paste above the piano.

Resize 75 to 20%, free rotate to the left at 20, paste below the candles.
Resize 77 to 15%, paste at the bottom below the shoes.
Resize 45 and 88 to 10%, paste at the bottom above the mirror.
Resize 121 to 13%, paste on the upper right on the bar.
Resize 67 to 20%, paste on the left above the piano.
Resize 105 to 12%, paste at the bottom right.
Resize 118 to 10%, paste at the bottom right, free rotate to the right at 20.
Resize 89 to 10%, paste at the bottom left.

Add any other elements that you would like, make it your own.
Always readjust your mask and elements how you like them before you
 merge your tag, resize, sharpen.
Crop your tag to be sure no shadows or lines are on the edges.
 Then add your copyright and name.
That's it

Hope you enjoyed doing my tut.        
Wednesday, September 2, 2026

FTU Glamour Never Dies

 This tut was written September 2nd, 2026 for those with a basic knowledge of psp. 

I am using the awesome Al kit by Bie Designz
Everything is included in the kit
Please read the TOU on how to credit your tags.

I used PSP2020...but any of them should work.
FTU Scrap Glamour Never Dies by Bie Designz  HERE
Check the rest of her blog HERE
WSL Mask 81, link is no longer available, so use a mask of choice

Font of choice, I used Anything Script

Drop shadow as you go is V -2 H 4, 50, 10, or use what you prefer.
Let's get started
*Remember to add your drop shadow as you go along*

Open a new image 800 x 800, paste paper 12, apply your mask,
move to the right, duplicate, mirror, merge together, duplicate, move to 
the bottom.

Resize frame 5 to 65%, paste, click inside, paste paper 6, invert, delete,
keep selected, paste tube 17, delete, select none.
Resize 7 to 40%, paste at the upper right below the frame, duplicate, mirror.
Resize 27 to 30%, paste at the upper right above the flowers at the top,
duplicate, mirror, move down on the right above the flowers.
Resize 20 to 40%, paste at the top to the right below the flowers and film.

Resize tube 4 to 50%, paste on the left above the frame.

Resize 46 to 30%, paste at the bottom below the tube.
Resize 10 to 25%, paste on the left below the tube.
Resize 4 to 25%, paste on the left above the tube.
Resize 26 to 20%, paste at the bottom below the tube above the props box.

Resize 21 to 35%, paste on the bottom right.
Resize 25 and 44 to 17%, paste at the bottom right.
Resize 28 and 95 to 13%, paste at the bottom above the tube.
Resize 64 to 20%, free rotate to the right at 20, paste below the film reels 
and move the camera reel up more.
Resize 119 to 30%, paste on the right below the frame.
Resize 70 to 15%, paste at the bottom by the tube.
Resize 59 to 15%, paste at the bottom right.
Resize 19 to 30%, mirror, paste on the right below the camera reel.

Add any other elements that you would like, make it your own.
Always readjust your mask and elements how you like them before you
 merge your tag, resize, sharpen.
Crop your tag to be sure no shadows or lines are on the edges.
 Then add your copyright and name.
That's it

Hope you enjoyed doing my tut.        

Friday, August 28, 2026

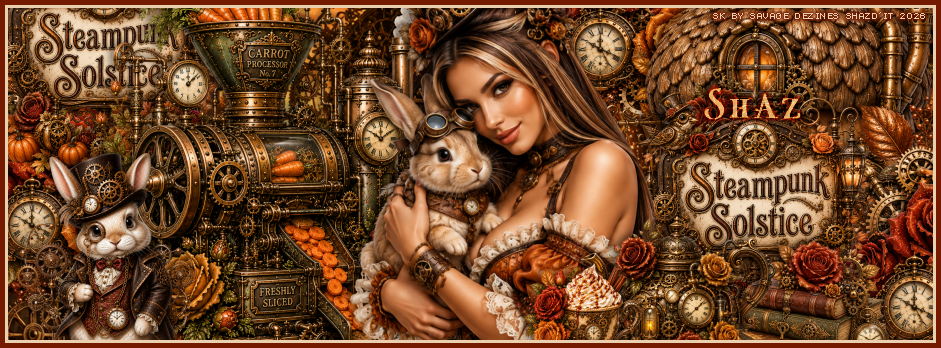
FTU Steampunk Solstice Timeline


This tut was written August 28th, 2026 for those with a basic knowledge of psp.

I am using an awesome Al kit by Savage Dezines
Everything is included in the kit, this is part of the Steampunk Solstice Blogtrain
Please read the TOU on how to credit your tags.

I used PSP2020...but any of them should work.
FTU Scrap Steampunk Solstice by Savage Dezines  HERE
Check out the rest of the blog HERE
Font Misteri Caps 

Drop shadow as go is V-2 H 4, 50, 10 or use what you prefer
Let's get started

I have been asked to do a FB Timeline and Ava
Open a new image 941 x 348, resize the paper to 78%, paste how you like.

Resize 12 to 35%, paste on the left.
Resize 17 to 38%, paste on the right.
Resize 18 to 20%, paste on the bottom right, duplicate, move to the upper
left below the train.
Resize 16 to 23%, paste on the left below the sign, duplicate, move to 
the upper right below the acorn house, duplicate once more, move
down and to the right below the sign.

Resize the tube to 55%, paste.

Resize 15 to 17%, paste on the bottom left.
Resize 2 to 15%, paste on the bottom right above the sign.
Resize 3 to 15%, paste on the right above the books.
Resize 14 to 10%, paste at the bottom by the coffee pot.
Add any other elements you want, once happy, merge together.
Add a frame of choice.
Add your name and copyright

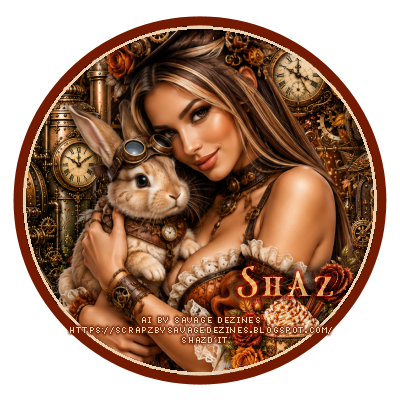
For the Ava
Open an image 400 x 400, draw a circle, width 10 or so to fit.
Click inside, add a new layer, fill with a contrasting color, contrast by 3, 
delete.
Click inside, expand by 3, paste your timeline how you like, invert, delete.
Add your name and copyright.

That's it, hope you enjoyed it

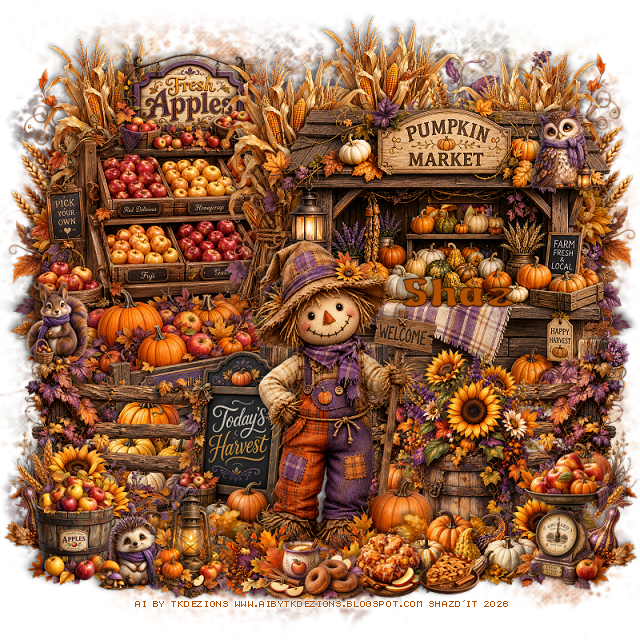
FTU Twilight Orchard

 This tut was written August 28th, 2026 for those with a basic knowledge of psp. 

I am using the awesome Al kit by TK Designs
Everything is included in the kit, this is part of the Twilight Orchard Blogtrain
Please read the TOU on how to credit your tags.

I used PSP2020...but any of them should work.
FTU Scrap Twilight Orchard by TK Dezigns  HERE
Check her store out to see all her other kits and tubes HERE
Miz Teeques Mask 52 HERE
Check the blog Here

Font of choice, I used Apple to Apple

Drop shadow as you go is V -2 H 4, 50, 10, or use what you prefer.
Let's get started
*Remember to add your drop shadow as you go along*

Open a new image 800 x 800, resize paper 2 to 75%, apply your mask,
erase parts that stick out to far.

Resize 57 to 50%, paste on the upper left.
Resize 55 to 20%, paste on top of the apple bin.
Resize 56 to 50%, paste on the upper right.
Resize 24 to 40%, paste on the left below the apple bin, duplicate, 
mirror, duplicate again, move back to the center a little.
go back to the left one, duplicate, move above the sign and
apple bin.
Resize 27 to 50%, paste on the bottom layer on the upper left, 
duplicate, mirror.

Resize 58 to 35%, paste on the left.
Resize 48 to 20%, paste at the bottom above the wagon.
Resize 26 to 40%, paste at the bottom above the pumpkins, duplicate, mirror.
Resize 31 to 30%, paste at the bottom right above the fence.
Resize 28 to 25%, paste at the bottom right, duplicate, mirror.
Resize 43 to 25%, paste at the bottom.
Resize 52 to 42%, paste at the bottom above the sign.
Resize 49 to 20%, paste at the bottom to the right of the scarecrow, 
duplicate, mirror.
Resize 51 to 18%, paste at the bottom right.

Resize 13 to 15%, paste at the bottom to the left.
Resize 4 to 8%, paste at the upper right on the pumpkin stand.
Resize 37 to 15%, paste at the bottom left.
Resize 39 to 20%, paste at the bottom above the scarecrow, duplicate, mirror.
Resize 2 to 8%, paste on the left on the fence post.
Resize 22 to 15%, paste at the bottom above the leaves.
Resize 32 to 10%, paste at the bottom below the coffee and donut tray.
Resize 5 to 8%, paste at the bottom left below the lantern.
Resize 46 to 8%, paste on the bottom right.

Add any other elements that you would like, make it your own.
Always readjust your mask and elements how you like them before you
 merge your tag, resize, sharpen.
Crop your tag to be sure no shadows or lines are on the edges.
 Then add your copyright and name.
That's it

Hope you enjoyed doing my tut.