Showing posts with label Arthur Crowe. Show all posts

Saturday, April 27, 2019

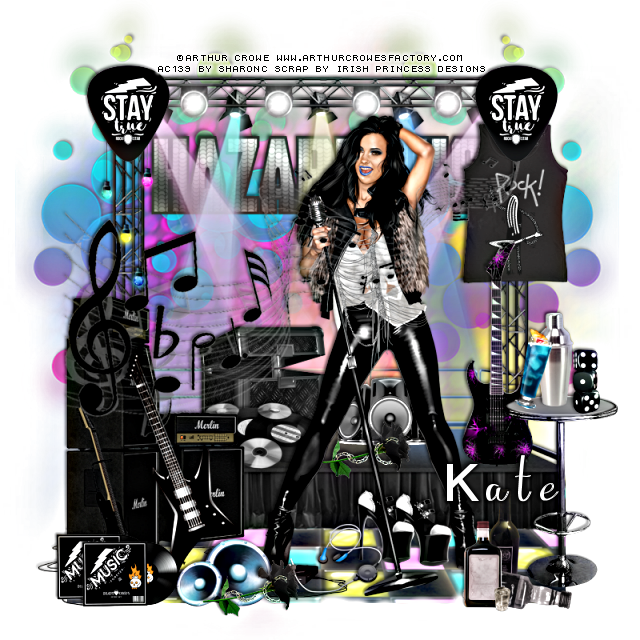
PTU Rock Goddess


This tut was written April 27th, 2019 for those with a basic knowledge of psp.
I am using the awesome artwork of  Arthur Crowe
The tube is  "Micro Skull Girl
You need a license to use this tube, do not use without a license.
You can find this art at Crowe's Store  HERE

I used PSPX...but any of them should work.
PTU kit Rock Goddess by Irish Princess Designs HERE  HERE and HERE
Dragonflypsp Mask 0018 HERE
Check out the rest of the blog HERE
Filters
xero-Clarity (Optional)
Font of choice,  I used Rubynt

Drop shadow is usually V-2 H-2 Black, 50, 5, use what you prefer.
Let's get started
*Remember to add your drop shadow as you go along*

Open a new layer 800 x 800
Select all, add a new layer, paste paper 3, into selection, apply your mask.

Resize element 132 to 80%, paste on the mask layer.
Resize element 131 to 78%, paste under the stage, erase the parts showing at the
back on each side.

Resize your tube to 65%, paste in front of the stage to the right.

Resize element 2 to 50%, paste to the left in front of the stage.
Resize element 38 to 20%, paste on the stage behind the speakers how you like.
Resize element 24 to 15%, paste at the lower left being on the top layer, duplicate, move
up and over a little.

Resize element 14 to 55%, paste below the stage behind the lights where you like.
Resize element 49 to 30%, paste at the right on the floor.
Resize element 140 to 35%, paste on the stage to the right of the tube.
Resize element 93 to 90%, paste on the mask on the right, duplicate, mirror,
erase any overlapping showing behind the stage.

Resize element 119 to 20%, paste on the stage below the records.
Resize element 23 to 15%, paste at the upper left on the stage, duplicate, move 
to the right.

Resize element 123 to 75%, paste above the speakers that are on the left.
(Option, leave above the tube or move the tube above the music notes)

Resize element 31 to 25%, paste at the upper right below the sign.
Resize element 87 to 20%, paste at the lower right above the table.
Resize element 122 to 15%, paste on the table at the right.
Resize element 50 to 15%, paste behind the glass layer.

Resize element 35 to 10%, paste on the table by the drink.
Resize element 13 to 15%, paste at the bottom above the tube layer.
Resize element 16 to 40%, paste to the left of the tube on the speakers being above
the music notes.
Resize element 12 to 20%, paste on the stage behind the tube.
Resize element 13 to 15%, paste at the bottom being on the top layer.
Resize element 111 to 15%, paste on the floor below the tube, duplicate, move over
a bit and up.
On the edge of the floor I tapped my eraser on the edge a little bit to break it up some.
Resize element 88 to 40%, paste on the left under the sign, erase any strings showing
at the top.
Resize element 76 to 15%, free rotate to the right at 90 degrees, paste at the bottom
above the blue speakers, duplicate, move below the tube on the stage.

Add any other elements that you like, make it your own.
Remember to always adjust all the elements how you like on your tag,
then resize your mask if needed before merging your tag.

Once happy, close off any background you had.
 Crop your tag to get rid of any stray edges, merge visible.
I used xero Clarity on the merged tag before adding the name and copyright.
Resize, sharpen, add your Copyright and name.

That's it
Hope you enjoyed doing my tut.

Sunday, February 11, 2018

PTU Dark Gothica Night


This tut was written Feb 10th, 2018 for those with a basic knowledge of psp.
I am using the awesome artwork of Arthur Crowe  
The tube is called "A Lady In Black"
You need a license to use this tube, do not use without a license.
You can find this tube at his store  HERE

I used PSPX...but any of them should work.
PTU Dark Gothica by Irish Princess Designs  HERE
Dragonfly Mask 018  HERE
Check out the rest of the blog HERE

Font of choice,  I used bu Wicked

Drop shadow is usually V-2 H-2 Black, 50, 5, use what you prefer.
Let's get started
*Remember to add your drop shadow as you go along*

Open a new image 800 x 800
Select all, paste paper 8 into selection, select none, apply your mask,
delete, merge group.
Resize element 152 to 75%, paste at the bottom.
Resize element 87 to 85%, paste below the gate at the bottom.

Resize element 35 to 23%, paste on the lower left in front of the post.

Resize your tube to 75%, paste at the bottom to the right of the books.
Resize element 65 to 85%, paste behind the fence at the bottom on the 
right, duplicate, mirror, duplicate again, move above the fence and to the 
right so the butterfly part shows and erase the part behind the tube.

Resize element 53 to 30%, paste at the upper left behind the tube.
Resize element 76 to 70%, paste below the brick back behind the tube how 
you like, erase any part showing outside the fence post.

Resize element 15 to 15%, paste at the bottom above the tube layer.
Resize element 40 to 15%, paste below the tube behind the grass at the bottom.
Resize element 18 to 35%, paste on the right below the grass by the fence post.
Resize element 52 to 15%, paste at the lower right below the book layer, duplicate,
move over a little more.

Resize element 146 to 15%, paste on the fence post, duplicate, mirror.
Resize element 41 to 75%, paste at the top below the tube layer.
Resize element 38 to 25%, paste at the bottom in front of the tube.
Resize element 61 to 15%, paste at the lower right by the book and rocks.
Resize element 33 to 25%, paste on one fence post, duplicate, mirror.

Add any other elements that you would like, make it your own.

Once happy with your tag, close off any background, crop your tag to make
sure there are no stray edges, merge visible, resize first.
 Add your copyrights and name.

That's it
Hope you enjoyed doing my tut.


Wednesday, September 13, 2017

PTU Alice Wonderland Babe


This tut was written Sept 13th, 2017, for those with a basic knowledge of psp.
I am using the awesome artwork of  Arthur Crowe
The tube is called "Wonderful Babe"
You need a license to use this art work. Please do not use without a license.
 You can this tube at his Store  HERE

Supplies Needed
I used PSPX...but any of them should work.
PTU  kit Wonder by BLT Creates HERE
Angie Tagged Me Mask 19  HERE
Check out the rest of the blog HERE

Font of Choice, I used Rabbit Hole

Drop Shadow usually V2 H2 50 black
 *Remember to add your drop shadow as you go along*

Open a new image 800 x 800
Resize paper 1 to 23%, apply your mask, delete, merge group.

Resize frame 2 to 30%, paste, click inside with your magic wand,
expand by 5, resize paper 9 to 22%, paste,  invert, delete, keep selected,
paste your middle size tube, delete, select none.
Resize frame 3 to 50%, paste on the blue frame.

Resize your full tube to 75%, paste on the left on the frame.

Resize card 2 to 10%, paste under the tube.
Resize the shrub to 20%, paste on the right, duplicate, mirror.
Resize the caterpillar to 20%, mirror, paste on the right above the shrub.
Resize the book to 10%, paste at the bottom above the caterpillar.
Resize the red mushroom to 10%, paste behind the caterpillar, duplicate,
move over to the left more and up, duplicate once more, move
behind the tube.

Resize the bottle to 7%, paste at the bottom.
Resize the cup to 6%, paste by the bottle.
Resize the cat to 7%, paste on the book.
Resize the crown to 15%, paste below the book layer on the right.

Resize scatter 2 to 15%, paste at the bottom below the bottle layer.
Resize the watch to 3%, paste on the upper right, duplicate, mirror, move
down some, duplicate the top one and move down below the mirrored one.
Resize scatters to 15%, paste at the upper right below the watch layer.
Resize cards to 10%, paste at the bottom below the book layer.
Resize bubbles to 15%, paste below the tube on the green shrub, duplicate,
mirror, move below the caterpillar on the right.
Resize the legs to 20%, paste below the tube on the left.
Resize rose 2 to 8%, mirror, paste between the cup and bottle at the bottom
to the left.

Add any other elements you would like to add.

Crop your tag to be sure no stray shadows are on the edges of your tag.
Once happy with it all, only if you are not going to animate,
close off any backgrounds, merge visible.
Resize first, then add your copyrights and name.

That's it
Hope you enjoyed doing my tut.


Thursday, June 15, 2017

FTU USA-4th of July

This tut was written June 15th, 2017, for those with a basic knowledge of psp.
I am using the awesome artwork of  Arthur Hunter Art.
This is one of his tube packages
You need a license to use this art work. Please do not use without a license.
 You can find this art at S&CO  Store  HERE

Supplies Needed
I used PSPX...but any of them should work.
Scrap USA 4th of July by Bitzy Beez  Designz HERE
Check out the rest of the blog HERE
WSL Mask_84  HERE

Filters
Xero-Mistifier
EyeCandy 4000-Gradient Glow (Optional)

Font of Choice, I used Hard Stones San Strip

Drop Shadow usually V2 H2 50 black
 *Remember to add your drop shadow as you go along*

This is a Quickie 😏

Open a new image 800 x 800, paste paper 14, resize your close up to 80%, paste
on the paper and move to the right some, merge down, apply your mask,
delete, merge group.
Duplicate, go to Adjust, Blur, Gaussian blur, number on 4, change the blend
mode to Screen, merge down.
Apply the Xero filter-Mistifier-default settings.

Resize your full tube to 70%, mirror, paste on the left.

Resize wordart 4 to 30%, paste at the bottom to cover the edge of the legs,
add a fat gradient glow of choice.
I used Eye Candy 4000, fat gradient with the first color being a blue and
the second color being white.

Resize the wagon 1 to 45%, paste below the tube layer.
Paste fireworks 2 below the mask layer, add noise at 100%, duplicate, mirror,
adjust so the blue shows at the bottom like the left side does, then erase all the rest
of the fireworks as much as you like.

Resize Deco 2 to 40%, paste below the tube on the left, duplicate, resize to 95%,
mirror, adjust on the right.

Resize fireworks 6 to 60%, paste above the other fireworks at the top, duplicate, move
down on one side, duplicate, mirror.
Resize rocket 1 to 35%, paste at the upper right below the mask layer.
Resize flag 1 to 40%, paste below the tube at the upper left.

Resize guitar 1 to 40%, mirror, place at the bottom above the wordart on
the left.
Resize drink 1 to 35%, paste on the right at the bottom above the wordart.
Resize flower 5 to 10%, paste on the guitar, duplicate, move to the right on the glass,
duplicate, move below the glass.

Add any other elements you would like to add.

Crop your tag to be sure no stray shadows are on the edges of your tag.
Once happy with it all, merge visible.
Resize first, then add your copyrights and name.
That's it
Hope you enjoyed doing my tut.


Wednesday, June 14, 2017

PTU Stormy Eyes


This tut was written June 14th, 2017 for those with a basic knowledge of psp.
I am using the awesome artwork of  Arthur Crowe.
Tube is called Sexy Man
Spend $8.00 and you can get him as a Bonus Tube.
You need a license to use this art work. Please do not use without a license.
 You can find this art at his store  HERE 

I used PSPX...but any of them should work.
PTU Scrap Stormy Seas by Irish Princess Designs  HERE
This kit is perfect for your Sailors, Mermaid any type of sealife tagging fun.
You can also find this kit at one of these stores HERE, HERE, HERE
RD Mask 158_3 HERE
Check out the rest of the blog HERE

Font of choice, I used FoglihtenNo04

Drop shadow is usually V-2 H-2 Black, 50, 5, use what you prefer.
Let's get started
*Remember to add your drop shadow as you go along*

Open a new image 800 x 800, resize paper 10 to 85%, apply your mask,
delete, merge group, duplicate, mirror.

Paste element 32 at the bottom, duplicate, mirror.
Paste element 19 at the bottom, duplicate, mirror, duplicate again, move
below element 32 and down some, erase the grass part on this one, duplicate,
mirror, adjust all to your liking.

Paste element 31 on the left below all the sand layers.
Resize element 34 to 95%, paste on the left above the light house, duplicate, mirror.
Paste element 36 the boat below the one on the right.
Drop shadow for the boat is V-8, H-15, 50, 5
Paste element 35 below the light house layer and down on the right, duplicate,
mirror, duplicate the left one, move up some.
Resize element 50 to 45%, paste on the right below the sand layers, duplicate, mirror.

Resize element 28 to 55%, paste on the top layer at the bottom left, free rotate
to the right at 25 degrees.
Resize element 60 to 40%, paste behind the anchor chain on the left, free
rotate to the left at 10 degrees.

Resize your tube to 65%, paste below the anchor layer and off center.
Duplicate the anchor, mirror, move below the tube and erase the anchor showing
behind the leg on the right.

Paste element 41 at the top behind the tube, duplicate, resize to 60%, move
over to the left over the light house.

Resize element 25 to 35%, paste on the left at the bottom above the anchor.
Resize element 72 to 35%, paste below the shells on the left, duplicate, mirror.
Paste element 30 below the light house.
Resize element 90 to 60%, paste at the upper left below the tube,
duplicate, mirror.
Resize element 33 to 35%, paste at the bottom by the left leg of the tube.
Resize element 29 to 35%, paste below the crab to cover the right leg edge.
Resize element 22 to 35%, paste on the right below the tube layer.
Paste element 46 at the bottom just below the crab.
Paste element 17 behind the tube on the ship how you like.

Add any other elements that you would like, make it your own.

Once happy with your tag, close off any background, crop your tag to make
sure there are no stray edges, merge visible, resize.
Add your copyrights and name.

That's it
Hope you enjoyed doing my tut.


Saturday, June 10, 2017

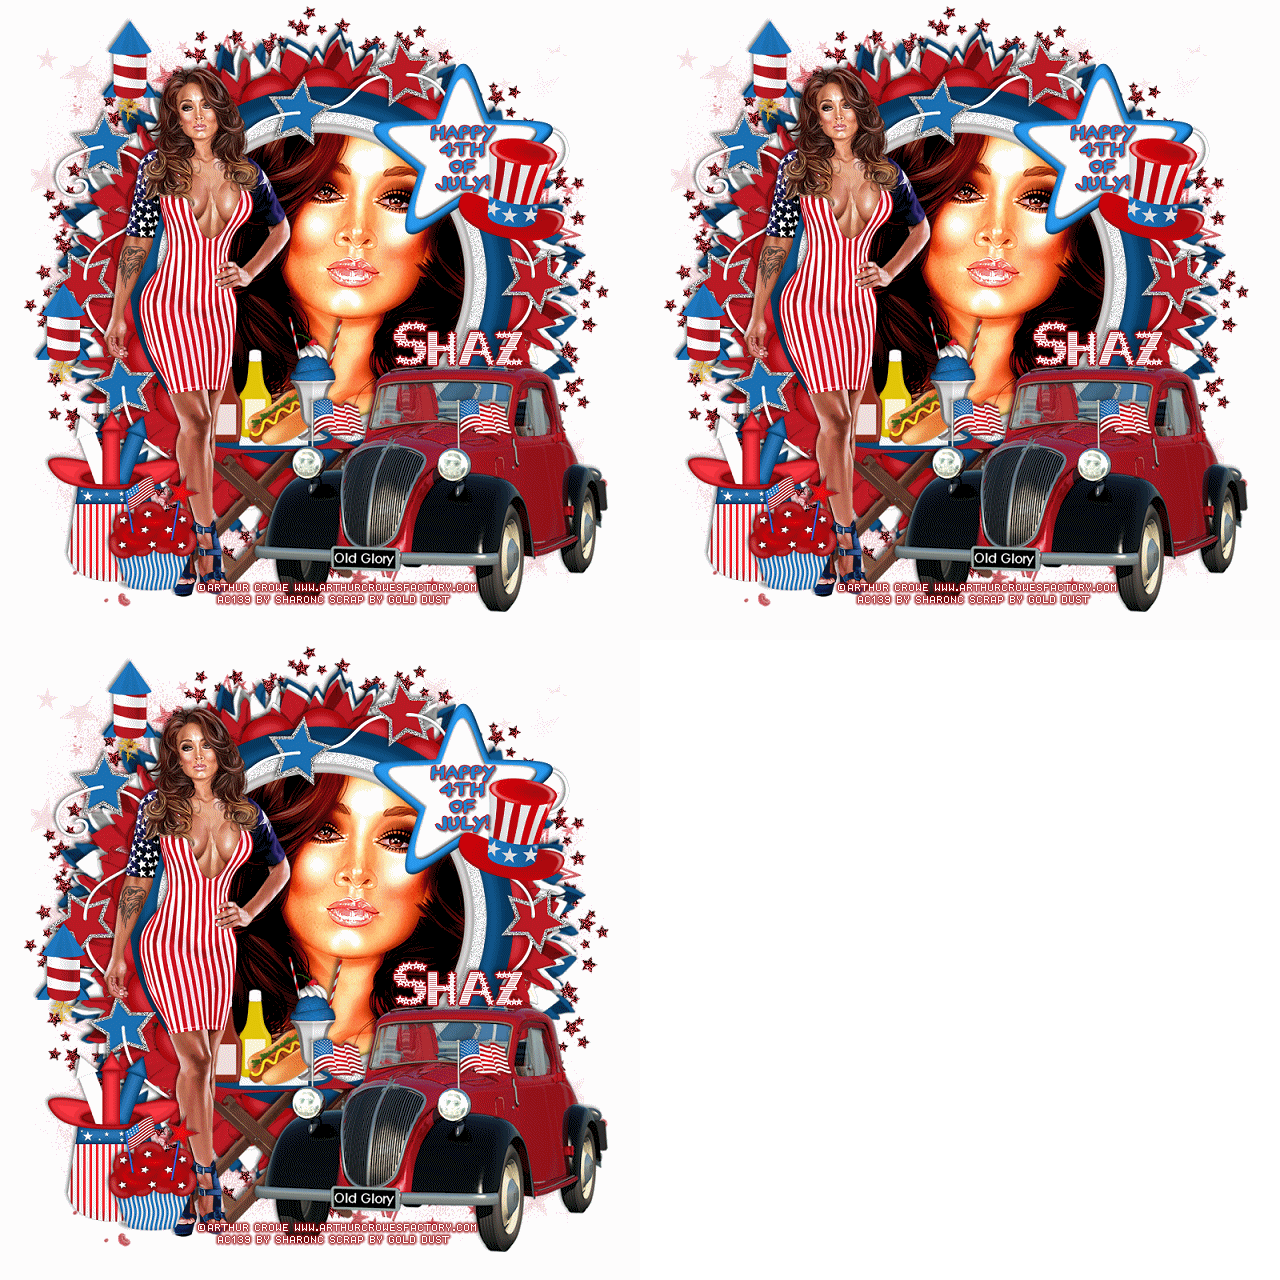
FTU Fourth of July


This tut was written June 3rd, 2017 for those with a basic knowledge of psp.
I am using the awesome artwork of  Arthur Crowe
Tube is called "Hot America"
You need a license to use this art work. Please do not use without a license.
 You can find this art at his store  HERE

Supplies Needed
I used PSPX...but any of them should work.
FTU Scrap Celebrate Freedom by Gold Dust HERE
Check out the rest of the blog HERE
AngieTaggedMe Mask 28  HERE
Check out the rest of the blog HERE
Filter
Mura Meister Copies-Encircle
Xero-Bad Dream

Font of Choice, I used Stripes and Stars

Drop shadow is usually V-2 H-2 Black, 50, 5, use what you prefer.
Let's get started
*Remember to add your drop shadow as you go along*


Open a new image 800x800
Resize the mask to 85%, paste paper 13, apply the mask, delete, merge group.

Paste frame 5, resize to 85%, click inside with your magic wand,
expand by 5, paste paper 1, invert, delete, keep selected, mirror your close up
tube, paste, delete, select none. Apply Xero filter-Bad Dream
Click on the white part of the frame, add noise at 50%.

Resize the car to 85%, paste on the right above the frame layer.

Resize your tube to 75%, paste on the left side.

Paste flower 3, flip, apply the Mura Meister Copies-Encircle, change the
first number to 14, move to the mask layer.

Paste flower 2, flip, apply Mura Meister Copies-Encircle, change
the first number to 16, move to just above the blue flower circle.

Paste flower 1, flip, apply Mura Meister Copies-Encircle with the first number
on 12, move above the white flower circle.
Resize the snacks to 75%, paste below the tube layer.

Resize the firecracker hat to 45%, paste to the left of the tube at the bottom.
Resize cupcake 2 to 40%, paste on the left at the bottom above the hat.

Resize star spray 3 to 80%, apply Mura Meister Copies-Encircle, first
number on 16, move to the mask layer.

Resize wordart 2 to 55%, paste on the frame on the upper right.
Paste the start string below the wordart string, erase any part showing
that you don't want, duplicate, free rotate to the left at 90, adjust on the right,
erase any parts you don't want, duplicate, mirror, adjust behind the tube.
Resize rocket 1 to 35%, paste where you like, duplicate if you like also.

Add any other elements you would like to add.

If you are going to animate, merge together with the white background.

Crop your tag to be sure no stray shadows are on the edges of your tag.
Resize first, then add your copyrights and name.
Add your copyright and name before taking it to animation shop.

Take your free hand, draw around the headlights of the car, then go to
Adjust, Bright and Contrast, have the numbers on
Brightness 18 and  Contrast on 20, select none, copy merged to animation shop.
Go back to psp, edit undo select none, undo Brightness and Contrast,
then apply Brightness and Contrast, changing the numbers to
21 and 23,  select none, copy merged, paste After Current Frame.
Go back to psp one more time, undo the steps again and apply
Brightness and Contrast again, change the numbers to 27 and 29, bring to
animation shop again, paste after current frame, test if happy save.

That's it
Hope you enjoyed doing my tut.


Saturday, April 1, 2017

PTU Fairy Fantasy


This tut was written March 31st, 2017 for those with a basic knowledge of psp.
I am using the awesome artwork of  Arthur Crowe.
Tube is called Flora Fairy.
You need a license to use this art work. Please do not use without a license.
 You can find this art at his store  HERE  

I used PSPX...but any of them should work.
PTU Scrap Easter Chick by Irish Princess Designs  HERE

This kit is beautiful, filled with lots of pretty elements and papers
ready for your fairytale, fantasy and more tagging fun.


You can also find this kit at one of these stores HERE, HERE, HERE
RD Mask Set 150_2  HERE
Check out the rest of the blog HERE

Font of Choice, I used Hector Le Dragon

Drop shadow is usually V-2 H-2 Black, 50, 5, use what you prefer.
Let's get started
*Remember to add your drop shadow as you go along*

Open a new image 800x800
Paste paper 5, apply your mask, delete, merge group.

Paste element 22, free rotate to the left at 90, resize to 75%, move to
the left more, click inside with
your magic wand, expand by 5, paste paper 18, move where you
like, invert, delete, keep selected.
Mirror your middle size tube, paste off center a little bit, delete, select none.

Resize your full tube to 70%, paste on the right.

Resize element 84 to 75%, paste below the paper layer of the frame,
duplicate, mirror, duplicate one more time, move to the center more.
Resize element 89 to 50%, paste at the top below the tube layer on the right,
duplicate, mirror, flip.

Resize element 57 to 50%, paste at the upper left under the vine, duplicate, mirror.
Resize element 100 to 40%, paste on the left below the vine at the bottom.
Paste element 71 on the right below the tube layer.
Resize element 3 to 30%, paste on the bottom below the vine layer about center.

Resize element 13 to 30%, paste on the left side below the book layer.
Paste element 45 on the right below the tube layer and move up, duplicate, mirror.

Resize element 50 to 15%, paste in front of the book.
Resize element 8 to 50%, paste on the upper right below the tube,
duplicate, mirror, erase the parts you don't want.

Resize element 29 to 35%, paste on the left.
Resize element 12 to 35%, paste down by the book.
Resize element 94 to 45%, paste on the right below the harp.
Resize element 17 to 20%, paste at the bottom on the book, duplicate,
move down a bit more.
Resize element 19 to 30%, paste on one side below the harp, duplicate, mirror.
Resize element 18 to 30%, paste on the right on the tube, duplicate, mirror,
move down more.
Paste element 92 being on the top layer now.

Add any other elements that you would like, make it your own.

Crop your tag to be sure no stray shadows are on the edges of your tag.
Once happy with it all, close off any backgrounds, merge visible.
Add your copyrights and name.

That's it
Hope you enjoyed doing my tut.


Wednesday, March 29, 2017

FTU Little Easter Duckie


This tut was written March 29th, 2017 for those with a basic knowledge of psp.
I am using the awesome artwork of  Arthur Crowe.
Tube is called "Little Duckie"
You need a license to use this art work. Please do not use without a license.
 You can find this art at his store  HERE

Supplies Needed
I used PSPX...but any of them should work.
FTU Scrap Easter Fan Freebie by C.S.E. Designs HERE
Check out the rest of the blog HERE
RD Mask Set 124_4  HERE
Check out the rest of the blog HERE
Filters
Mura Meister Copies-Encircle

Font of Choice, I used Aulyars

Drop shadow is usually V-2 H-2 Black, 50, 5, use what you prefer.
Let's get started
*Remember to add your drop shadow as you go along*

Open a new image 800x800
Paste paper 2, apply your mask, delete, merge group.

Paste frame 5, click inside with your magic wand, expand by 10, paste paper
2, invert, delete, move below the frame, select none.

Paste element 60 on the frame at the bottom, duplicate, flip, mirror.
Resize element 79 to 75%, paste at the top on the ivy layer, duplicate, mirror.

Paste element 75 at the bottom, duplicate, move to the left below the
paper layer of the frame, duplicate, mirror.

Paste element 5 at the bottom more to the right, being on the top layer now.

Resize your tube to 60%, paste on the left above the egg layer.

Back to the original tube, close off the butterfly and flower, resize
this tube to 25%, mirror, place at the bottom to the right more.

Resize element 33 to 55%, paste in the center on the frame layer behind the tube.
Resize element 40 to 45%, paste on the left below the duck.


Resize element 82 to 75%, paste below the frame and up how you like.
Resize element 19 to 40%, paste below the egg in the center, adjust, duplicate, mirror,
adjust by the duckie, rotate it to the left about 15 degrees, duplicate, mirror,
move out from the egg to the right a bit and erase any stem showing.
Resize element 3 to 50%, mirror, paste below the yellow flower on the left,
duplicate, mirror, adjust and you might need to erase a bit of the stem

Resize element 49 to 45%, paste at the bottom by the flower on the duck's foot.
Resize element 47 to 85%, paste above the egg at the bottom and move to the right a bit.
Resize element 37 to 50%, mirror, paste on the left below the bowl of eggs, duplicate,
move to the center by the large egg, duplicate again and move to the
right of the egg at the bottom more.
Resize element 61 to 40%, paste on the left below the yellow flower and up a bit,
duplicate, mirror, adjust.

Resize element 77 larger to 115%, being on the top layer now,
paste where you like the looks, then I took my Pick tool and pull it down and
up a bit more to get it how I liked it.
Then move the little duck above that.
Resize element 48 to 75%, paste at the upper right, duplicate, resize to
50%, paste on one side, duplicate, mirror, adjust.

Resize element 9 to 75%, apply Mura Meister Copies-Encircle, change
the first number to 14, move to just above the mask layer.

Add any other elements you would like to add.

Crop your tag to be sure no stray shadows are on the edges of your tag.
Once happy with it all, close off any backgrounds, merge visible.
Resize first, then add your copyrights and name.

That's it
Hope you enjoyed doing my tut.


Tuesday, March 7, 2017

PTU Good Luck Baby


This tut was written March 7th, 2017 for those with a basic knowledge of psp.
I am using the awesome artwork of  Arthur Crowe.
Tube is called "GOOD LUCKY BABY"
You need a license to use this art work. Please do not use without a license.
 You can find this art at his store  HERE

Supplies Needed
I used PSPX...but any of them should work.
PTU Scrap kit "Good Luck Baby" by Irish Princess Designs 

This kit is AWESOME, and it is EXCLUSIVE at Arthur Crowe's Store
to match the tube, you can get the Tube and kit Combo HERE

RD Mask Set 149_2  HERE
Check out the rest of the blog HERE
Filters
Mura Meister Copies-EncircleFont of Choice, I used bu Wicked

Drop shadow is usually V-2 H-2 Black, 50, 5, use what you prefer.
Let's get started
*Remember to add your drop shadow as you go along*

Open a new image 800x800, resize paper 6 to 85%, paste, apply your mask, delete, merge group. Resize the mask to 90% now.

Resize element 05 to 65%, click inside with your magic wand, expand by 5,
paste paper 2, invert, delete, move below the frame, paste your close up tube,
delete, select none.

Resize your tube to 75%, paste on the left side of the frame.
Apply an inner bevel to the close up tube and the full tube with these settings
Bevel Shape 2, Width 2
18, 2, 9, 10
315, 50, 30
Color White

Resize element 12 to 60%, apply Mura Meister Copies-Encircle, change
the first number to 14, move under the paper layer of the frame.

Resize element 11 to 35%, paste on the left on top of the tube layer.
Resize element 9 to 78%, paste below the paper layer of the frame.

Resize element 13 to 35%, paste on the right of the tube.
Resize element 24 to 35%, paste on the left, hiding the stems below the
wordart some, duplicate, move below to the right below the coins once pasted, free
rotate to the right at 10 degrees.
Resize element 25 to 20%, paste below the pot of gold on one side, duplicate, mirror,
adjust to the other side.
Resize element 16 to 25%, free rotate to the left at 90 degrees, paste under the coins on
the right, duplicate, mirror.
Resize element 34 to 25%, paste below the leaves on one side,
duplicate, mirror.
Resize element 7 to 14%, free rotate to the left at 25 degrees, paste by the pot of gold.
Resize element 27 to 40%, paste on the left below the tube, duplicate, resize to 70%, paste
on the right below the clover layer.
Resize element 28 to 15%, paste on the left below the wordart layer.
Resize element 10 to 25%, paste by the pot of gold.
Resize element 42 to 45%, paste below the frame on the right at the bottom,
duplicate, mirror.
Resize element 2 to 15%, free rotate to the left at 25 degrees, paste on the
right where you like, layer, duplicate, move to the top more.
Resize element 35 to 45%, paste at the bottom being on the top layer, duplicate,
mirror.

Add any other elements you would like to add.

Crop your tag to be sure no stray shadows are on the edges of your tag.
Once happy with it all, close off any backgrounds, merge visible.
Resize first, then add your copyrights and name.

That's it
Hope you enjoyed doing my tut.

Tag for Artist