Showing posts with label The Paper Shelter. Show all posts

Wednesday, August 16, 2023

FTU Lose Yourself in the Music


 This tut was written August 16th, 2023 for those with a basic knowledge of psp.

I am using the awesome artwork of ©The Paper Shelter
The tube is called Let's Get Loud
You can find this tube at The Paper Shelter Store HERE

I used PSP2020...but any of them should work.
FTU Scrap Hot Music by Designs by LK HERE  
Check out the rest of the blog  HERE
Mask of choice, I used Miz Teeques Mask 87 HERE
Check out the rest of the blog HERE
Millie's PSP Madness Template  618 HERE
Check out the rest of the blog HERE
Filter
xero-Porcelain 

Font of choice I used Back Street

Drop shadow is V -2 H -4, 50, 10, Black or use what you prefer.
Let's get started
*Remember to add your drop shadow as you go along*

Open the template, hold the Shift key and hit d to duplicate, close
the original.
Delete the credits and the dotted line around the words.
Close off the wordart for now.

Go to Image, Canvas size, 800 x 800.
Paste paper 6 above the white layer and apply your mask.

Layer 1 and layer 5, select all, float, defloat, new layer, add a paper or pattern of choice, 
I used one in my psp program called Abstract 4, sized it smaller to 50%, 
add a fat white gradient glow using Eye Candy 4000.

 Layer 2 of the template, select all, float, defloat, new layer,
paste a paper or choose a color from your tube, I used #3ca690, delete the
template layer on each one as you go along.
Go to Effects, Texture Effects, Weave with these numbers 
6, 6, 40, gap color white, weave color I used #9adacd.
Add a fat white gradient glow using Eye Candy 4000.

Layer 3 add paper 1, add the same gradient glow.

Layer 4, paste paper 4, keep selected, resize the tube to 75%, paste to the left,
delete, select none.
Add the xero filter-Porcelain.

Resize your tube to 30%, paste on the top circle.

Paste the drum set behind the tube.
Resize the electric guitar to 65%, paste on the right above the tube layer.
Resize the vinyl box to 45%, paste at the bottom by the guitar.
Resize the keyboard to 70%, paste at the bottom.
Resize the martini to 60%, paste at the bottom left.
Resize the microphone to 40%, paste at the bottom.
Resize the pink ipod to 25%, paste at the bottom.
Resize the headphone to 30%, paste at the bottom right.

Resize music notes 3 to 50%, duplicate a few times and place where you like.
Paste the disco ball on the upper right above the green layer.
Resize the boot to 50%, duplicate, paste at the bottom left.
Resize the sunglasses to 50%, paste at the bottom.
Open the wordart, leave white or change the color and add a fat gradient glow.
Resize the arrow to 50%, paste on the upper right, duplicate, mirror, paste on the left.
Paste the wire on the mask layer on the left, duplicate, move to the right.

Add any other elements you would like, make it your own.
Crop your tag to be sure no shadows or lines are on the edges.
 Then add your copyright and name.
That's it

Hope you enjoyed doing my tut.   

Monday, March 27, 2023

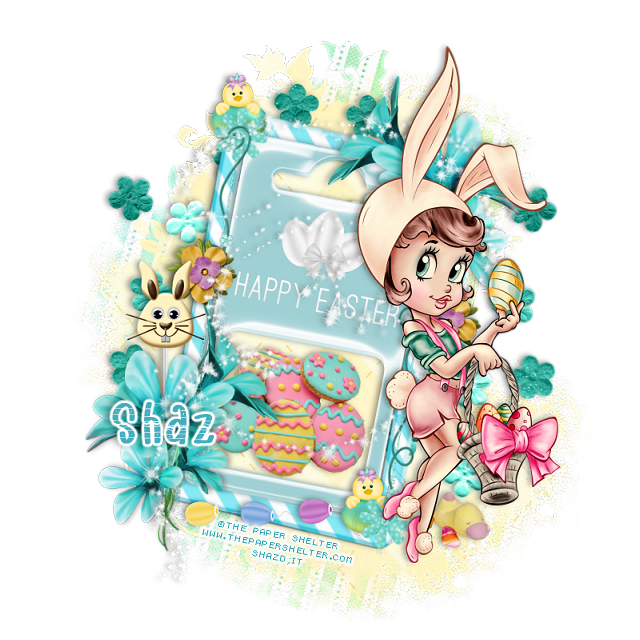
FTU Easter Surprise

 This tut was written March 27th, 2023 for those with a basic knowledge of psp.

I am using the awesome artwork of ©The Paper Shelter
The tube is called Cute Bunny Girl
You can find this tube at The Paper Shelter Store HERE

I used PSP2020...but any of them should work.
FTU Easter Sunshine by Disturbed Scraps  HERE  
Check out the rest of the blog HERE
Mask of choice, I used Vivienne's Digital Tagging Mask 32 HERE
Check out the rest of the blog HERE

Font of choice, I used Blaster Easter Ornament

Drop shadow is V -1 H -3, 35, 10, Black or use what you prefer.
Let's get started
*Remember to add your drop shadow as you go along*

This is a Quickie

Open a new image 800 x 800, paste paper 1, apply your mask, delete, merge
group, free rotate to the right at 15.
Paste paper 12, apply your mask, delete, merge group.

Resize element 32 to 65%, paste.
Resize element 29 to 65%, free rotate to the right at 11, take your Pick tool
to fit it better behind element 32.
Rotate element 23 to 80% to the left, resize to 80%, paste on the left being 
on the top layer, erase the stick part on each end, duplicate, move to the right.

Resize element 5 to 80%, paste at the upper right, duplicate, mirror move down to 
the lower left.
Resize element 36 to 25%, paste at the upper left below the small flower, duplicate, 
move down to the right below the small flower.
Resize element 4 to 30%, paste on the left center being on the top layer, duplicate, 
move to the right.
Resize element 45 to 60%, paste on the left below the blue flower.

Resize your tube to 40%, paste on the right.

Resize element 60 to 75%, paste inside the frame opening.
Resize element 43 to 25%, paste at the bottom right below the tube.
Paste element 8 below the frames to the right, free rotate to the right at 10, erase 
the ones you don't want, duplicate, mirror.
Resize element 49 to 25%, paste at the bottom.
Resize element 26 to 80%, paste below the tube layer.

Add any other elements you would like, make it your own.
Crop your tag to be sure no shadows or lines are on the edges.
 Then add your copyright and name.
That's it

Hope you enjoyed doing my tut.