
This tut was written March 26th, 2020 for those with a basic knowledge of psp.
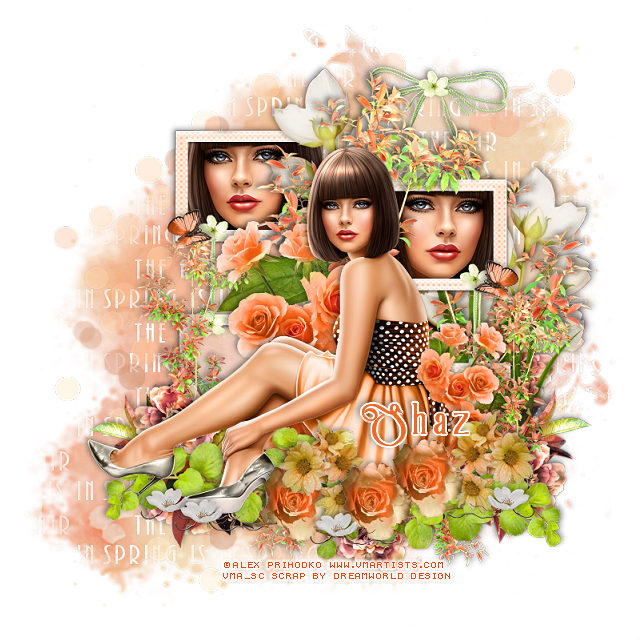
I am using the awesome artwork of Alex Prihodko
The tube is called "Nadine"
You need a license to use this tube, do not use without a license.
You can find this tube at VMArtists store HERE
Font of choice, I used Victorian Parlor Vintage
Drop shadow is usually V-2 H-2 Black, 50, 5, use what you prefer.
Let's get started
*Remember to add your drop shadow as you go along*
Open a new image 800 x 800
Resize paper 10 to 22%, paste, apply your mask, delete, merge group,
mirror.
Resize your tube to 45%, paste to the bottom.
Resize frame 16 to 18%, paste on the right and up behind the tube,
duplicate, move
to the left and down and below the top frame layer,
erase the hanger part on top of the left one.
Click inside the frames, expand by 5, paste the resized paper 10, invert,
delete, keep selected.
Resize your tube to 70%, paste in one frame, mirror and paste in the other
frame, select none.
Resize element 40 to 25%, paste above the frame on the left and behind
the tube, duplicate, mirror, erase the large green leaf.
Resize element 11 to 30% paste below the tube on the left, erase the rock
that is showing, duplicate, mirror, move above the white flower on
the right, erase any rock that might be showing.
Resize element 32 to 30%, paste behind the tube on the frames, duplicate,
mirror, move below the paper layer of the frames on the right above
the grass layer and down some, erase any stem showing at the bottom.
Duplicate one of them again, resize to 50%, move above the frame and to the
lower right, duplicate, mirror, move below the tube on the left.
Resize element 68 to 10%, free rotate to the left at 90 degrees, mirror, paste
below the tube to the left, duplicate, move above the tube, mirror, resize to
60%, move by the tube.
Resize element 22 to 15%, paste at the bottom below the tube on the left,
duplicate, mirror.
Resize element 60 to 5%, paste at the bottom above the tube, duplicate
two more times, place on each side.
Resize element 12 to 5%, paste between the other flowers, duplicate,
move over more.
Resize element 02 to 10%, paste at the lower right above the frame, duplicate,
mirror, adjust on the left.
Resize element 44 to 25%, paste on the mask toward the upper left,
duplicate a couple more times and move one down and the other to
the right.
Resize element 55 to 5%, paste below the other flowers at the bottom,
duplicate a couple more times and move around.
Resize element 48 to 5%, paste at the bottom above the tube on her shoes,
duplicate, move over a little, duplicate again, move more to the right.
Resize element 61 to 5%, paste on the left, duplicate, mirror.
If you want some wordart saying on your mask, type out what you want,
paste above mask, apply Mura Meister Copies-Tiling, gap on 2, then select
your mask, select all, float, defloat, invert, being on the wordart hit, delete,
select none.
Change the blend mode or lower the opacity if you like.
Add any other elements that you would like, make it your own.
Always readjust your mask and elements how you like them before you
merge your tag, sharpen once.
Crop your tag to make sure no shadows or anything on the edges, merge visible.
Crop your tag to make sure no shadows or anything on the edges, merge visible.
Then add your copyright and name.
That's it
Hope you enjoyed doing my tut.
Hello Shaz
ReplyDeleteThank you for this great tut
I love it
I know I posted the tag in a forum we are in
but I just also wanted to post it here too
https://media.fotki.com/2v2HfmkfzxwDe7d.png
Hugs , Betsy E.
Betsy E. thank you so much this is beautiful. love it :)
ReplyDelete