

This tut was written December 19, 2022 for those with a basic knowledge of psp.
I am using the awesome artwork of ©Elegancefly_Grianna
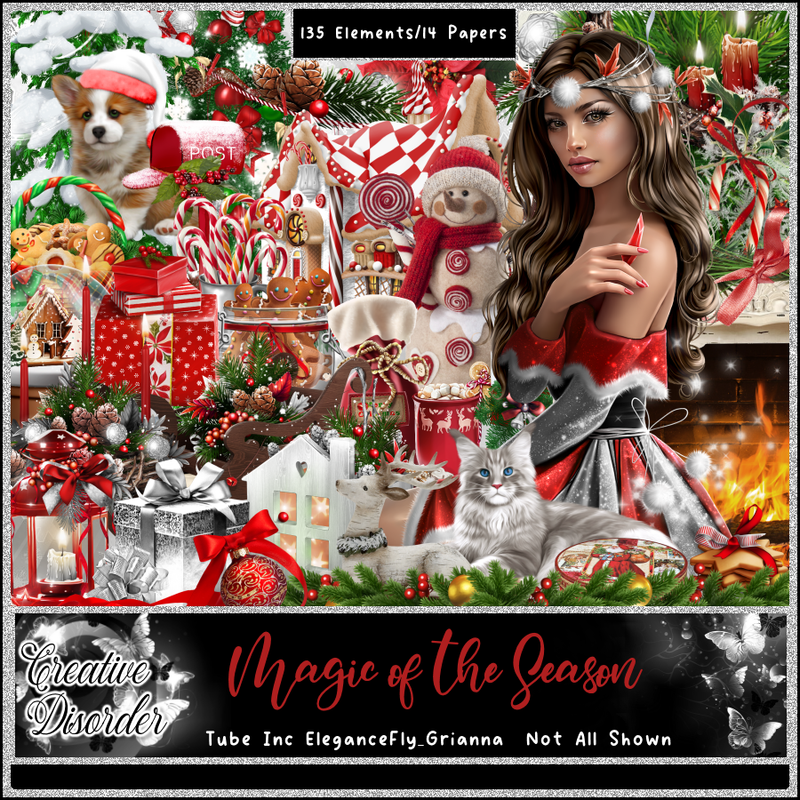
You need a license to use this tube, do not use without a license.
Tube by ©Elegancefly_Grianna is included in the kit.
I used PSP2020...but any of them should work.
Kit contains 135elements, 14 papers and ©Elegancefly_Grianna.
Check out her blog HERE
Template 14 by Adrienne's Designs HERE
Check out the rest of the blog HERE
Mask of choice, I used DD Mask 2019 Xmas Mask HERE
Check out the rest of the blog HERE
Filters
EyeCandy 4000-Glass
Mura Meister Copies-Encircle
Font of choice, I used Cimero Pro
Drop shadow is V -1 H -4, 50, 10, or use what you prefer.
Let's get started
*Remember to add your drop shadow as you go along*
Open the template, hold the shift key and hit D to duplicate, close the original,
go to Image, Canvas size, 800 x 800, paste paper 4 on the bottom layer above the
white background, apply your mask, delete, merge group.
Delete the credits and all the wordart.
Select layer 11, paste paper 5, invert, delete, delete the template layer as you go along.
Apply Eye Candy 4000, Glass with these settings on each layer as well.
10.65, 75
30, 35, 50, 30, 0, 50 color on white.
Lighting
263, 57
100, 40, 0, 71
Bevel profile, Button
Layer 7, paste paper 11, invert, delete, apply the glass settings.
Layer 1, paper 13, invert, delete, glass settings.
Move layer 4 below layer 5 and merge with layer 3, select, paste paper 6,
invert, delete, no glass with this one, keep selected, resize your tube
to 50%, paste in one side, mirror the tube and paste in the other side, delete, both,
select none.
Merge the two tube together, duplicate, go to Adjust, Blur, Gaussian blur, number
on 5, change the blend mode to Overlay or one you prefer.
Merge layer 6 down with 5, change the color to white and add noise at 100%.
Layer 10, paper 11, invert, delete, glass settings.
Layer 8, paper 14, invert, delete, glass.
Resize element 35 to 35%, flip, apply Mura Meister Copies-Encircle, first 3
numbers on 24, 75, 55, move to the bottom layer above the mask.
Resize element 60 to 20%, duplicate, close one, apply Mura Meister Copies,
first 3 numbers on 24, 76, 56, paste above the greenery circle.
Open the closed one and move to the upper left and right corners.
Resize element 24 to 65%, paste a little off center being on the top layer now.
Resize element 128 to 75%, paste on the tree.
Resize element 46 to 45%, paste at the lower left.
Resize your tube to 25%, paste to the right more.
Resize element 78 to 25%, paste on the right behind the tube.
Resize element 77 to 17%, paste at the bottom above the tube.
Resize element 8 to 25%, paste on the right below the tray of food, duplicate,
move to the left of the tube.
Resize element 35 to 40%, paste at the bottom above the gift on the right,
duplicate, move above the sled on the left, duplicate, move to the center more.
Resize element 28 to 25%, paste at the bottom being on top.
Resize element 30 to 20%, paste at the lower left.
Resize element 10 to 15%, paste by the cat, duplicate, move where you like.
Resize element 17 to 20%, paste at the bottom.
Resize element 15 to 10%, paste by the cup.
Resize element 99 to 25%, paste at the lower right on the greenery.
Resize element 111 to 35%, paste below the sled on the left, duplicate, mirror.
Resize element 42 to 15%, paste on the tree top.
Resize element 18 to 20%, paste below the cat on the left.
Resize element 66 to 25%, paste on the cat's head.
Duplicate, apply Mura Meister Copies-Encircle with the first 3 numbers on
24, 71, 55, move below the red rectangle layer.
Resize element 49 to 25%, paste at the bottom below the cupcake.
Resize element 50 to 20%, mirror, paste at the bottom.
Resize element 94 to 20%, paste at the bottom below the ornament.
Add any other elements that you would like, make it your own.
Always readjust your mask and elements how you like them before you
merge your tag, resize, sharpen.
Crop your tag to be sure no shadows or lines are on the edges.
Then add your copyright and name.
That's it
Hope you enjoyed doing my tut.
No comments:
Post a Comment