Tuesday, February 26, 2019

PTU Mint Dream


This tut was written Feb 26th, 2019 for those with a basic knowledge of psp.
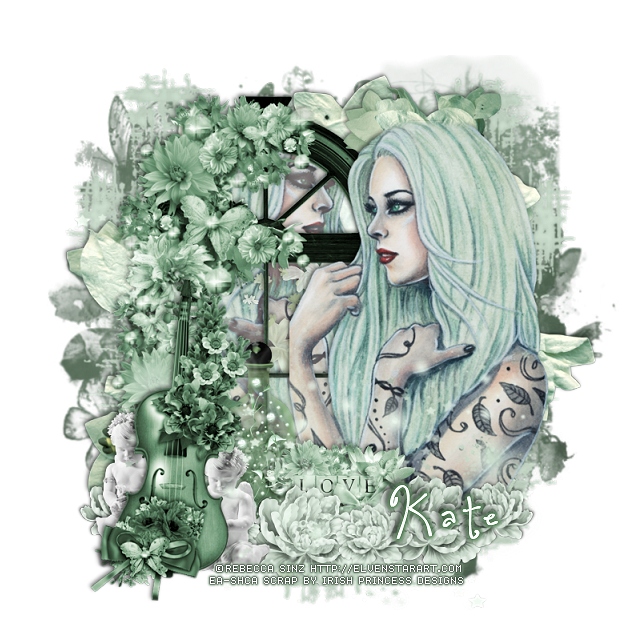
I am using the awesome artwork of  Rebecca Sinz
The tube is  "Mint
You need a license to use this tube, do not use without a license.
You can find this art at her Store  HERE

I used PSPX...but any of them should work.
PTU matching kit Mint Dream by Irish Princess Designs HERE, HERE and HERE
MizTeeques Mask 246 HERE
Check out the rest of the blog HERE
Filters
xero-Alienmist

Font of choice,  I used One Starry Night

Drop shadow is usually V-2 H-2 Black, 50, 5, use what you prefer.
Let's get started
*Remember to add your drop shadow as you go along*

Open a new layer 800 x 800
Select all, add a new layer, paste paper 13, into selection, apply your mask, 
delete, merge group, select none.  Resize the mask larger to 110%.
Adjust to fit your tag later.
Resize element 12 to 90%, paste on the mask on the right, duplicate, mirror.
Resize element 5 to 85%, paste next.

Resize element 103 to 75%, paste to the left. Take your free hand tool, draw around
the frame, resize paper 27 to 80%, paste below the window, invert, delete, keep 
selected.  Resize your tube to 85%, paste below the window how you like, delete,
select none.
Apply the xero filter-Alienmist with the default settings.

Resize your tube to 85%, mirror, paste on the right above the frame.
Take your eraser and just hit the edges at the top of the tube lightly.

Resize element 146 to 55%, paste on the left above the frame.
Resize element 4 to 35%, free rotate to the right at 90 degrees, mirror, paste
at the upper right below the tube.
Resize element 149 to 20%, paste at the bottom above the tube, duplicate,  move 
over more, duplicate again, resize smaller to 65%, duplicate three more times, 
place on each side of the larger flowers.

Resize element 101 to 85%, paste below the violin layer.
Resize element 105 to 25%, paste below the flowers about center above the tube layer.
Resize element 7 to 25%, paste at the bottom below the sparkle layer by the
violin, duplicate move to the left behind the violin.

Resize element 144 to 45%, paste below the window frame.
Resize element 141 to 35%, paste below the love sign to the right of the violin a little.

Add any other elements that you like, make your own.
Adjust all the elements before merging your tag.

Once happy, close off any background you had.
 Crop your tag to get rid of any stray edges, merge visible.
Resize, sharpen, add your Copyright and name.

That's it
Hope you enjoyed doing my tut.

PTU Suzy


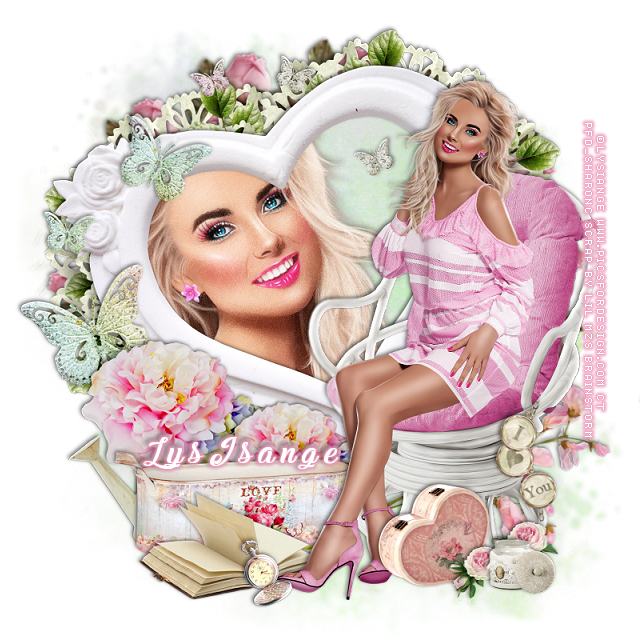
This tut was written Feb 26th, 2019, for those with a basic knowledge of psp.
I am using the awesome tube by artist  LysIsange
Tube is called "Suzy"
She comes in several different colors.
 You need a license to use this art, please do not use without a license.
You can get this tube at the PFD store HERE

I used PSPX...but any of them should work.
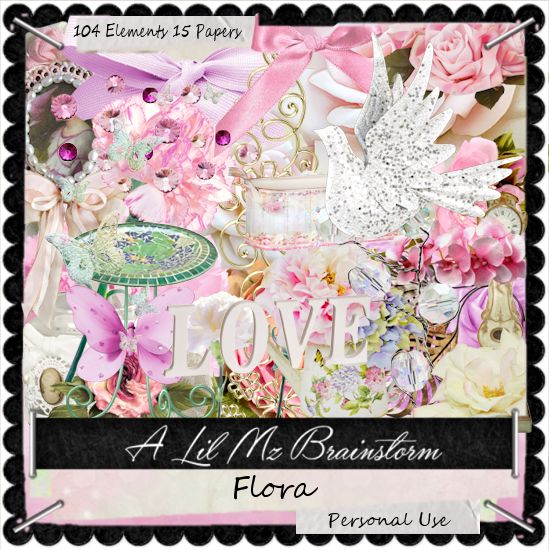
PTU I paired it with Flora kit, exclusive at her store by LMB  HERE
Dragonflypsp Mask 0035  HERE
Check out the rest of the blog HERE
Filters
xero-Soft Mood, Artworx
Mura Meister Copies

Font of choice,  I used Melancholight

Drop shadow is usually V-2 H-2 Black, 50, 5, use what you prefer.
Let's get started
*Remember to add your drop shadow as you go along*

Open a new image 800 x 800
Paste paper 8, apply your mask, delete, merge group.
Always readjust your mask to fit your tag better once you are done, before you merge.

Resize element 1 to 20%, paste, click inside with your magic wand, expand
by 5, paste paper 9, invert, delete, keep selected.
Resize your tube to 75%, mirror, paste in the frame to the left more, delete,
select none.
Duplicate your tube, go to Adjust, Blur, Gaussian blur, number on 4, change
the blend mode to Screen.  Apply the xero filter, Soft Mood first, then 
Artworx, merge down.

Resize element 31 to 40%, apply Mura Meister Copies, first number on 14, move below
the paper layer of the frame, adjust.
Paste element 29 on the flower circle and adjust to the right and up how you like,
duplicate, mirror, do the same on the left with adjusting.
Go back to the flower circle and take your Pick tool to adjust it more how you like.

Resize your tube to 27%, paste on the right above the frame layer.

Resize element 56 to 55%, paste below the tube layer to the left.
Resize element 79 to 40%, paste at the bottom below the tube.
Resize element 75 to 50%, paste at the lower left below the long basket element,
duplicate, resize to 75%, move to the right more.

Resize element 26 to 15%, paste at the bottom above the book.
Resize element 35 to 25%, paste at the bottom above the tube layer.
Paste element 5 on the frame on the left, duplicate, mirror, leave one butterfly in
the frame by the tube and erase all others.

Resize element 72 to 55%, free rotate to the right at 40 degrees, paste
behind the tube at the lower right how you like.

Resize element 68 to 55%, paste on the chair, erase the top chain part.
Resize element 37 to 15%, paste at the lower right being on the top layer, duplicate,
move over and below the first one.
Resize element 81 to 15%, paste by the flowers.

Add any other elements you would like, make it your own.
Always remember to adjust the elements before merging to get them like you like.

Once happy with your tag, close off any background, crop your tag to make
sure there are no stray edges, merge visible, resize first.
Add your copyrights and name.

That's it
Hope you enjoyed doing my tut.
Sunday, February 24, 2019

PTU Chirstmas Morning


This tut was written Feb 22nd, 2019, for those with a basic knowledge of psp.
I am using the awesome tube by artist  LysIsange
Tube is called "Christmas Morning" CU/PU
She comes in four colors
 You need a license to use this art, please do not use without a license.
You can get this tube Exclusive at Lys store HERE

I used PSPX...but any of them should work.
PTU matching kit Christmas Morning Exclusive by LMB  HERE
MizTeeques Mask 222  HERE
Check out the rest of the blog HERE
Filters

Font of choice,  I used Aquarelle

Drop shadow is usually V-2 H-2 Black, 50, 5, use what you prefer.
Let's get started
*Remember to add your drop shadow as you go along*

Open a new image 800 x 800
Paste paper 11, apply your mask, delete, merge group, merge down.
Resize your mask larger to 115 or 120%.

Resize element 72 to 95%, paste on the mask.
Paste element 77 at the bottom of the window.

Resize your tube to 25%, paste on the rug and to the left more.

Resize element 58 to 30%, paste on the rug to the right.
Resize element 92 to 50%, paste behind the tube to the right.
Paste element 66 at the top below the window, add a dark pink drop shadow.
Resize element 1 to 30%, paste on the stool.
Resize element 40 to 25%, paste on the rug above the book layer.
Resize element 32 to 25%, paste on top of the books.

Paste element 5 at the top below the clouds layer, erase any showing on the
sides of the windows.
Resize element 4 to 15%, paste at the bottom above the tube, duplicate,
resize smaller to 75%, paste over a little to the left.
Resize element 76 to 60%, paste behind the stool.
Resize element 67 to 15%, paste below the window on the frame part where you like.

Add any other elements you would like, make it your own.
Always remember to adjust the elements before merging to get them like you like.

Once happy with your tag, close off any background, crop your tag to make
sure there are no stray edges, merge visible, resize first.
Add your copyrights and name.

That's it
Hope you enjoyed doing my tut.