

This tut was written December 13th, 2021 for those with a basic knowledge of psp.
I am using the awesome artwork of Alex Prihodko
The tube is "Glass of Champagne"
I bought mine when Alex was still at Verymany
You need a license to use this tube, do not use without a license.
You can find this art at VMArtists store HERE
The store is down so I cannot link directly to the tube.
I used PSP2020...but any of them should work.
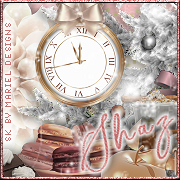
FTU kit Happy New Year 2021 by Mariel Designs HERE
This is on FB, you will see the preview, look to the right there is a link, then you
will have to scroll down until you come to the kit.
Thank you for sharing with us Mariel.
Template 877 by Millies' PSP Madness HERE
Check out the rest of the blog HERE
Scrappy Bit of Fun Mask 251 HERE
Check out the rest of the Blog HERE
Filter
Mura Meister Copies-Encircle
Font of choice, I used Stealing Hearts
Drop shadow is V -2 H 4, 40, 10, or use what you prefer.
Let's get started
*Remember to add your drop shadow as you go along*
Open the template, hold the shift key and hit the letter D to duplicate,
close the original.
Go to Image, Canvas size 800 x 800
Delete the credits and layers 13, 12, 11
Paste paper 4 on the bottom layer, apply your mask, delete, merge group.
Merge layer 1 and 2 of the template together, select all, float, defloat, paste paper 5,
invert, delete, select none.
Select layer 3, paste paper 4, invert, delete.
Layer 5, paste paper 3 so the glitter shows at the bottom, invert, delete, select
none, duplicate, flip, erase the paper part at the bottom so the glitter shows.
Layer 5, paste paper 3, invert, delete.
Move layer 9 down below 8 and merge 9 and 7 together, select all, float, defloat,
paste paper 4, invert, delete, select none.
Merge layer 10 and 8 together.
Paste element 97 center above the frames.
Paste element 92 below the tree layer above the glitter frames, erase some on
each end.
Resize element 29 to 25%, paste at the upper left behind the cityscape.
Resize frame 1 to 65%, paste on the big circle on the right, duplicate, move down
on the circle on the left.
Resize your tube to 45%, paste to the right above the tree layer.
Resize element 57 to 15%, paste, apply Mura Meister Copies-encircle, first 3
numbers on 22, 47, 50, move below the large circle at the upper right, duplicate,
mirror, flip, move down behind the circle at the lower left.
Resize element 7 to 25%, paste at the bottom below the tube.
Resize element 16 to 25%, paste at the bottom above the tube.
Resize element 2 to 35%, paste at the bottom above the gift box.
Resize element 23 to 25%, paste below the champagne bucket.
Resize element 5 to 20%, paste behind the apple to the left.
Resize element 8 to 40%, paste at the lower right.
Resize element 6, to 10%, paste at the bottom.
Resize element 85 to 10%, paste at the bottom.
Resize element 104 to 75%, paste on the left, erase the number 1, draw around one
of the 2s and paste where the 1 was, merge
down, then add a white fat gradient glow or a white background of choice.
Resize element 17 to 30%, paste below the music notes.
Paste element 36 on the mask layer at the upper left, duplicate, move down on
the lower right and above the 2 pink frames.
Paste element 101 above the tube layer.
Resize element 37 to 75%, paste behind the silhouette.
Resize element 21 to 15%, paste at the bottom by the bucket, duplicate, move over
below the silhouette.
Resize element 57 to 30%, paste on the lower right behind the hat, duplicate,
move to the left below the tree layer.
Add any other elements that you would like, make it your own.
Always readjust your mask and elements how you like them before you
merge your tag, resize, sharpen.
Crop your tag to be sure no shadows or lines are on the edges.
Then add your copyright and name.
That's it
Hope you enjoyed doing my tut.
Awesome Tut!
ReplyDeleteThank you :)
ReplyDelete