
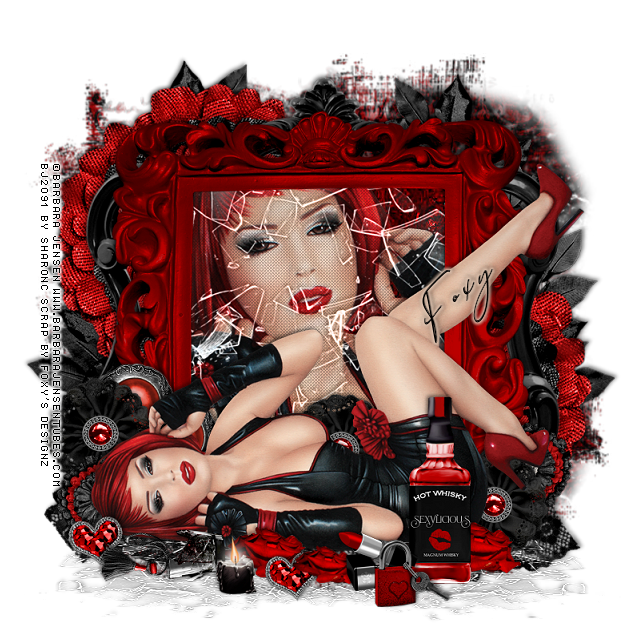
This tut was written April 10th, 2019 for those with a basic knowledge of psp.
I am using the awesome artwork of "Barbara Jensen"
Tube is "41-1" Layered. The tube is not included with the kit.
You need a license to use this tube, do not use without a license.
You can find this tube at her store HERE
I used PSPX...but any of them should work.
Filters
Screen Works-Light Gauze
Screen Works-Light Gauze
Font of choice, I used Sottalica
Drop shadow is usually V-2 H-2 Black, 50, 5, use what you prefer.
Let's get started
*Remember to add your drop shadow as you go along*
Open a new image 800 x 800
Paste paper 3, apply your mask, delete, merge group.
Resize a little larger to 110% or so.
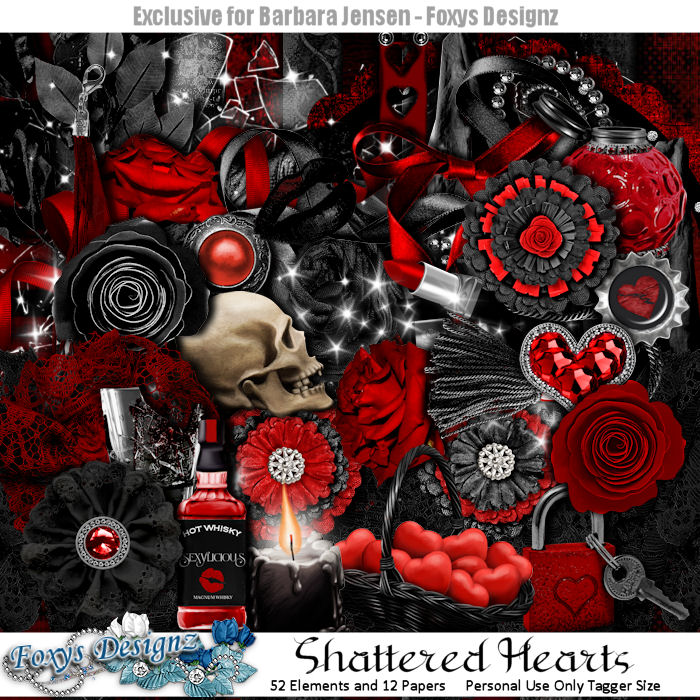
Resize element 48 to 85%, paste on the mask layer.
Resize element 49 to 70%, paste on the black frame.
Click inside with your magic wand, expand by 5, paste paper 4 below the red
frame, invert, delete.
Keep selected, free rotate your close up tube to the right at 90 degrees,
paste in the frame, delete, select none.
Duplicate the close up, go to Adjust, Blur, Gaussian blur, number on 4, change the
blend mode to Hard Light.
Apply the Screen Works Filter-Light Gauze, lower the opacity to 30, merge down.
Select the red frame and click inside with the magic wand again, paste
element 28, invert, delete, select none.
Change the blend mode to Luminance(L).
Paste your tube at the bottom on the red frame.
Paste element 28, take your free hand tool, hold the shift key down and
drag the top square on one side down, then the other until flat.
Move to the bottom under the tube, duplicate, mirror, adjust to your liking.
Resize element 92 to 90%, paste on the mask layer at the upper left, duplicate,
move down to the lower right.
Resize element 30 to 20%, free rotate to the left at 90 degrees, paste at the bottom
in front of the tube where you like.
Resize element 41 to 50%, paste at the lower right above the tube.
Resize element 36 to 25%, paste by the bottle.
Resize element 15 to 25%, paste at the lower left above the glass.
Resize element 6 to 25%, paste below the tube about center, duplicate a couple of
times, move one right and the other to the left.
Resize element 22 to 25%, paste at the bottom below the glass, duplicate, move
to the right below the bottle, duplicate once more, resize to 75%, move back
by the other one and off set a little.
Resize element 1 to 25%, paste on the left below the tube by her head,
duplicate, move to the right below the flower behind her shoe.
Resize element 33 to 20%, mirror, paste at the bottom above the tube by the glass.
Paste element 39 on the mask on the right, duplicate, mirror, adjust.
Resize element 34 to 25%, paste at the bottom by the lipstick.
Resize element 21 to 50%, paste on the left on the frame behind the flowers,
duplicate, move over a little.
Resize element 11 to 50%, paste at the bottom above the frame layer so a little
shows on one side, duplicate, mirror.
Resize element 8 to 20%, free rotate to the left at 10 degrees, paste at the
lower left above the tube, duplicate, move to the roses and move between them.
Paste paper 3, apply your mask, delete, merge group.
Resize a little larger to 110% or so.
Resize element 48 to 85%, paste on the mask layer.
Resize element 49 to 70%, paste on the black frame.
Click inside with your magic wand, expand by 5, paste paper 4 below the red
frame, invert, delete.
Keep selected, free rotate your close up tube to the right at 90 degrees,
paste in the frame, delete, select none.
Duplicate the close up, go to Adjust, Blur, Gaussian blur, number on 4, change the
blend mode to Hard Light.
Apply the Screen Works Filter-Light Gauze, lower the opacity to 30, merge down.
Select the red frame and click inside with the magic wand again, paste
element 28, invert, delete, select none.
Change the blend mode to Luminance(L).
Paste your tube at the bottom on the red frame.
Paste element 28, take your free hand tool, hold the shift key down and
drag the top square on one side down, then the other until flat.
Move to the bottom under the tube, duplicate, mirror, adjust to your liking.
Resize element 92 to 90%, paste on the mask layer at the upper left, duplicate,
move down to the lower right.
Resize element 30 to 20%, free rotate to the left at 90 degrees, paste at the bottom
in front of the tube where you like.
Resize element 41 to 50%, paste at the lower right above the tube.
Resize element 36 to 25%, paste by the bottle.
Resize element 15 to 25%, paste at the lower left above the glass.
Resize element 6 to 25%, paste below the tube about center, duplicate a couple of
times, move one right and the other to the left.
Resize element 22 to 25%, paste at the bottom below the glass, duplicate, move
to the right below the bottle, duplicate once more, resize to 75%, move back
by the other one and off set a little.
Resize element 1 to 25%, paste on the left below the tube by her head,
duplicate, move to the right below the flower behind her shoe.
Resize element 33 to 20%, mirror, paste at the bottom above the tube by the glass.
Paste element 39 on the mask on the right, duplicate, mirror, adjust.
Resize element 34 to 25%, paste at the bottom by the lipstick.
Resize element 21 to 50%, paste on the left on the frame behind the flowers,
duplicate, move over a little.
Resize element 11 to 50%, paste at the bottom above the frame layer so a little
shows on one side, duplicate, mirror.
Resize element 8 to 20%, free rotate to the left at 10 degrees, paste at the
lower left above the tube, duplicate, move to the roses and move between them.
Add any other elements that you would like, make it your own.
Always adjust your mask and everything else before you merge your tag.
Always adjust your mask and everything else before you merge your tag.
Once happy, close off any background you had.
Crop your tag to get rid of any stray edges, merge visible.
Resize, sharpen, add your Copyright and name.
That's it
Hope you enjoyed doing my tut.
Very cool tut-thank you for sharing
ReplyDeleteYou are very welcome glad you liked it :)
ReplyDelete