

This tut was written Dec 15th, 2019 for those with a basic knowledge of psp.
I am using the awesome artwork of Alex Prihodko
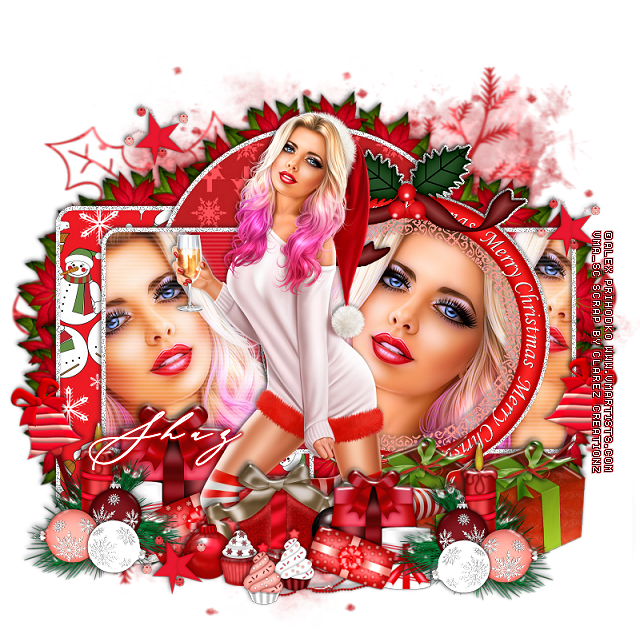
The tube is called "Festive Mood 2"
You need a license to use this tube, do not use without a license.
You can find this tube at VMArtists store HERE
Font of choice, I used Month Glade
Drop shadow is usually V-2 H-2 Black, 50, 5, use what you prefer.
Let's get started
*Remember to add your drop shadow as you go along*
Open your template, hold the shift key and hit the letter d to
duplicate, close the original.
Delete the copyright, and all the wordart and layer 6.
Go to Image, Canvas size and make it 800 x 800 or a size you prefer.
Select all, add a new layer, paste paper 11 into selection, select none,
apply your mask, delete, merge group.
As always adjust your mask once your tag is completed.
Starting with layer 1 of the template, select all, float, defloat, paste
paper 1, invert, delete, keep selected and go to Selections, Modify,
Select selection borders, select both sides checked, width at 3, anti-alas checked,
add a new layer, fill with white, select none.
Add noise at 100%.
You will do this on each layer of the templates to make frames on each one.
Layer 2, select all, float, defloat, paste paper 11, invert, delete.
Add the same type of white frame like before.
Layer 3, select all, float, defloat, add a new layer, paste paper 7 into
selection, same frame added.
Go to Effects, Texture Effects, Blinds with these settings
5, 25, both boxes checked and color white.
Will come back to this later to add the tubes.
Layer 4, select all, float, defloat, new layer, fill with white and add noise.
Layer 5, select all, float, defloat, paste paper 24, move how you like,
invert, delete, select none.
Paste element 44 on this layer, erase the bells hanging below,
take your free hand tool, draw around the frame, paste your tube, invert,
delete, select none, move the tube below the frame.
Apply the xero filter-Porcelain.
Resize your tube to 42%, paste on the left above the frame.
Ok go back to the red rectangle, select all, float, defloat, paste your tube on
the right, adjust to your liking, duplicate, mirror, adjust again, invert,
delete, select none, merge the tubes together, duplicate.
Go to Adjust, Blur, Gaussian blur, number on 4, change the blend mode to
Soft Light or one you prefer, merge down.
Apply the xero filter-Porcelain.
Watch your edges for any shadowing and erase.
Go to Effects, Texture Effects, Blinds with these settings
duplicate, close the original.
Delete the copyright, and all the wordart and layer 6.
Go to Image, Canvas size and make it 800 x 800 or a size you prefer.
Select all, add a new layer, paste paper 11 into selection, select none,
apply your mask, delete, merge group.
As always adjust your mask once your tag is completed.
Starting with layer 1 of the template, select all, float, defloat, paste
paper 1, invert, delete, keep selected and go to Selections, Modify,
Select selection borders, select both sides checked, width at 3, anti-alas checked,
add a new layer, fill with white, select none.
Add noise at 100%.
You will do this on each layer of the templates to make frames on each one.
Layer 2, select all, float, defloat, paste paper 11, invert, delete.
Add the same type of white frame like before.
Layer 3, select all, float, defloat, add a new layer, paste paper 7 into
selection, same frame added.
Go to Effects, Texture Effects, Blinds with these settings
5, 25, both boxes checked and color white.
Will come back to this later to add the tubes.
Layer 4, select all, float, defloat, new layer, fill with white and add noise.
Layer 5, select all, float, defloat, paste paper 24, move how you like,
invert, delete, select none.
Paste element 44 on this layer, erase the bells hanging below,
take your free hand tool, draw around the frame, paste your tube, invert,
delete, select none, move the tube below the frame.
Apply the xero filter-Porcelain.
On the frame go to Selections, Modify,
Select selection borders, select both sides checked, width at 3, anti-alas checked,
add a new layer, fill with white, select none.
Add noise at 100%, move below the paper layer of the frame.
Resize your tube to 42%, paste on the left above the frame.
Ok go back to the red rectangle, select all, float, defloat, paste your tube on
the right, adjust to your liking, duplicate, mirror, adjust again, invert,
delete, select none, merge the tubes together, duplicate.
Go to Adjust, Blur, Gaussian blur, number on 4, change the blend mode to
Soft Light or one you prefer, merge down.
Apply the xero filter-Porcelain.
Watch your edges for any shadowing and erase.
Go to Effects, Texture Effects, Blinds with these settings
5, 25, both boxes checked and color white.
Resize element 12 to 75%, flip, apply Mura Meister Copies, Encircle, first
number on 26, move to the mask layer to one side, take your Pick tool and
adjust behind your tag, duplicate, mirror.
Paste element 48 on the mask layer at the top, duplicate about 5 more
times and move to each side on two of them and down more with the other two.
Resize element 43 to 50%, paste at the bottom above the tube.
Resize element 15 to 65%, paste at the lower left below the tube, duplicate,
move above the ornament layer, resize to 75% and move to the right a little.
Apply Eye Candy 4000, glass to these gifts and ornament layers with these settings.
3, 75
30, 35, 50, 0, 50
color on white
Lighting 84, 54
100, 0, 72
Bevel Profile is Button
Resize element 17 to 50%, paste at the bottom right being on the top layer,
duplicate, mirror, move to the left.
Apply Eye Candy 4000-Glass with the same settings.
If you don't have this you can leave as is or maybe apply a bevel setting.
Resize element 5 to 50%, paste on the lower right below the tube layer,
duplicate, move more to the left behind the tube.
Resize element 50 to 20%, paste at the bottom being on the top layer.
Resize element 1 and 30 to 25%, paste at the bottom.
Resize element 16 to 25%, paste at the bottom left, duplicate two more times,
move one to the upper left, the other one to the right and down where you like.
Resize element 14 to 50%, free rotate to the right at 20 degrees, paste below
the gift at the lower right, duplicate, mirror.
Ava is easy, just resize element 48 to a size you want, then the frame with
the tube to fit above it.
Ava is easy, just resize element 48 to a size you want, then the frame with
the tube to fit above it.
Add any other elements that you would like, make it your own.
Always readjust your mask and elements how you like them before you
merge your tag, sharpen once.
Crop your tag to make sure no shadows or anything on the edges, merge visible.
Then add your copyright and name.
That's it
Hope you enjoyed doing my tut.
No comments:
Post a Comment