Wednesday, September 16, 2020

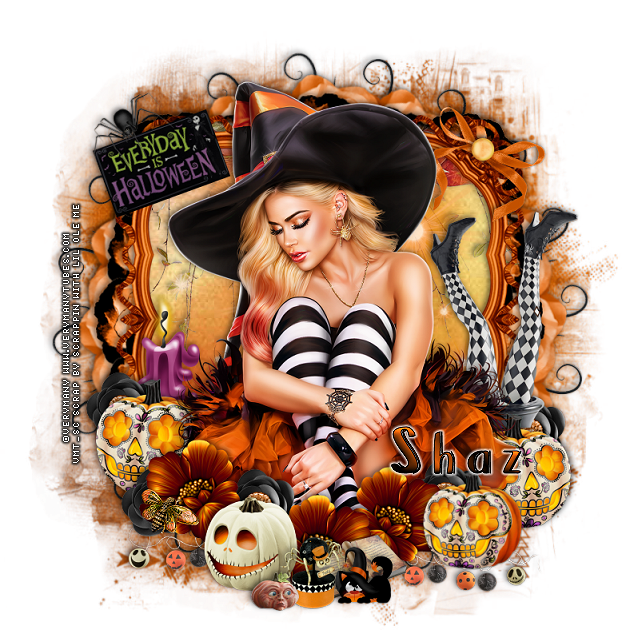
FTU Everyday is Halloween


This tut was written September 16th, 2020 for those with a basic knowlewdge of psp.
I am using the awesome artwork of Verymany
The tube is called "Witch 11"
You need a license to use this tube, do not use without a license.
You can find this tube at Verymany store  HERE

I used PSPX...but any of them should work.
FTU kit Cackles and Candies by Scrappin with Lil Ole Me HERE
You will have to register with her store first
Apparently the store no longer exist, and I don't know where else you can get the kit.
Mask of choice, I used MizTeeque's Mask 284  HERE
Check out the rest of her blog HERE
Filters
Murs Meister Copies-Encircle

Font of choice,  I used Brunella

Drop shadow is  V-3 H-5 Black, 50, 10, use what you prefer.
Let's get started
*Remember to add your drop shadow as you go along*

Open a new image 800 x 800 or a size you prefer, can always resize later.
Paste paper 1, apply your mask, delete, merge group, duplicate,  change
the blend mode to Hard Light, merge down.

Resize element 30 to 85%, paste, click inside with your magic wand,
expand by 5, paste paper 8, move where you like, invert, delete, select none.

Resize element 25 to 30%, apply Mura Meister Copies-Encircle, first number 
on 20, move below the paper layer of the frame.
Resize element 27 to 30%, apply Mura Meister Copies-Encircle, first number
on 16, move above the black tree circle layer.
Resize element 19 to 27%, apply Mura Meister Copies-Encircle, first 
number on 16, move above the flower circle.
Remember to adjust to fit behind your frame how you like.

Take element 19, resized to 27%,  paste below the paper layer of the frame at
the upper left, duplicate, mirror.

Resize your tube to 50%, paste above the frame.

Paste element 66 below the frame, and adjust so the veins shows, erase any
part at the top outside the frame.
Resize element 23 to 45%, paste on the right below the tube.
Resize element 75 to 25%,  mirror, paste at the lower right below the tube, duplicate,
resize smaller to 85%, mirror, move over a little.
Duplicate the larger pumpkin, mirror, move to the left below the tube.

Resize element 14 to 20%, paste at the lower left.
Resize element 21 to 25%, paste at the bottom below the pumpkin, duplicate,
move over a little more to the left, duplicate, mirror, move to the 
left side of the pumpkin.
Resize element 16 to 15%, paste below the flowers by the tube hand, duplicate
a few times and move around how you like.

Resize element 64 to 15%, paste at the bottom being on the top layer.
Resize element 17 to 30%, paste at the bottom below the other elements,
duplicate, mirror, erase any you don't want.
Resize element 18 to 25%, free rotate to the left at 20 degrees, paste on the
frame at the upper left.

Resize element 7 to 25%, paste on the left above the frame.
Resize element 8 to 20%, paste at the bottom below the little spider box element.
Resize element 9 to 10%, paste at the bottom being on the top layer.

Resize element 45 to 35%, paste at the upper left on the sign.
Resize element 26 to 25%, mirror, paste on the frame at the upper right below 
the tube layer.
Resize element 28 to 5%, paste on the bow.

Resize element 36 to 15%, paste at the lower left on the flower.
Resize element 73 to 15%, paste at the bottom.
Paste element 32 below the frame layer behind the tube.

Add any other elements that you would like, make it your own.
Always readjust your mask and elements how you like them before you
 merge your tag, sharpen once.
Crop your tag to make sure no shadows or anything on the edges

 Then add your copyright and name.

That's it

Hope you enjoyed doing my tut. 

Monday, September 14, 2020

FTU Sweet Treat


This tut was written September 14th, 2020 for those with a basic knowlewdge of psp.
I am using the awesome artwork of Veleri
Tube is called "Cute Hampster"
You need a license to use this tube, do not use without a license.
You can find this tube at PFD store  HERE

I used PSPX...but any of them should work.
FTU kit Little Treat by  Création Fleurdelys  HERE
Check out the rest of the blog HERE
DD Assorted Mask 5 HERE
Has been brought to my attention the link it no longer valid for the mask,
so use one you like.
You can check out her blog HERE
Filters
Mura Meister Copies-Encircle

Font of choice,  I used Copperplate Light for the name

Drop shadow is  V-2 H-2 Black, 50, 10, use what you prefer.
Let's get started
*Remember to add your drop shadow as you go along*

Open a new image 800 x 800 or a size you prefer.
Paste paper 3, apply your mask, delete, merge group,
duplicate, change the blend mode to Multiply, merge down.
Duplicate again, mirror, merge down.

Resize frame 5 to 60%, paste, click inside with your magic wand, expand by
5, paste paper 5, invert, delete, select none.
Bevel for Frame
Go to Effects, 3D Effects, Inner Bevel
Shape 2, width 5
25, 8, 10, 0
0, 52, 25
color white

Resize element 58 to 55%, apply Mura Meister Copies-Encircle, first 
number on 12, paste on the mask layer.

Copy the flower wreath from the tube, resize to 30, apply Mura Meister-Copies
first number on 14, move below the paper layer of the frame.

Resize element 34 to 30%, flip, apply Mura Meister-Copies, first number
on 20, move below the flower circle, resize larger to 110%.

Duplicate the green strawberry circle, resize to 90%, move above the flower
layer.

Recolor element 45 using this color #fd527a, leaving the center as is.
Resize to 40%, apply Mura Meister Copies-Encircle, first number on 18,
move below the paper layer of the frame.
(Keep this flower for later use.)

Resize your tube to 30%, paste above the frame.

Resize element 34 to 50%, paste on the frame below the tube on the left,
duplicate, mirror.
Resize element 58 to 55%, paste on the left above the frame, duplicate, 
mirror, move down more on the right.

Element 45, the flower that was recolored and sized to 40%, paste at the lower right
above the tube, duplicate, mirror, duplicate once more, move to the 
right and below the tube layer.
Duplicate as many times as you like and resize one or two.

Resize element 15 to 18%, paste at the lower right.
Resize element 31 to 18%, paste at the lower right below the drink.
Resize element 11 to 18%, paste at the lower right above the drink.

Resize element 2 to 25%, paste at the lower left above the flower.
Resize element 30 to 25%, paste at the lower left above the strawberries.
Resize element 40 to 15%, paste by the cupcake, duplicate, move to the right
and below the candy layer.
Resize element 16 to 25%, paste at the lower left below the cupcake.
Resize element 67 to 15%, paste at the lower right above the cupcake.

Resize element 3 to 20%, paste at the bottom above the flower.
Resize element 41 to 10%, paste at the bottom being on the top layer, duplicate,
move over a bit, duplicate, mirror.
Resize element 28 to 40%, paste at the bottom being on the top layer.

Resize element 47 to 70%, flip, apply Mura Meister Copies-Enicrcle, first
number on 24, move to the mask layer.
Adjust all circle layers how you like behind the frame.
Resize element 46 to 10%, duplicate 3 times, move two to the right and one to the left.

I typed out Sweet Treat using font  Copperplate Gothic Light
and Aquarelle

Add any other elements that you would like, make it your own.

If you want to do a Signature tag
Open a size of choice
I did one with 600 x 250
Resize most elements to 80 or so and some a bit larger, place
where you prefer, once happy, merge visible, sharpen, add your 
copyright and name.

Avator size of choice
Take what elements you would like to use, resize smaller, once 
happy, merge visible, add name and copyrights.

Always readjust your mask and elements how you like them before you
 merge your tag, sharpen once.
Crop your tag to make sure no shadows or anything on the edges

 Then add your copyright and name.

That's it
Hope you enjoyed doing my tut.

Saturday, September 12, 2020

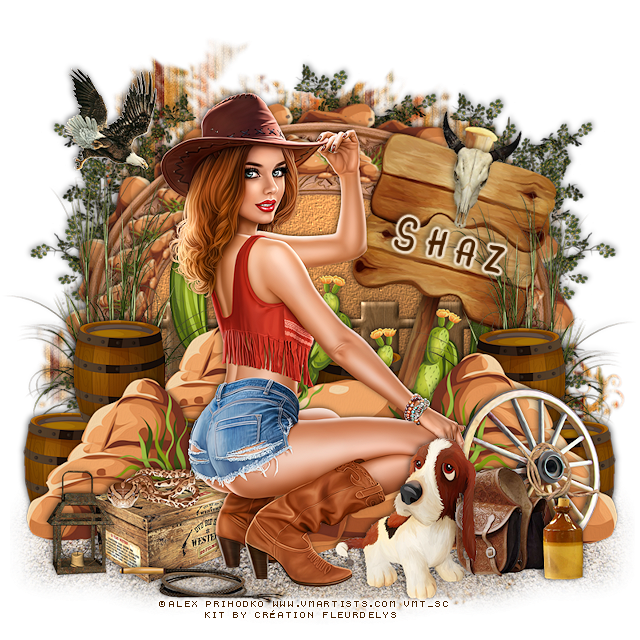
FTU She's A Cowgirl


This tut was written September 12th, 2020 for those with a basic knowlewdge of psp.
I am using the awesome artwork of Alex Prihodko
You need a license to use this tube, do not use without a license.
You can find this tube at VMA store  HERE

I used PSPX...but any of them should work.
FTU kit Western by  Création Fleurdelys  HERE
Check out the rest of the blog HERE
I used Gems Mask  208 if you have this one.
Her links are no longer available, so use a mask you prefer.
You can check out her blog HERE
Filters
Mura Meister Copies-Encircle
Font of choice,  I used Candy

Drop shadow is  V-2 H-2 Black, 50, 10, use what you prefer.
Let's get started
*Remember to add your drop shadow as you go along*

Open a new image 800 x 800 or a size you prefer.
Paste paper 6, if using the same mask, apply it twice, delete, merge group.
Paste paper one, apply the mask twice, delete, merge group,
then merge down.

Resize frame 3 to 80%, paste, click inside with your magic wand, expand by
5, paste paper 8, invert, delete, select none.
Go to Effects, Texture Effects, Texture and use one of your choice
on the paper layer.
I used concrete, 25%, 
0,2,00
315, 30, color white 
apply again.

Resize element 44 to 50%, flip, apply Mura Meister Copies, Encircle, first 
number on 18, move below the paper layer of the frame, take your free hand 
tool and pull the rock circle out to fit how you like behind the frame.

Open element 44 again, resize to 20%, apply Mura Meister Copies, Encircle, first 
number on 28, paste above the frame, using you Free Hand tool
again to fix on the frame how you like.

Resize element 27 to 75%, paste on the mask layer on the left, duplicate,
mirror, duplicate, move to the center.

Resize element 18 to 75%, paste inside the frame.
Resize element 16 to 50%, paste on one side above the rock frame,
duplicate, mirror.
Resize element 44 to 90%, paste at the bottom on the right, duplicate,  resize 
to 85%, mirror. 
Duplicate again, move below the other rocks and over and up a bit to 
the right.

Resize element 9 to 40%, paste on the left between the rocks,
duplicate, mirror.

Resize your tube to 50%, paste, being on the top layer where you like.

Paste element 42 at the bottom below all the rocks to one side, duplicate, mirror.
Resize element 49 to 30%, paste on the right above the rocks.
Resize element 34 to 45%, free rotate to the right at 15 degrees, paste
on the right below the tall grass layer

Resize element 11 to 20%, paste at the lower right above the wheel.
Resize element 39 to 35%, paste at the lower right.
Resize element 31 to 20%, paste at the lower right.

Resize element 1 to 35%, paste at the lower left below the tube layer.
Resize element 45 to 20%, mirror, paste on top of the box.
Resize element 4 to 35%,  paste at the lower left above the tube.

Resize element 52 to 35%, free rotate to the right at 15 degrees, paste
on top of the sign.
Resize element 40 to 40%, paste on the right above the fence layer,
duplicate, mirror.

Resize element 46 to 25%,mirror, paste at the upper left.
Go back to one of the barrels, duplicate, move to the center more and down
below the cactus layers.
Resize element 43 to 35%, paste at the lower left being on the top layer.

Add any other elements that you would like, make it your own.

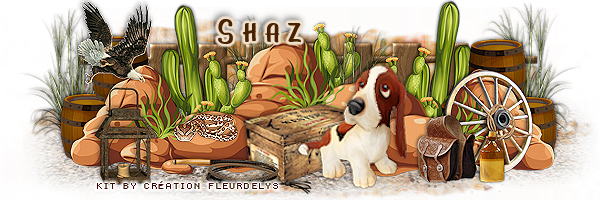
If you want to do a Signature tag
Open a size of choice
I did one with 600 x 200
Resize most elements to 40 or so and some a bit larger, place
where you prefer, once happy, merge visible, sharpen, add your 
copyright and name.

Avator size of choice
Take what elements you would like to use, resize smaller, once 
happy, merge visible, add name and copyrights.

Always readjust your mask and elements how you like them before you
 merge your tag, sharpen once.
Crop your tag to make sure no shadows or anything on the edges

 Then add your copyright and name.

That's it
Hope you enjoyed doing my tut.