Friday, January 6, 2023

FTU Blue Jean Baby

 This tut was written January 6th, 2023 for those with a basic knowledge of psp. 

I am using the awesome artwork of ©Verymany
Tube is Mia
You need a license to use this tube, do not use without a license.
You can find this tube at Verymany Store HERE

I used PSP2020...but any of them should work.
FTU PS Oct2020 Blue Jean Baby by Eyeinspire  HERE  
Check out the rest of the pages HERE
DD Christmas Template 6 Spirits HERE
Check out the rest of the blog HERE
Mask of choice, I used RD Mask 757 HERE 
Check out the rest of the blog HERE
Filter
Mura Meister Copies-Encircle 

Font of choice, I used Blue Jeans

Drop shadow is V -1 H -4, 50, 10, or use what you prefer.
Let's get started
*Remember to add your drop shadow as you go along*

Open the template, duplicate, close the original.
Delete the wordart, deer, circle of dots and credits.

Go to Image, Canvas size 800 x 800
Resize paper 7 to 22%, paste above the white background, apply your mask,
delete, merge group, move to one side, duplicate, mirror, merge down.
Change the color to a darker blue.

Select the large brown square, add a new layer, resize paper 7 to 22%, paste,
invert, delete. Add a dark blue gradient glow.
Resize the flower to 13%, apply Mura Meister Copies-Encircle, first 3 numbers
on 30, 65, 65, move below the red circle.

Select the red circle, select all, float, defloat, add a new layer, fill with
#0d2946 or color of choice, delete the template layer on each one as you go along.
Go to Effects, Texture Effects, Tile with these settings
Tile shape Square 
75, 8, 2 
25, 1, 0, 50
315, 50, 30 
color white
Apply a dark blue gradient glow.
Select the green circle, resize paper 12 to 22%, paste, invert, delete.
Dotted circles add noise at 100%.

Select left red rectangle, add a new layer, fill with #0d2946, select none.
Do the same with the right red rectangle. Add the same dark gradient blue to both.
Add the Tile effect as before.

Select the green rectangle, resize paper 12 to 22%, paste, invert, delete.

The left and right light green strip, resize paper 5 to 22%, paste, invert, delete.
White square, add noise at 100%.
Select the red square, paste your tube, invert, delete.
Duplicate the tube, go to Adjust, Blur, Gaussian blur, number on 4, change the
blend mode to Overlay or whatever you prefer.

Select the brown square, resize paper 7 to 22%, paste, invert, delete.
Leave the dotted square white or change the color to a dark blue.

Resize your tube to 50%, paste being on the top layer.

Resize the frame to 30%, paste behind the tube on the square.
Resize snippet 2 to 25%, paste on the right below the tube layer.
Resize snippet 1 to 25%, paste on the right and down more.
Resize word strip 2 to 25%, paste at the bottom above the tube, change the color
to match your tube, I used #4b618b.

Resize the pocket to 15%, free rotate to the right at 20, paste on the lower
right below the wordart, duplicate, mirror, move back by the first one and below it.
Resize the arrow to 25%, paste on the right.

Resize the flower to 20%, paste at the lower right below the foot of the tube,
duplicate, resize smaller to 80%, move up below the first flower.
Duplicate both flowers mirror to the left, one below the tube the other above the sign.

Resize foilage 1 to 20%, paste on the left below the flowers.
Add noise at 50%.
Resize floral 2 to 20%, paste above the pockets.
Resize the favorite sign to 20%, change the color, paste at the upper left.

Add any other elements you would like, make it your own.
Crop your tag to be sure no shadows or lines are on the edges.
 Then add your copyright and name.
That's it

Hope you enjoyed doing my tut.     


PTU Sweet Valentine


This tut was written January 6th, 2023 for those with a basic knowledge of psp. 

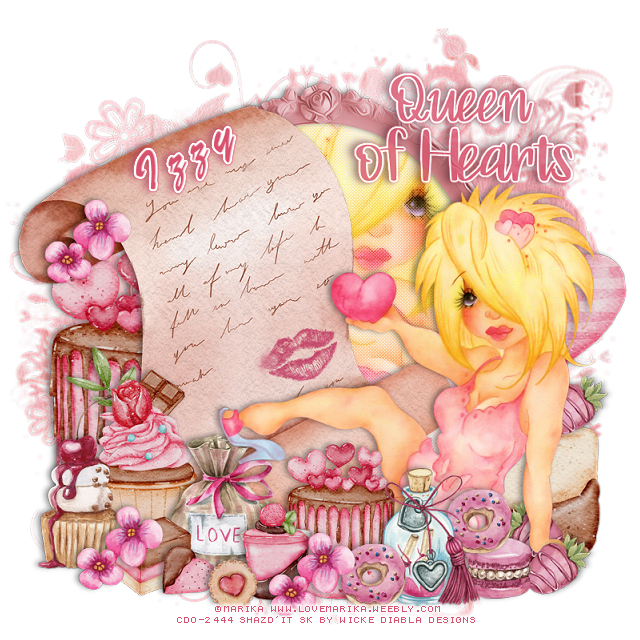
I am using the awesome tube by ©Marika

The tube is 119-3
You need a license to use this tube, please do not use without a license.
You can find this tube at CDO store HERE

I used PSP2020...but any of them should work.
PTU Scrap Sweet Valentine mini kit by Wicked Diabla Designs  HERE 
This kit has 35 elements, 8 papers, 3 Frames and 2 Wordart
Mask of choice, I used DD NVM_4  HERE
Check out the rest of the Blog HERE
Filters
Screen Works-Light Gauze
xero-Porcelain 

Font of choice, I used Brush Script

Drop shadow is V -1 H -4, 40, 10, color black or use what you prefer.
Let's get started
*Remember to add your drop shadow as you go along*

Open a new image 800 x 800, paste paper 2, apply your mask, delete, merge group.
Resize frame 3 to 75%, paste, click inside with the magic wand, expand by 5, paste  
paper 2, invert, delete.

Paste element 29 on the left above the frame.
Resize element 21 to 70%, paste on the left below the scroll.
Select the frame again, resize your tube to 85%, mirror, paste, invert, delete, 
select none.
Duplicate the tube, go to Adjust, Blur, Gaussian blur, number on 4, change the blend 
mode to Screen.
Apply the filter Screen Works-Light Gauze, merge down, then apply xero-Porcelain.

Resize your tube to 55%, paste on the right being on the top layer.

Resize element 21 to 40%, paste at the bottom above the tube.
Resize element 20 to 25%, paste at the bottom.
Resize element 19 to 50%, paste on the left.
Resize element 35 to 40%, paste on the left.
Resize element 10 to 35%, paste at the bottom below the tube layer.
Resize element 16 to 20%, paste at the bottom, duplicate, move to the left.

Resize element 14 to 35%, paste at the bottom.
Resize element 24 to 20%, paste on the left below the flowers.
Resize element 8 to 15%, paste on the lower right above the tube.
Resize element 6 to 15%, paste on top of the cookie, duplicate, move to the left
and above the jar.
Go back to one of the flowers, duplicate, move up on the scroll.

Resize element 26 to 75%, paste on the right behind the tube.
Resize element 5 to 15%, paste on the bottom right below the hand of the tube, duplicate,
mirror, move above the hand, duplicate again, move up on the candy behind
the tube.
Resize element 22 and 23 to 13%, paste at the bottom being on the top layer.

Resize wordart 2 to 25%, paste at the upper right, add a fat white gradient glow, lower
the opacity to around 80.

Add any other elements that you would like, make it your own.
Always readjust your mask and elements how you like them before you
 merge your tag, resize, sharpen.

Crop your tag to be sure no shadows or lines are on the edges.
 Then add your copyright and name.
That's it

Hope you enjoyed doing my tut.    
PTU Dragon Delights


This tut was written January 6th 2033 for those with a basic knowledge of psp. 

I am using the awesome tube by ©Destiny Lauritsen

This was the Bonus tube for August 2022

You need a license to use the tube, please do not use without a license.
You can find this  artist tubes at CDO HERE  


I used PSP2020...but any of them should work.
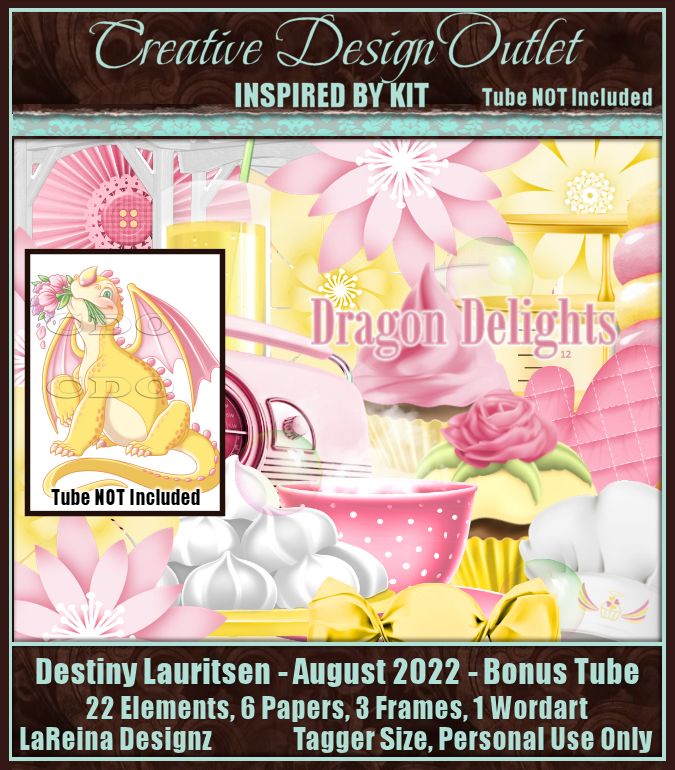
PTU ScrapLRD_IB-Destiny Lauritsen-Aug2022-bt by LaReina Designz HERE 
This kit has 22 elements, 6 papers, 3 frames and 1 wordart
"Tube is not included"
Mask of choice, I used Miz Teeques Mask 118  HERE
Check out the rest of the Blog HERE
Filters
Mura Meister Copies-Encircle

Font of choice, I used Dragon Wings

Drop shadow is V -1 H -4, 40, 10, or use what you prefer.
Let's get started
*Remember to add your drop shadow as you go along*

Open a new image 800 x 800, paste paper 4, apply your mask, delete, 
merge group.

Resize frame 3 to 80%, paste.
Resize frame 2 to 70%, paste on the pink frame.
Click inside the pink frame, expand by 10, paste paper of choice, I used 
paper 2.
Resize element 12 to 25%, apply Mura Meister Copies-Encircle first 3 numbers
on 20, 55, 55, move below the paper layer.
Resize element 13 to 25%, apply Mura Meister Copies changing the 2nd 2 numbers
to 61, 61, move below the first circle.
Resize element 14 to 25%, apply Mura Meister Copies, changing the 2nd 2
numbers to 63, 63 move to the bottom layer above the mask.

Resize the tube to 70%, paste above the frame.
Resize element 22 to 85%, paste on the dragon on the right.

Resize element 17 to 30%, paste at the bottom above the tube.
Resize element 5, 6, 8 and 10 to 20%, paste at the bottom by the cup.
Resize element 4 to 30%, paste at the bottom below the egg.
Resize element 15 to 25%, paste at the bottom on the right below the cupcake.
Resize element 16 to 30%, paste by the radio.

Resize element 13 to 30%, paste on the right below the dragon, duplicate, move 
above the dragon, duplicate one and mirror, move below below the dragon on
the left.
Resize element 12 to 20%, paste on the left above the flower, duplicate, mirror.
Resize element 18 to 20%, paste on the left below the marshmallows, duplicate,
move up and over a little.

Being on the top layer, resize the wordart to 90%, paste where you like. add a 
white fat gradient glow, change the blend mode to Hard Light.
Add a drop shadow with this color #bc4c69.
Resize element 1 to 20%, paste at the bottom above the cup.

Add any other elements that you would like, make it your own.
Always readjust your mask and elements how you like them before you
 merge your tag, resize, sharpen.

Crop your tag to be sure no shadows or lines are on the edges.
 Then add your copyright and name.
That's it

Hope you enjoyed doing my tut.