Friday, January 27, 2023

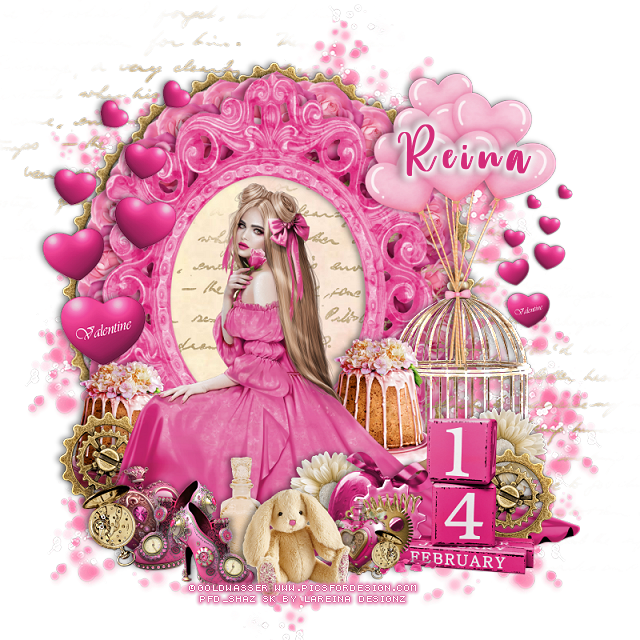
PTU Steamy Valentine


This tut was written January 27th, 2023 for those with a basic knowledge of psp. 

I am using the artist ©Goldwasser

Tube is included in the kit

You need a license to use this tube, please do not use without a license. 

Use the license from the store you bought the kit.

I used PSP2020...but any of them should work.
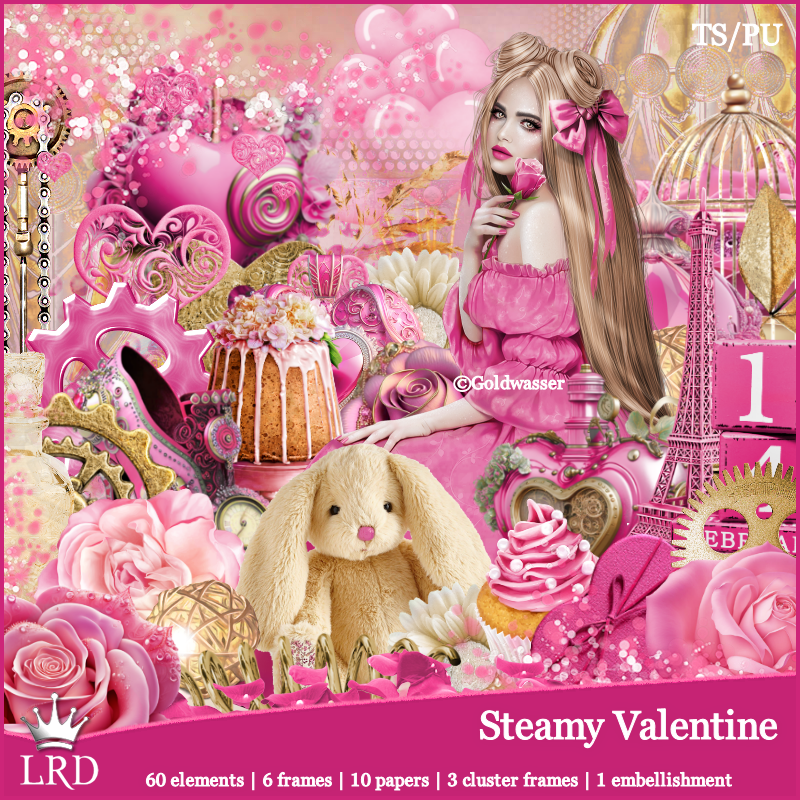
PTU Scrap Steamy Valentine by LaReina Designz HERE HERE HERE
Kit includes 60 elements, 6, frames, 10 matching papers, 3 Clusters 
and 1 Embellishment 
Filters
Mura Meister Copies-Encircle

 Font of choice, I used Annamellia

Drop shadow as you go is V -1 H -4, 40, 10, or use what you prefer.
Let's get started
*Remember to add your drop shadow as you go along*

Open a new image 800 x 800
Resize frame 5 to 75%, paste, click inside with the magic wand, expand
by 5, paste paper 5, invert, delete.
Paste element 57 on the paper layer in the frame, duplicate, move to the 
upper left below the paper layer.
Resize element 30 to 20%, paste below the paper layer, apply Mura Meister Copies
-Encircle, first 3 numbers on 22, 58, 50

Resize the tube to 65%, paste at the bottom.

Resize element 27 to 50%, paste on the right behind the tube.
Resize element 12 to 30%, paste at the bottom above the tube.
Resize element EB01 to 40%, paste at the bottom by the sign.
Resize element 13 to 25%, paste on the right below the tube, duplicate, 
mirror, move behind the tube on the left, duplicate again, move 
below the flower circle and apply the same settings with Mura Meister.

Resize element 20 to 60%, paste on the right above the birdcage.
Resize element 39 to 20%, paste at the bottom below the gear on the right,
duplicate, move back to the left more.
Resize element 25 to 25%, paste at the bottom.
Resize element 53 to 30%, paste behind the rabbit.
Resize element 16 to 35%, paste on the right above the cage, duplicate,
mirror.

Resize element 15 to 20%, paste at the bottom left above the tube.
Resize element 28 to 20%, paste at the bottom by the watch.
Resize element 26 to 25%, paste on the left, duplicate resize to 50%, move to 
the right.
Resize element 34 to 20%, paste at the bottom duplicate, mirror, move back by
the first shoe.

Paste element 60 below the words layer, duplicate 2 or 3 times, move how you like.

Add any other elements that you would like, make it your own.
Always readjust your mask and elements how you like them before you
 merge your tag, resize, sharpen.

Crop your tag to be sure no shadows or lines are on the edges.
 Then add your copyright and name.
That's it

Hope you enjoyed doing my tut.   

FTU Love Is

 This tut was written January 26th, 2023 for those with a basic knowledge of psp. 

I am using the awesome artwork of ©Lady Mishka
Tube is Bee Girl
You need a license to use this tube, do not use without a license.
You can find this tube at PFD Store HERE

I used PSP2020...but any of them should work.
FTU Special Gift by Additive Pleasures  HERE  
Scroll down a bit
Check out the rest of the blog HERE
DD Template 145_Love Is HERE
DD Mask NVM_3 HERE 
Check out the rest of the blog HERE
Filter
EyeCandy 4000-Glass
Unplugged Tools-Interlace

Font of choice, I used Annamellia

Drop shadow is V -1 H -4, 40, 10, Black or use what you prefer.
Let's get started
*Remember to add your drop shadow as you go along*

Open the template, hold the shift and hit the letter d to duplicate, close the
original, delete the credits, small hearts and  scattered hearts.
Being on the bottom layer above the white background, select all, float, defloat,
add a new layer, paste paper 10 into selection, apply your mask, delete, merge 
group.

Merge the first, last and center brown strips together, select all, float, 
defloat, paste paper 3, invert, delete, select none, delete the template layer.
Apply Eye Candy 4000, glass with these settings on each layer
Bevel width 1080
Smoothness 75
30, 35, 50, 0, 50 
Lighting 267, 65
100, 40
Highlight color white
Add noise at 100% on the white circle.

Select the yellow oval, paste paper 12, invert, delete, apply the glass setting.
Select the gold circle, paste paper 6, invert, delete, glass setting.

The second and fourth brown strips, paste paper 9, invert, delete, glass settings.

Resize the frame element to 65%, free rotate to the left at 15 degrees, paste on the left
above the heart, delete the heart and the white heart, duplicate the frame,
mirror, move above the hearts on the right, then delete both of those hearts.
Click inside with the magic wand, expand by 7, paste the note paper, invert, delete. 

Resize the heart frame to 65%, paste on top of one of the hearts, duplicate, mirror.

Resize your tube to 50%, duplicate and mirror one of them, paste below the heart element,
duplicate both, go to Adjust, Blur, Gaussian blur, number on 5, change the blend 
mode to Screen on one you prefer.
Apply Unplugged Tools-Interlace before you merge them.

Resize your tube to 20%, paste below the wordart.

Merge all the wordart and white and drop shadow together, move where you like.
Add a white gradient glow.
Paste the ribbon element below the paper layer of the hearts at the left, duplicate,
mirror, adjust how you like.

Paste the ivy at the bottom above the ribbon.
Resize the box to 40%, paste at the lower left.
Resize the love basket to 30%, paste at the bottom above the tube.
Resize flower 2 to 30%, paste on the box.
Resize the button to 75%, mirror, paste on the right, duplicate, resize to 75%, 
move up and above the other button.
Duplicate the 2 button hearts and move to the upper left.

Paste beads 2 at the bottom below the tube.
Resize the sparkles to 80%, at the bottom being on the top layer, duplicate,
move to the top below the tube.
Resize the balloons to 505, free rotate to the right at 25 degrees, paste behind the 
tube at the upper right.

Add any other elements you would like, make it your own.
Crop your tag to be sure no shadows or lines are on the edges.
 Then add your copyright and name.
That's it

Hope you enjoyed doing my tut.     


Color on white 

Wednesday, January 25, 2023

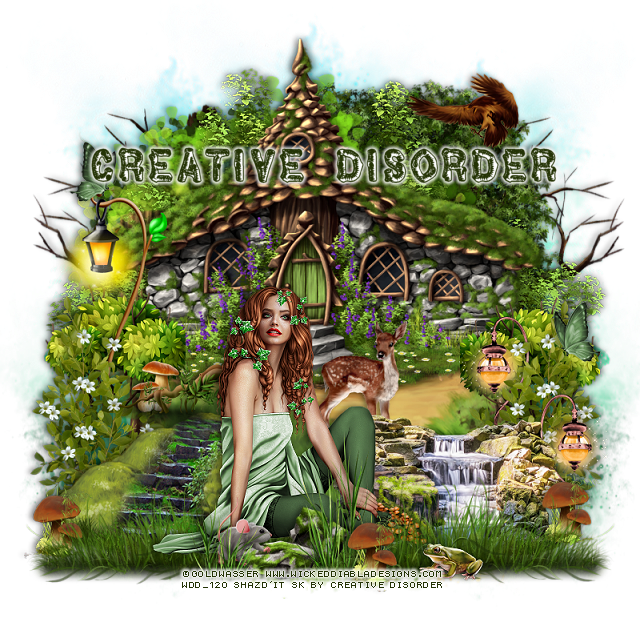
PTU Forest Wishes


This tut was written January 25th, 2023 for those with a basic knowledge of psp. 

I am using the awesome artwork of ©Goldwasser
1 Tube is included in the kit
You need a license to use this tube, do not use without a license.
Use the license where you buy the kit.

I used PSP2020...but any of them should work.
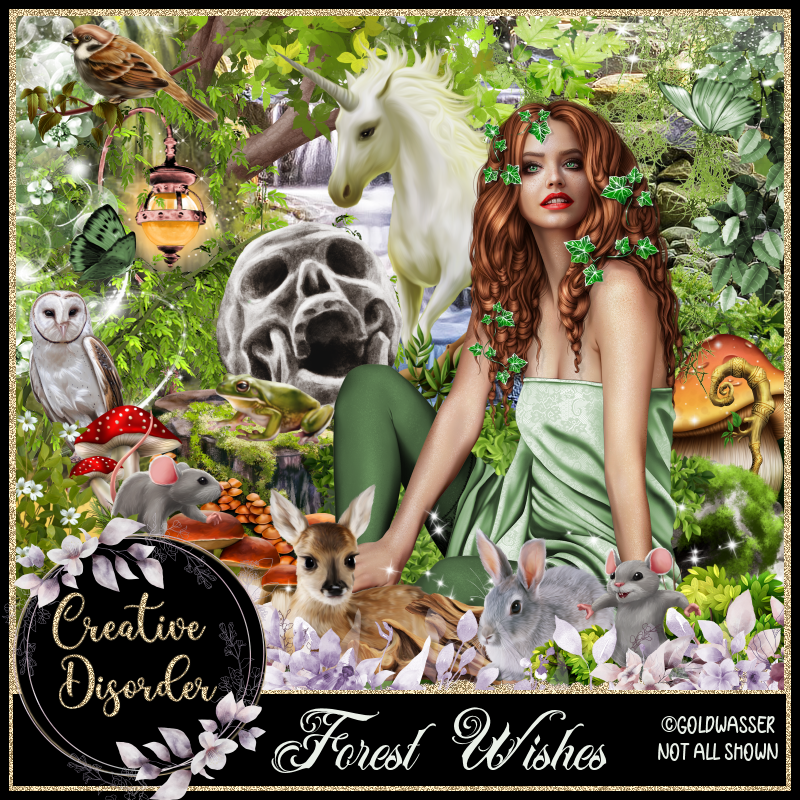
PTU Forest Wishes by Creative Disorder  HERE  
Kit contains 101 elements, 14 papers and 1 beautiful tube by Goldwasser.
Check out her blog HERE
Mask of choice, I used Vivienne Digital Tagging Mask 16 and 50 HERE
Check out the rest of the blog HERE

Font of choice, I used Pinewood 

Drop shadow is V -1 H -4, 50, 10, or use what you prefer.
Let's get started
*Remember to add your drop shadow as you go along*

Open a new image 800 x 800, resize paper 10 to 90%, apply mask 16, delete, 
move to the left more, merge group, duplicate, mirror, duplicate again, move to 
the center and below the other two and up a little, erase any of the sides if you like.

Resize element 61 to 60%, paste toward the top.
Resize element 58 to 55%, paste toward the top.
Resize element 79 to 75%, paste above the mask layer to the left a bit, erase
the tree trunk at the bottom.
Resize element 59 to 60%, paste on the right above the mask layer.
Resize element 60 to 60%, paste above the mask on one side, duplicate, mirror.

Resize paper 9 to 75%, paste being on the top layer now, apply mask 50, invert
delete, select none, move below the house.
Resize element 12 to 70%, paste at the bottom to the left above the top mask layer.
Resize element 30 to 35%, paste at the lower right.
Resize element 11 to 35%, paste on the left above the house, duplicate, mirror.
Resize element 97 to 40%, paste on the left below the steps, duplicate, mirror.

Resize your tube to 17%, mirror, paste at the bottom being on the top layer.

Resize element 86 to 25%, paste below the water element.
Resize element 89 to 15%, paste at the bottom below the tube.
Resize element 57 to 40%, paste at the bottom to one side below the tube, 
duplicate, mirror.
Resize element 8 to 20%, paste at the lower left below the greenery, duplicate a
couple more times and move where you like.

Resize element 70 to 15%, paste at the bottom below the grass.
Resize element 73 to 30%, paste on the left behind the tube.
Resize element 83 to 15%, paste behind the log.
Resize element 18 to 40%, paste on the left below the bushes.
Resize element 46 to 30%, mirror, paste on the right below the bushes, duplicate,
mirror, move back to the right below the water element.

Resize element 27 to 15%, paste at the bottom below the grass.
Resize element 87 to 20%, paste at the bottom right.
Resize element 14 to 15%, mirror, paste at the upper right.
Resize element 14 to 15%, paste on the lantern, duplicate, mirror, move down.

Add any other elements that you would like, make it your own.
Always readjust your mask and elements how you like them before you
 merge your tag, resize, sharpen.

Crop your tag to be sure no shadows or lines are on the edges.
 Then add your copyright and name.
That's it

Hope you enjoyed doing my tut.