Friday, February 3, 2023

PTU CT Tag Ashley Benson/by Wicked Diabla

     **CT Tag FOR *** Wicked Diabla Designs***

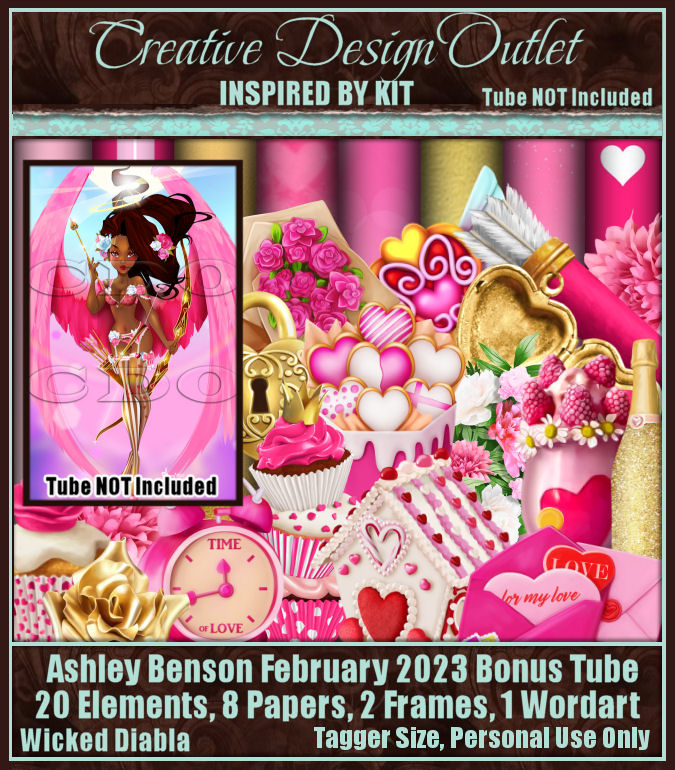
***NEW kit Scrap WD_IB-Ashley Bensen February 2023-bt
by Wicked Diabla Designs ***
Scrap WD_IB-Ashley Bensen February 2023-bt
KIT is HERE
Awesome kit with 20 elements, 8 papers, 2 frames and 1 wordart
This kit was made to go with the February Bonus Tube

Below is the tag I made with this kit 


Thursday, February 2, 2023

PTU Will You Be My Valentine


This tut was written February 2nd, 2023 for those with a basic knowledge of psp. 

I am using the awesome artist ©Yuki
The tube is called Gloria
You need a license to use this artist, please do not use without a license.
You can find this tube at PFD HERE

I used PSP2020...but any of them should work.
PTU Will You Be My Valentine by Shelley Lynn Designz  HERE 
Awesome Kit contains 151 elements, 15 frames, 12 papers and 1 wordart
Mask of choice, I used Sophisticat Simone Mask 321 HERE
Check out the rest of the blog HERE

Font of choice, I used Harrington

Drop shadow is V -1 H -4, 50, 10, or use what you prefer.
Let's get started
*Remember to add your drop shadow as you go along*

Open a new image 800 x 800, paste paper 1, apply your mask, delete, merge
group.

Resize element 147 to 75%, paste.
Resize your tube to 30%, paste on the frame.

Resize element 139 to 50%, paste on the frame on the right below the tube,
duplicate, mirror.
Resize element 96 to 40%, paste below the tube on the left, duplicate, mirror.
Resize element 121 to 70%, paste on the right on the frame layer.

Resize element 36 to 25%, paste on the left below the flower layer behind
the tube.
Resize element 10 to 25%, paste at the bottom above the tube.
Resize element 24 to 25%, paste at the bottom below the cat in the cups.
Resize element 55 to 20%, paste below the hat to the left.
Resize element 5 to 20%, paste on the right on the flower.
Resize element 56 to 20%, paste at the lower right below the cat.
Resize element 60 to 18%, paste by the cup.
Resize element 4 to 20%, mirror, paste at the bottom by the hat.

Resize element 130 to 25%, paste at the lower left below the rabbit.
Resize element 70 to 10%, paste at the bottom left below the rabbit.
Resize element 45 and 46 to 15%, paste at the bottom left.
Resize element 74 to 15%, paste at the bottom left below the strawberries.
Resize element 135 to 25%, paste above the tube layer behind the hat.

Add any other elements that you like, make it your own.
Crop your tag to be sure no shadows or lines are on the edges.
 Then add your copyright and name.
That's it

Hope you enjoyed doing my tut.             

Wednesday, February 1, 2023

FTU Memories


 This tut was written February 1st, 2023 for those with a basic knowledge of psp. 

I am using the awesome artwork of ©Chris Pastel
Tube is Kim
You need a license to use this tube, do not use without a license.
You can find this tube at her Store HERE

I used PSP2020...but any of them should work.
FTU Potpourri by Charlottes Web  HERE  
Check out the rest of the blog HERE
Mask of Choice, I used Miz Teeques Mask 354 HERE
Check out the rest of the blog HERE

Font of choice, I used Boutique Free

Drop shadow is V -1 H -4, 40, 10, Black or use what you prefer.
Let's get started
*Remember to add your drop shadow as you go along*

Open a new image 800 x 800, select all, add a new layer, paste paper 1
into selection, apply your mask.

Resize element 17 to 85%, paste, erase the tag part hanging at the bottom.
Take your free hand tool, draw around the post card frame,
paste paper 6, invert, delete, move below the post card, keep selected,
mirror your tube, paste, delete, select none.
Duplicate the tube, go to Adjust, Blur, Gaussian blur, number on 5, 
change the blend mode to Darken or one you prefer.

Resize element 16 to 70%, paste at the upper left below the paper layer, duplicate,
mirror, move down to the lower right.
Paste paper 6 in both those frames, keep selected and paste your tube, 
mirror one of them.
Duplicate the tube and do the same as with the other tube.
Watch for shadows on the edges to erase.

Resize your tube to 45%, mirror, paste at the bottom left.
Paste element 13 below the tube to the right.

Resize element 14 to 75%, paste on the upper right above the past, duplicate,
Blur, Gaussian blur, number on 5, change the blend mode to Darken, merge down.
Resize element 15 to 50%, free rotate to the left at 25, paste behind the tube on 
the left. 
Write something on it if you like before you rotate and merge them together.
Resize element 7 to 85%, paste on the left behind the tube, duplicate, mirror,
resize to 75%, move down on the right, erase some of the strings over the wordart.

Resize element 5 to 50%, paste below the tube, erase the strings below.
Paste element 21 on the mask layer to the right, duplicate, move to the left and up.
Resize element 1 to 60%, paste above the tube where you like.

Add any other elements you would like, make it your own.
Crop your tag to be sure no shadows or lines are on the edges.
 Then add your copyright and name.
That's it

Hope you enjoyed doing my tut.