Tuesday, August 23, 2022

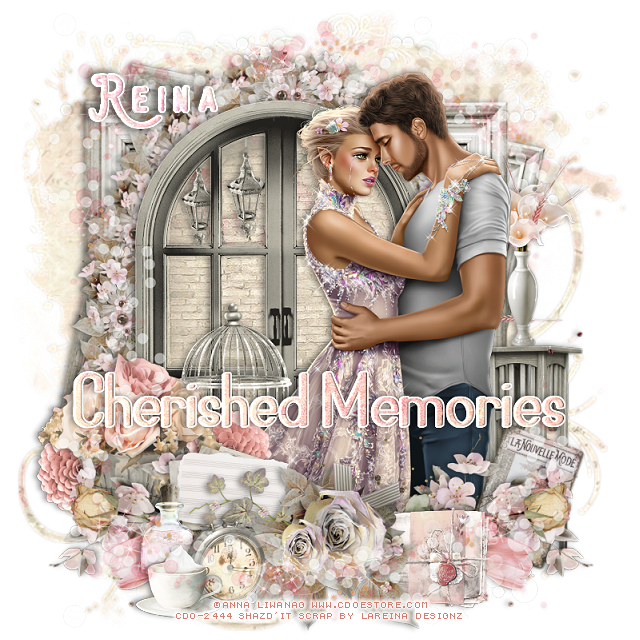
PTU Cherished Memories


This tut was written August 23rd, 2022 for those with a basic knowledge of psp. 

I am using the the artist Anna Liwanag

Tube is 104-2

You need a license to use this tube, please do not use without a license.
You can find this tube at CDO HERE  


I used PSP2020...but any of them should work.
PTU Scrap Cherished Memories by LeReina Designz HERE 
This mini kit has 35 elements, 8 papers and 5 frames and 1 wordart
Mask of choice, I used RD Mask 709 HERE
Check out the rest of the Blog HERE
Filter
Mura Meister Copies-Encircle

Font of choice, I used Billyforges 

Drop shadow is V -1 H -5, 50, 10, or use what you prefer.
Let's get started
*Remember to add your drop shadow as you go along*

Open a new image 800 x 800, paste paper 2, flip, apply your mask, delete, merge group.
Paste paper 5, apply the mask, delete, merge group, merge down.

Paste element 5, to the left a little, draw around the frame of the window,
paste paper 5, move so the arch fits behind the window, invert, delete.

Resize element 7 to 35%, apply Mura Meister Copies-Encircle, with the first 
3 numbers on
16, 50, 70, move below the paper layer of the window.
Resize frame 3 to 90%, paste below the flower circle.

Resize your tube to 40%, paste to the right on the window.

Resize element 1 to 65%, paste at the bottom above the tube on the right, duplicate,
mirror.
Resize element 15 to 40%, paste at the lower left below the flowers.
Resize element 23 to 45%, flip, paste at the bottom above the flowers.
Resize element 21 to 45%, paste on the right behind the tube.
Resize element 20 to 40%, paste on the table on the right.
Resize element 16 to 40%, paste above the window to the left of the tube.

Resize element 2 to 40%, paste below the window layer, erasing the bottom light.
Resize element 28 to 20%, paste at the lower left being on the top layer.
Resize element 6 to 20%, paste below the clock layer.
Resize element 22 to 25%, paste at the bottom below the top flower to the left.
Resize element 17 to 25%, paste below the top flower to the right.

Resize element 30 to 25%, free rotate to the right at 20 degrees, paste at the lower
right above the tube.
Resize element 26 to 20%, paste above the tube by the birdcage, duplicate, move to the 
lower left.

Resize element 4 to 20%, paste by the clock.
Paste element 35 at the bottom being on the top layer, duplicate, flip, move below the tube.
Paste the wordart being on the top layer were you like and color you like.
I used paper 2 and added a white background.

Add any other elements that you would like, make it your own.
Always readjust your mask and elements how you like them before you
 merge your tag, resize, sharpen.

Crop your tag to be sure no shadows or lines are on the edges.
 Then add your copyright and name.
That's it

Hope you enjoyed doing my tut.    

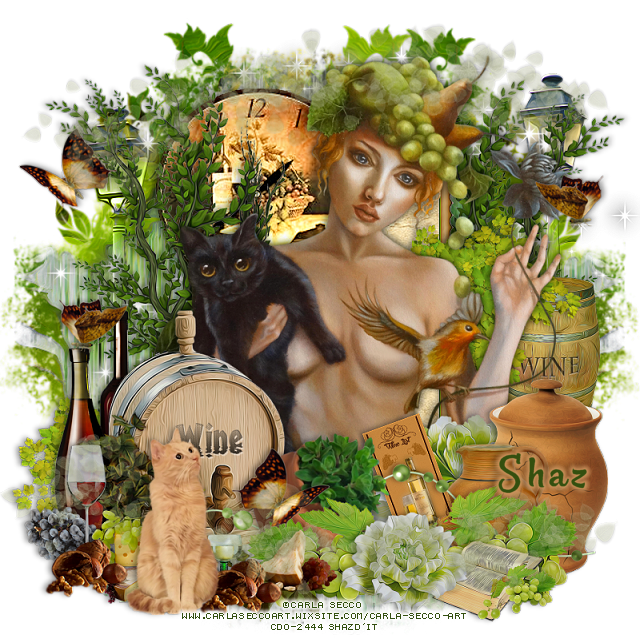
FTU Wine Time


 This tut was written August 23rd, 2022 for those with a basic knowledge of psp. 

I am using the awesome artwork of Carla Secco
The tube is "2-3"
You need a license to use this tube, do not use without a license.
You can find this art at CDO Store HERE

I used PSP2020...but any of them should work.
FTU kit Bellissimo Vita by Elli's Creations  HERE
Check out the rest of the blog HERE
Mask of choice, I used Vivienne's Digital Tagging 032 HERE
Check out the rest of the blog HERE

Font of choice, I used Beauty in the Ordinary 

Drop shadow is V -1 H -4, 40, 10, or use what you prefer.
Let's get started
*Remember to add your drop shadow as you go along*

Open a new image 800 x 800, paste paper 9, apply your mask, delete, merge 
group, duplicate, change the blend mode to Multiply, merge down,
duplicate, mirror, adjust.

Resize element 49 to 75%, paste off center to the right a little.
Click inside with your magic wand, expand by 5, paste paper 3, invert, delete, 
select none.
Resize element 38 to 85%, paste on the mask layer, change the blend mode
to Luminance(L), duplicate, mirror, readjust later.

Resize your tube to 80%, paste above the frame.

Past element 60 behind the frame at the upper left on the frame.
Resize element 67 to 70%, paste at the lower left above the tube.
Resize element 61 to 50%, paste at the bottom.
Resize element 26 to 40%, paste on the right below the tube.
Resize element 44 to 50%, paste on the right above the wine barrel, duplicate, mirror,
move down on the left.

Resize element 62 to 75%, paste on the left above the frame, duplicate, mirror,
move below the paper layer of the frame on the right.
Resize element 15 to 75%, paste on the lower right to cover the flower on the tube.
Resize element 43 to 50%, paste on the right.
Resize element 8 to 40%, paste by the other vase.

Resize element 22 to 60%, paste at the bottom above the wine barrel that is on
the left.
Resize element 1 grapes to 50%, paste at the bottom right above the vases, duplicate,
mirror, move back by the vase with the green in it.
Resize element 16 to 60%, paste at the bottom above the grapes.
Resize element 1 the sign to 25%, free rotate to the left at 20 degrees, paste below
the grapes.

Resize element 10 to 20%, paste at the bottom left being on the top layer.
Resize element 24 to 85%, free rotate to the left at 90 degrees, paste below
the pot with the green in it.

Resize element 30 to 35%, paste at the bottom below the light green element.
Resize element 53 to 60%, paste on the left behind the wine barrel.
Resize element 42 to 85%, paste at the lower left being on the top layer, duplicate,
move to the right more.
Paste element 31 and 32 where you like, duplicate both and mirror and move 
again where you like.
Paste element 41 at the bottom being on the top layer, duplicate, flip, move
to the top, resize to 95%.

Paste element 57 on the mask on the left, duplicate two more times and move
each one to the right more.
Resize element 58 to 35%, mirror, paste at the lower left.

Add any other elements that you would like, make it your own.
Always readjust your mask and elements how you like them before you
 merge your tag, resize, sharpen.

Crop your tag to be sure no shadows or lines are on the edges.
 Then add your copyright and name.
That's it

Hope you enjoyed doing my tut.          
Saturday, August 20, 2022

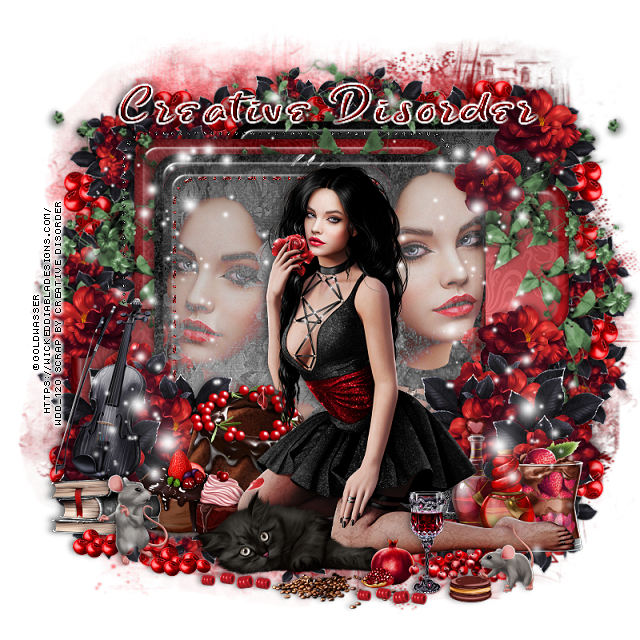
PTU Dark Sweets


This tut was written August 20th, 2022 for those with a basic knowledge of psp. 

I am using the awesome artwork of ©Goldwasser
You need a license to use this tube, do not use without a license.
Tube by Goldwasser is included in the kit.

I used PSP2020...but any of them should work.
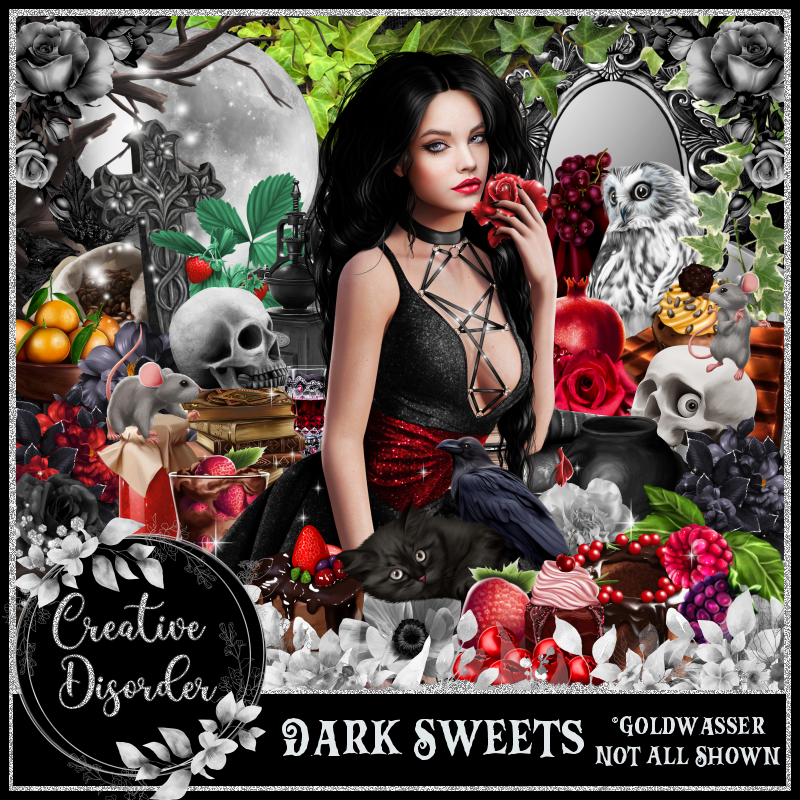
PTU Dark Sweets by Creative Disorder  HERE 
Kit contains 126 elements, 14 papers and ©Goldwasser tube is included with kit.
Check out her blog HERE
Millie's PSP Madness Template 887 HERE
Check out the rest of the blog HERE
MizTeeques Mask 284 HERE
Check out the rest of the blog HERE
Filter
Mura Meister Copies-Encircle
EyeCandy 4000-Glass

Font of choice, I used Bar Hoppers Demo

Drop shadow is V -1 H -4, 40, 10, or use what you prefer.
Let's get started
*Remember to add your drop shadow as you go along*

Open the template, hold the shift key and hit the letter d to duplicate,
close the original. Delete the credits.
Go to Image, Canvas size, 800 x 800, all layers checked, resize later.
Paste paper 13 above the white background. apply your mask, delete, merge group.
Duplicate, merge down.

Add EyeCandy 4000-Glass to each of the layers with these settings
Basic
10.80, 75
30, 35, 50, 0, 50
color white
Lighting
124, 62 
100, 40
0, 72
Bevel Profile
Button
Select layer 1, select all, float, defloat, mirror paper 10, paste, move where you like,
invert, delete, delete template on each layer as you go along.
Select layer 8, add noise at 100%, or what you prefer.

Select layer 2, paste paper 11, invert, delete.
Merge layer 4 down with 3, select all, paste paper 5, invert, delete.
Layer 5, select all, paste paper 3, invert, delete, keep selected, resize your tube to
75%, paste, delete, select none.
Change the blend mode to Lighten.

Select layer 6, paste paper 6, move how you like, invert, delete, keep selected, 
mirror your resized tube, paste, delete, select none.
Change the blend mode to Lighten.
Apply the Glass to these two tubes also.
Select layer 7, add a new layer, fill with a red color, add noise, select none.

Resize your tube to 30%, mirror, paste about center.

Open a new layer, resize element 63 and 100 to 20%, paste element 100 on one side and below element 63, duplicate, mirror, merge these three together.
Paste above the mask layer,
Apply Mura Meister Copies-Encircle with the first 3 numbers on
14, 65 and 65, duplicate, move one to each side.
Paste element 99 on the left on the circle layer, duplicate, mirror.
Go back and unmerge elements 63 and 100, paste element 63, free rotate to the left 
at 45 degrees, paste ant the upper right, duplicate, mirror, duplicate, flip, duplicate,
mirror.

Resize element 125 to 25%, paste at the bottom above the tube.
Resize element 63 to 35%, paste at the lower left below the tube, duplicate, mirror.
Resize element 75 to 25%, paste at the lower left behind the tube.
Resize element 41 and 123 to 20%, paste by the first cake.

Resize element 36 to 20%, paste at the lower left above the cakes.
Resize element 100 to 15%, paste at the bottom by the cakes, duplicate, move behind
the mouse to the left.
Resize element 57 to 15%, paste on the left behind the berries.

Resize element 66 to 35%, mirror, paste on top of the books.
Resize element 45 to 15%, paste at the bottom above the cat layer.
Resize element 30 to 20%, paste at the bottom.
Resize element 47 to 15%, paste at the bottom.
Resize element 23 and 24 to 25%, paste on the right below the tube.
Resize element 43 to 10%, paste at the bottom being on the top layer.
Resize element 35 to 15%, mirror, paste by the cookie.

Resize element 58 to 25%, paste on the left behind the violin and below
the flower, duplicate, mirror, duplicate, move up on the right.
Go back to the green vine on the upper right, duplicate, resize to 75%, move up below 
the 2 red flowers, duplicate, mirror, adjust.
Resize element 69 to 25%, paste on the right below the bottles.
Resize element 33 to 20%, paste at the bottom by the cat.
Paste element 85 on the right, duplicate, mirror, erase any parts on the faces you
don't want.
Resize element 104 to 15%, paste at the bottom, duplicate, move to the left of 
the cat.

Add any other elements that you would like, make it your own.
Always readjust your mask and elements how you like them before you
 merge your tag, resize, sharpen.

Crop your tag to be sure no shadows or lines are on the edges.
 Then add your copyright and name.
That's it

Hope you enjoyed doing my tut.