Tuesday, February 21, 2023

FTU Irish Luck


This tut was written February 21st, 2023 for those with a basic knowledge of psp. 

I am using the awesome artwork of ©Attila
Tube is Millie
You need a license to use this tube, do not use without a license.
You can find this tube at Elegancefly Store HERE

I used PSP2020...but any of them should work.
FTU Irish Luck by Miz Teeques   HERE  
Check out the rest of the blog HERE
Millie's PSP Madness Template 904 HERE
Check out the rest of the blog HERE
Mask of Choice, I used RD Mask 737 HERE
Check out the rest of the blog HERE
Filter
EyeCandy 4000-Glass

Font of choice, I used Beautiful Kisses

Drop shadow is V -1 H -4, 40, 10, Black or use what you prefer.
Let's get started
*Remember to add your drop shadow as you go along*

Open the template, duplicate, close the original, delete the credits, close off the
wordart for now.
Paste paper 3 on the bottom layer above the white, apply your mask, delete, merge group.
Go to Image, Canvas size, make it 800 x 800 all layers checked.

Paste element 19 above the mask on the upper left, erase the 2 long stems,
duplicate, mirror, duplicate both,
flip, move to the bottom, duplicate the bottom right one, free rotate to the right 
at 90 degrees, move to the left side, duplicate, mirror.
Paste element 12 on the upper left above the greenery, duplicate, mirror,
duplicate, flip, duplicate, mirror.

Select layer 1, select all, float, defloat, resize papaer 4 to 75%, paste, invert, delete,
delete the template layer. Delete each layer of the template as you go along.
Apply Eye Candy 4000, Glass with these settings
Bevel Width 15.55,  Smoothness 75
30, 35, 50, 0, 50
Color on white
Select layer 2, paste paper 12, invert, delete, add the glass setting like before.
Select layer 4, paste paper 14, delete, apply the glass.
Select layer 5, paste paper 13, delete, same glass settings.

Select layer 6, paste paper 9, invert, delete, apply the glass setting.
Merge layer 7, 8 and 9 together, select all, paste paper 11, invert, delete, apply
the glass setting.
Merge 10, 11 and 12 together, drop shadow.

Resize frame 4 to 75%, paste being on the top layer, click inside with the magic 
wand, expand by 5, resize paper 6 to 60%, paste below the frame, invert, delete,
select none.
Delete layer 13.
Resize element 18 to 90%, paste on above the frame to the left, duplicate, mirror.

Resize your tube to 30%, mirror, paste on the left above the frame.
Paste element 22 at the bottom on the frame to the right, duplicate, mirror.
Paste element 6 at the top above the frame, duplicate, flip, move to the bottom above
the tube.
Resize element 14 to 65%, paste behind the tube to the left, duplicate, mirror.

Resize element 3 to 50%, paste at the bottom above the tube, duplicate, change
the blend mode to Multiply, merge down, duplicate, free rotate to the right
at 90, move behind the vines on the left behind the tube, duplicate, mirror, duplicate 
once more, move back behind the tube and down some, erasing any stems on any of 
them that is showing.
Go back to the one above the tube at the bottom, resize to 90%.
Resize element 23 to 50%, paste behind the flower on the right, duplicate, mirror.

Resize element 42 to 40%, paste on the lower right below the clover line.
Resize element 33 to 30%, paste at the bottom.
Resize element 32 to 25%, paste at the bottom to the left of the pot, duplicate, mirror.

Resize element 50 to 25%, free rotate to the right at 20, paste at the bottom by the pot,
duplicate, move where you like.
Resize element 8 to 25%, paste at the lower left above the tube.
Resize element 1 to 40%, paste on the right, duplicate, mirror, duplicate more if you like.
Resize element 4 to 50%, paste behind the books at the lower right, duplicate, mirror.

Now either open the wordart that came with the template or use one from the kit.
I used wordart 3, resize to 85%, paste at the lower left.

Add any other elements you would like, make it your own.
Crop your tag to be sure no shadows or lines are on the edges.
 Then add your copyright and name.
That's it

Hope you enjoyed doing my tut.  


Monday, February 20, 2023

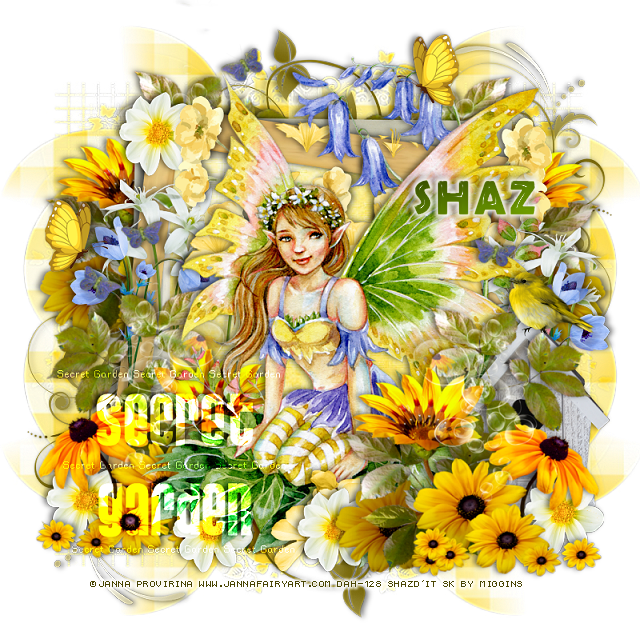
FTU Secret Garden


 This tut was written February 20th, 2023 for those with a basic knowledge of psp. 

I am using the awesome artwork of ©Janna Prosvirina
Tube is Lydia
You need a license to use this tube, do not use without a license.
You can find this tube at DAH Store HERE

I used PSP2020...but any of them should work.
FTU Miggs SYHO23K, thank you Miggins   HERE  
Check out the rest of the blog HERE
Mask of Choice, I used Tres Tags & Tuts Mask 381 HERE
Check out the rest of the blog HERE
Wordart by Chilly's PSP World HERE
Check out the rest of the blog HERE

Font of choice, I used Berlin Sans FB Demi

Drop shadow is V -1 H -4, 40, 10, Black or use what you prefer.
Let's get started
*Remember to add your drop shadow as you go along*

Open a new image 800 x 800, paste paper 4, apply your mask, delete, merge group,
duplicate, change the blend mode to Darken, merge down.
I resized mine larger to 110%.

Resize element 40 to 65%, paste, click inside with the magic wand, expand by 5,
paste paper 10, invert, delete, select none.
Resize element 9 to 55%, paste on the frame.
Paste element 34 below the paper layer of the frame at the top to the right,
duplicate, mirror, flip, move to the bottom left.

Resize element 6 to 75%, paste on the frame at the bottom right, duplicate,
mirror.
Resize element 8 to 40%, paste below the yellow flowers, duplicate, mirror.

Resize your tube to 80%, paste between the flowers, with the right one being on top.

Duplicate both yellow flowers, move the right one up to the left below the paper layer, and 
the left one up to the right, erase the top butterflies.

Resize element 26 to 40%, paste one on the left above the white flowers, duplicate, mirror.
Resize element 7 to 20%, paste at the upper left on the frame layer, duplicate 
a couple of times and move down on each side below the yellow flowers, duplicate one
twice, move above the tube at the bottom and one below the tube to the left.

Resize element 47 to 50%, paste at the top right above the frame, duplicate, 
mirror.
Resize element 32 to 85%, paste behind the tube at the top.
Resize element 45 to 15%, paste at the top, duplicate, mirror, move down on the left.

Resize element 4 to 50%, paste on the right below the small white flower.
Resize element 27 to 20%, paste on the right being on the top layer above the 
bird house.
Paste the wordart at the bottom left being on the top layer, change to blend mode
to Overlay.

Add any other elements you would like, make it your own.
Crop your tag to be sure no shadows or lines are on the edges.
 Then add your copyright and name.
That's it

Hope you enjoyed doing my tut.  
Tag set for Miggins


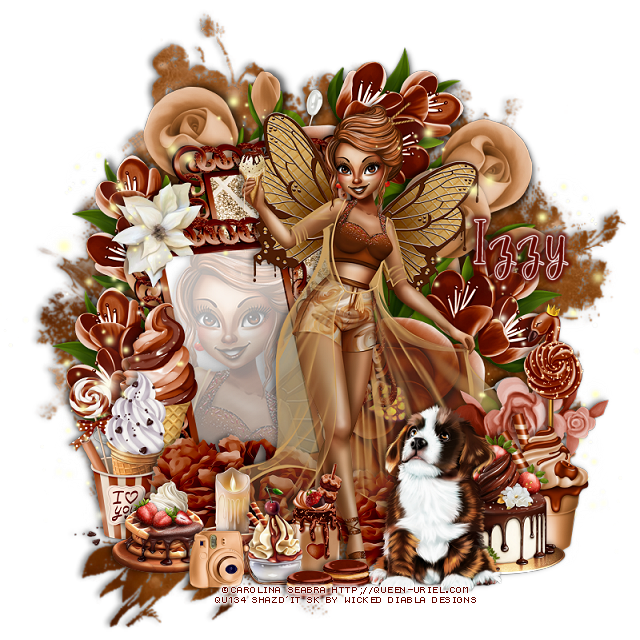
PTU Caramel Swirl Ice Cream Fairy


This tut was written February 20th, 2023 for those with a basic knowledge of psp. 

I am using the awesome tube by ©Carolina Seabra

Tube is called Caramel Swirl Ice Cream Fairy
You need a license to use this tube, please do not use without a license.
You can find this tube at her store HERE

I used PSP2020...but any of them should work.
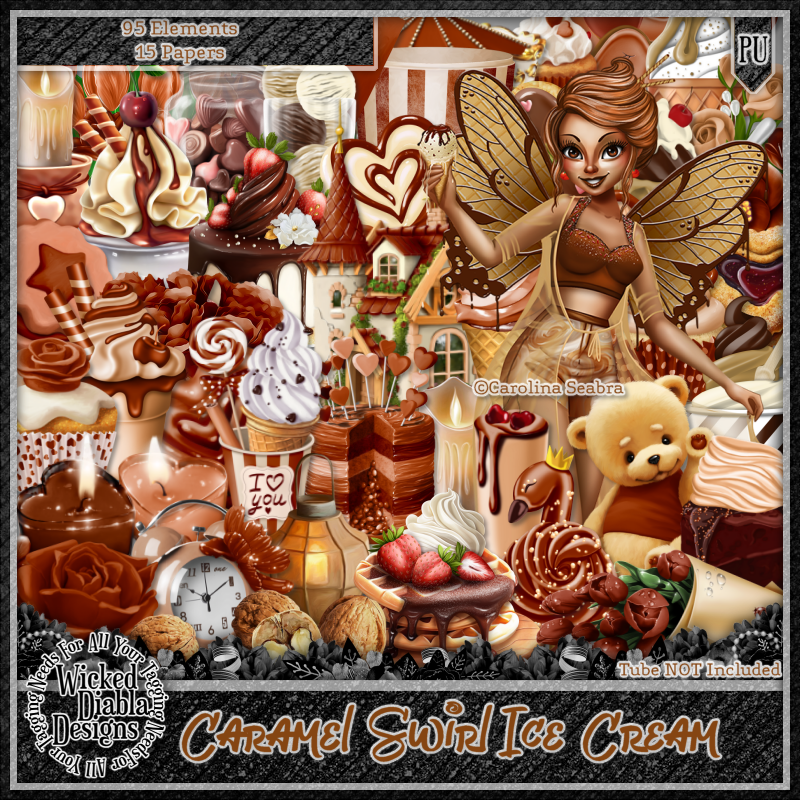
PTU Scrap Caramel Swirl Ice Cream Fairy by Wicked Diabla Designs  HERE 
 This awesome kit is a match for the tube by the same name, 
it has 95 elements and 15 papers
Mask of choice, I used Miz Teeques Mask 285 HERE
Check out the rest of the Blog HERE

Font of choice, I used Betterfly

Drop shadow is V -1 H -4, 50, 10, color black or use what you prefer.
Let's get started
*Remember to add your drop shadow as you go along*

Open a new image, 800 x 800, select all, new layer, paste paper 13 into selection,
apply your mask, delete, merge group.

Resize element 19 to 45%, paste, move up on the left a bit, duplicate, move
over and down more on the left.
Take your magic wand, click inside the frame that was move down, expand
by 2, paste your tube, invert, delete, lower the opacity to around 30,
merge down.
Fill the back mirror with a paper if you like. I used paper 5, resized to 50%.

Resize your tube to 60%, paste above the frames to the right a bit.

Resize element 16 to 50%, paste on the right below the frame layer, duplicate,
mirror, duplicate, move up on the left and below the other flower layers, 
duplicate once more, free rotate to the right at 90, move to the top.
Resize element 7 to 25%, paste at the lower right above the tube.

Resize element 38 to 60%, paste at the bottom left above the frame, duplicate, 
move to the right.
Resize element 75 to 27%, mirror, paste at the lower right above the tube.
Resize element 88 to 20%, paste on the right behind the dog.
Resize element 77 to 20%, paste behind the cake on the right.

Resize element 43 to 30%, paste on the left above the frame.
Resize element 72 to 25%, paste above the ice cream cone.
Resize element 5 to 17%, paste at the bottom above the tube.
Resize element 1 and 4 to 15%, paste at the bottom.
Resize element 40 to 30%, paste behind the camera and ice cream at the bottom.

Resize element 6 to 7%, paste at the bottom by the dog, duplicate, move over a bit.
Resize element 92 to 15%, paste at the lower left behind the camera.
Resize element 14 to 15%, paste on the frame at the top left.
Resize element 73 to 20%, paste on the right below the cakes.

Resize element 84 to 75%, paste on the left, duplicate, mirror.

Add any other elements that you would like, make it your own.
Always readjust your mask and elements how you like them before you
 merge your tag, resize, sharpen.

Crop your tag to be sure no shadows or lines are on the edges.
 Then add your copyright and name.
That's it

Hope you enjoyed doing my tut.