Friday, May 26, 2023

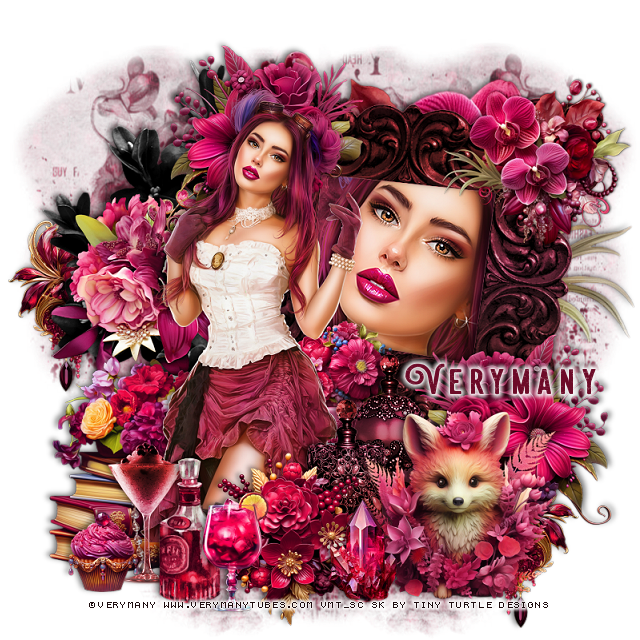
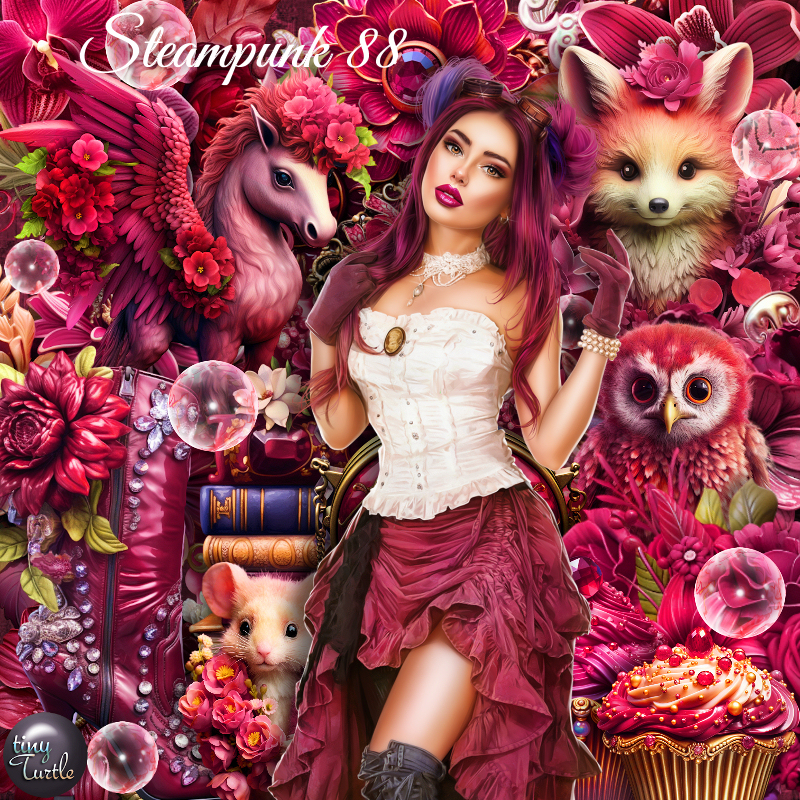
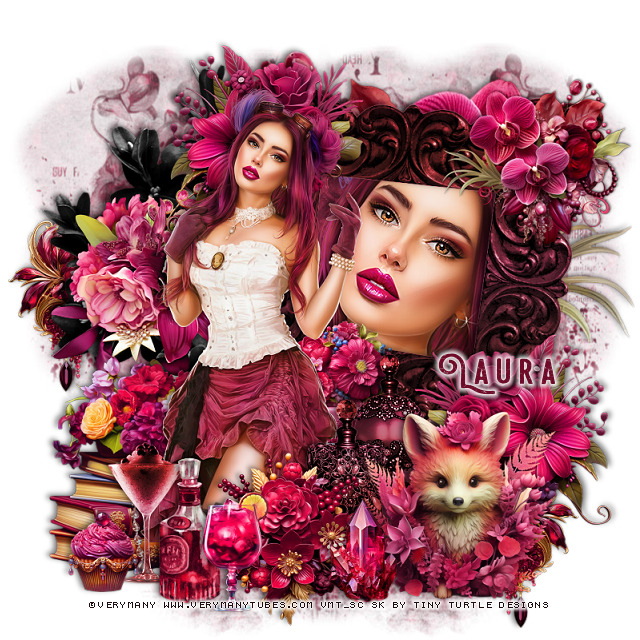
PTU Steampunk 88


 This tut was written  May 26th, 2023 for those with a basic knowledge of psp. 

I am using the awesome tube by ©Verymany

The tube is called Steampunk 88
You need a license to use this tube, please do not use without a license.
You can find the tube at Verymany HERE

I used PSP2020...but any of them should work.
PTU Scrap Steampunk 88 by Tiny Turtle Designs  HERE
"Tube is NOT included"
You can find all Tiny Turtle Designs kits HERE
Mask of choice, I used Miz Teeque's Mask 342 HERE
Check out the rest of the blog HERE

 Font of choice, I used Steelworks Vintage

Drop shadow as you go is V -2 H 4, 50, 10, or use what you prefer.
Let's get started
*Remember to add your drop shadow as you go along*

Open a new image 800 x 800, paste paper 17, apply your mask, delete, merge
group, duplicate, mirror.

Resize element 11 to 80%, paste on the upper right.
Click inside with the magic wand, expand by 5, paste paper 17, invert, delete,
keep selected, paste your tube, delete, select none.

Resize element 88 to 40%, paste at the upper left on the frame,
duplicate, mirror, move down to the bottom right.

Resize your tube to 40%, paste above the frame on the left.

Resize element 86 to 40%, paste behind the tube on the left.
Resize element 29 to 40%, paste on the left behind the tube.
Resize element 5 to 85%, paste on the left below the paper layer of the frame.
Resize element 83 to 35%, paste at the bottom being on the top layer.
Resize element 90 to 30%, paste behind the tube.

Resize element 59 to 30%, paste at the bottom above the tube.
Resize element 22 and 24 to 30%, paste behind the fox.
Resize element 121 to 40%, paste at the bottom left above the tube.
Resize element 23 to 30%, paste at the bottom left.
Resize element 101 to 25%, paste at the bottom.
Resize element 94 to 20%, paste at the bottom.
Resize element 33 to 30%, paste on the left below the other flowers, duplicate,
mirror, move down to the bottom so the jewel shows.
Resize element 66 to 15%, paste at the bottom left being on the top layer.

Resize element 100 to 90%, mirror, paste on the right above the mask,
 duplicate, move to the top layer, resize smaller to 40%, mirror, move on the
corner of the frame at the upper right.

Add any other elements that you would like, make it your own.
Always readjust your mask and elements how you like them before you
 merge your tag, resize, sharpen.

Crop your tag to be sure no shadows or lines are on the edges.
 Then add your copyright and name.
That's it

Hope you enjoyed doing my tut

Tag for Laura  


Thursday, May 25, 2023

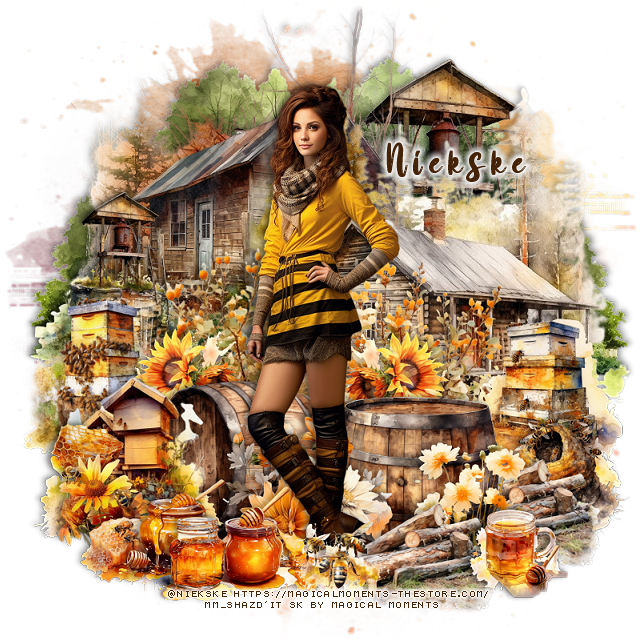
PTU Spring Bees


This tut was written May 25th, 2023 for those with a basic knowledge of psp. 

I am using the awesome artwork by Niekske
 Tube is included with the kit
You need a license to use this tube, do not use without a license.
Read the TOU about the license

I used PSP2020...but any of them should work.
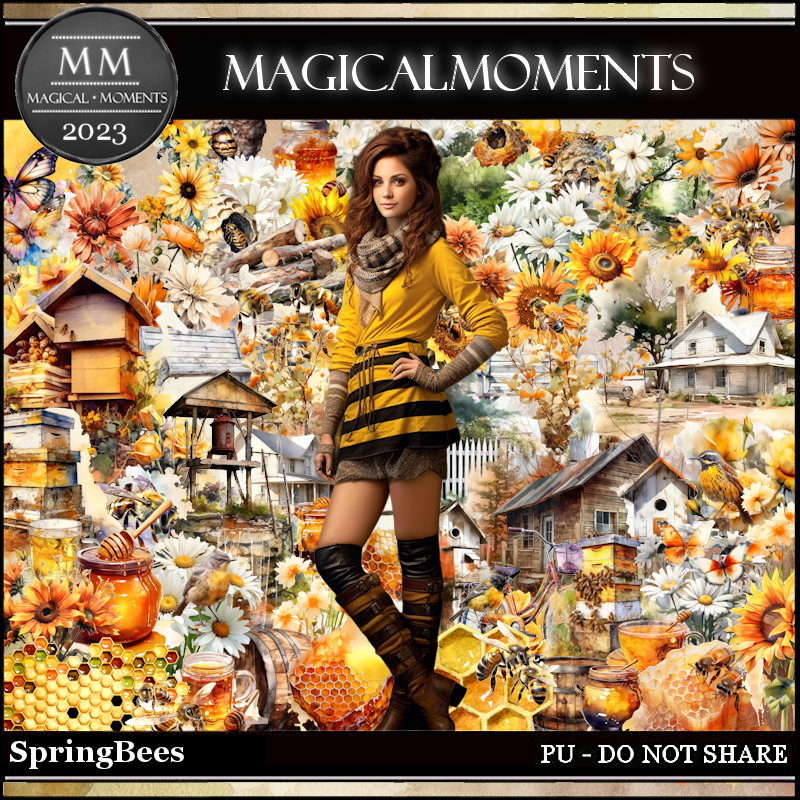
PTU Spring Bees by Magical Moments HERE  HERE HERE
Awesome kit with 76 elements, 5 papers and a tube by Niekske
Mask of choice, I used Vivienne's Digital Tagging Mask 41 HERE
Check out the rest of the blog HERE

Font of choice, I used Maple Memories

Drop shadow is V -2 H -4, 35, 10, color Black or use what you prefer.
Let's get started
*Remember to add your drop shadow as you go along*

Open a new image 800 x 800, paste paper 3, apply your mask, delete, merge
group.

Paste element 36 on the upper left.
Paste element 37 on the right.
Paste element 29 on the upper right behind the houses, duplicate, resize 
larger to 50%, paste above the houses to the left and down a little.
Paste element 71 at the top below the houses, duplicate, move down on the 
left, duplicate, mirror.

Resize the tube to 50%, paste above the house.

Resize element 44 to 50%, paste behind the tube.
Resize element 18 to 50%, paste behind the tube a little to the right.
Resize element 17 to 65%, paste behind the tube a little to the left.
Resize element 50 to 50%, paste behind the tube.
Resize element 19 to 50%, paste on the left behind the barrels.

Resize element 7 to 35%, paste on the left behind the barrel, duplicate, 
mirror, move behind the barrel and up on the right.
Resize element 35 to 50%, paste at the bottom left above the tube.
Resize element 46 to 30%, paste at the lower left being on the top layer.
Resize element 22 to 30%, paste at the bottom above the tube.

Resize element 39 to 30%, paste at the bottom left.
Resize element 10 to 30%, paste at the bottom.
Resize element 9 to 20%, paste at the bottom left below the jar.
Resize element 38 to 20%, paste at the left above the bee hive.
Resize element 45 to 25%, paste at the bottom by the other jars.

Resize element 43 to 50%, paste on the right above the house and behind
the sunflowers.
Resize element 54 to 40%, paste at the bottom above the barrel, move 
the flowers behind the logs, duplicate, move the logs behind the barrels.
Resize element 73 to 40%, paste on the right behind the logs.
Resize element 20 to 40%, paste on the right behind the bee nest.
Resize element 52 to 25%, paste at the bottom.
Resize element 12 to 25%, paste at the bottom right.

Add any other elements you would like, make it your own.
Crop your tag to be sure no shadows or lines are on the edges.
 Then add your copyright and name.
That's it

Hope you enjoyed doing my tut.       

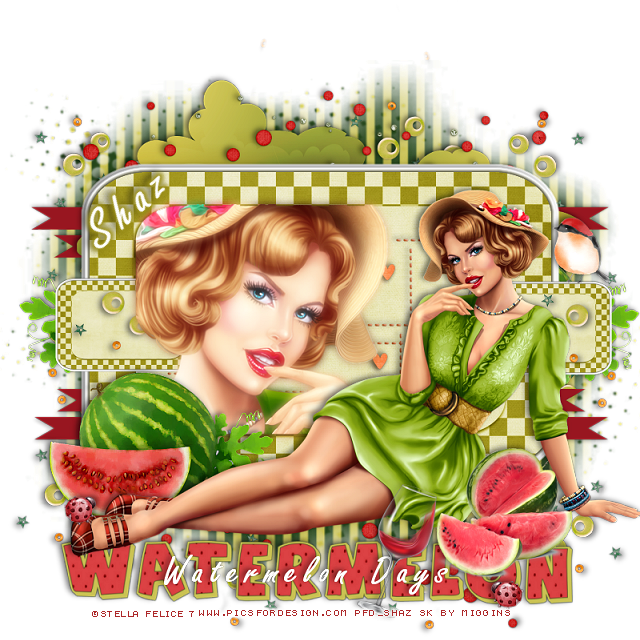
FTU Watermelon Days


This tut was written May 25th, 2023 for those with a basic knowledge of psp.

I am using the awesome artwork of ©Stella Felice 7
The tube is called Christina
You need a license to use this tube, please do not use without a license.
You can find this tube at PFD Store HERE

I used PSP2020...but any of them should work.
FTU SYHO Blog Train Watermelon Days  HERE  
Check out the rest of the blog  HERE
Mask of choice, I used Vivienne's Digital Tagging Mask 30 HERE
Check out the rest of the blog HERE

Font of choice I used Freestyle Script

Drop shadow is V -1 H -4, 50, 10, Black or use what you prefer.
Let's get started
*Remember to add your drop shadow as you go along*

Open a new image 800 x 800, resize paper 2 to 22%, paste, 
apply your mask, resize as needed.

Resize element 6 to 40%, paste, click in the light center part with your
magic wand, mirror your tube, paste on the left, invert, delete, select none.
Duplicate the tube, go to Adjust, Blur, Gaussian blur, number on 5, 
change the blend mode to Screen, merge down.

Duplicate the frame, change the blend mode to Multiply, merge down.
Add a medium gradient glow, number on 4, with #585636 and then add a fat white
gradient glow, using Eye Candy 4000-Gradient glow.
Duplicate the frame, resize to 30%, paste to the right, duplicate, mirror.

Resize element 25 to 50%, paste below the tube, erase any outside the solid part
of the frame.
Resize your tube to 45%, paste at the bottom being on the top layer.
Resize element 11 to 50%, paste at the top above the mask layer, duplicate, flip.

On the Alpha, take each letter and resize to 15%, paste to spell out
watermelon.
I used Freestyle Script to type out Watermelon Days.

Resize element 15 to 25%, paste at the top above the mask layer, erase the 
trunk at the bottom.
Resize element 19 to 25%, paste on the right above the mask, duplicate, move up
a little and in a little more, merge these two together, duplicate, mirror,
duplicate, flip, duplicate, mirror, duplicate again, move up behind the 
small frame just so the leaves show, duplicate, mirror.
Resize element 13 to 15%, paste at the bottom above the wordart.

Resize element 22 to 15%, paste on the mask layer, erasing parts you 
don't want, duplicating, mirror, flip, erasing as you go along, paste 
on the small frames below the tubes and erase the extras.
Resize element 16 to 3%, paste at the bottom on the wordart, duplicate, mirror,
paste on the left.
Resize element 14 to 5%, paste on the right on the small frame.

Add any other elements you would like, make it your own.
Crop your tag to be sure no shadows or lines are on the edges.
 Then add your copyright and name.
That's it

Hope you enjoyed doing my tut.