Saturday, August 22, 2020

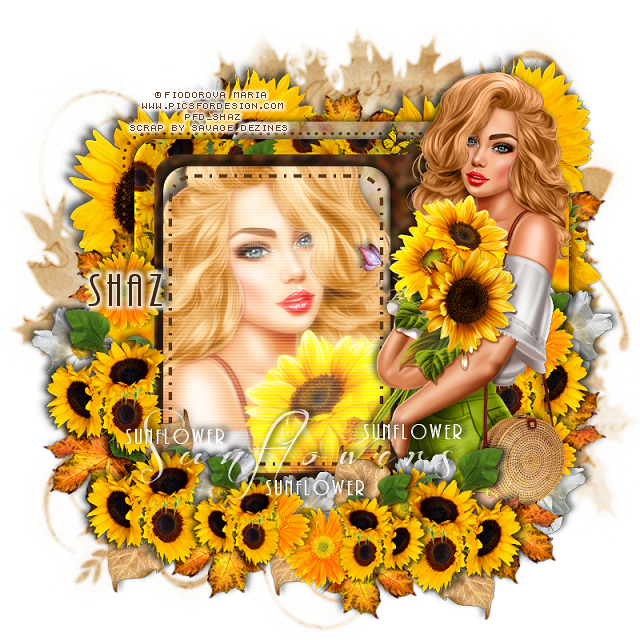
FTU Sunflower Cutie


This tut was written August 22, 2020 for those with a basic knowlewdge of psp.
I am using the awesome artwork of Fiodoroa Maria
The tube is called "Diana and sunflowers"
You need a license to use this tube, do not use without a license.
You can find this tube at PFD store  HERE

I used PSPX...but any of them should work.
FTU kit SD Designers Choice  HERE 
Check out the rest of the blog HERE
Millie's PSP Madness Template 887 HERE
Check out the rest of the blog HERE
Mask of choice, I used DD Fall Mask_Set 2_ 4  HERE
Check out the rest of the blog HERE
Filters
Medhi-Grain Natural 2.0
Mura Meister Copies-wallpaper rotate

Font of choice,  I used Before the Rain, AR Bonnie

Drop shadow is  V-3 H-5 Black, 50, 10, use what you prefer.
Let's get started
*Remember to add your drop shadow as you go along*

Open the template, duplicate, close the original, delete the credits.
Go to Image, Canvas size, 800 x 800, can alway resize later.

Resize the paper to 22%, paste above the white background, apply your mask,
delete, merge group.
Duplicate, change the blend mode to multiply, merge down.

Select layer 1, select all, float, defloat, resize the paper to 22%, paste, invert,
delete, select none.
Duplicate, change the blend mode to multiply, merge down, delete the 
template layer.
Apply the Medhi filter-Grain Natural 2.0, default settings.
Then go to Effects, 3 D Effects, Inner Bevel with these settings
Shape 2, Width 5
25, 2, 4, 0
270, 52, 25
or play around and get what you like.
Color white

Layer 8 the dotted line, change to a color of choice.

Select layer 2, float, defloat, new layer, fill with #5f3c1d, keep selected,
resize element 7 to 25%, paste, apply the Mura Meister Filter-wallpaper- rotate.
number on 23,  select none, merge down, apply the same bevel settings as before.

Merge layer 4 down with layer 3, select all, float, defloat, add a new layer,
fill with #fab300.
Apple the Medhi filter, Grains Natural 2.0 same settings.
Same bevel settings.

Select layer 5, float, defloat, add a new layer fill with #5f3c1d, apply the Medhi filter,
same settings.
Select layer 6, float, defloat, resize the paper to 22%, paste, invert, delete,
 keep selected.
Resize your tube to 50%, mirror, paste, apply the bevel setting to the paper.
Apply the Medhi filter to the paper.
Duplicate your tube, Go to Adjust, Blur, Gaussian Blur, number on 4,
change the blend mode to Screen, merge down.
Go to Effects, Blinds, with these settings
4, 25, both boxes checked.
Be sure to watch the edges for any shadows showing, erase if they do.

Layer 7, dotted lines, change to a color of choice.

Resize the tube to 30%, paste on the right.

Resize element 7 to 60%, paste above the mask at the upper left, duplicate,
mirror, move up more on the right.
Duplicate, bring to the top layer, flip, resize smaller to 45%,  paste 
above the tube at the lower left, duplicate, mirror, cover the bottom of the legs.
Duplicate again, resize to 75%, move over some, duplicate, mirror.

Resize element 8 to 20%, paste below the sunflowers on the right, duplicate,
mirror, move up a bit, duplicate again, move to the center more, duplicate, mirror.
Duplicate as many times as you like and move around.

Resize element 1 to 15%, paste at the bottom where you like, duplicate, mirror,
duplicate a couple more times, flip and move where you like.

Go back to the larger sunflowers at the bottom, duplicate both and move up 
on the left and up and behind the tube on the right.

Resize element 6 and 9 to 15%, paste on the right below the tube layer how 
you like, duplicate each and move to the left.
Duplicate both and move to the bottom more to the center, duplicate once more 
on each and move.

Add some wordart if you like.
I typed out Sunflowers using font Before the Rain
Then I used AR Bonnie for the smaller Sunflower words, duplicate,
move how you prefer.

Add any other elements that you would like, make it your own.
Always readjust your mask and elements how you like them before you
 merge your tag, sharpen once.
Crop your tag to make sure no shadows or anything on the edges

 Then add your copyright and name.

That's it
Hope you enjoyed doing my tut.

Tuesday, July 7, 2020

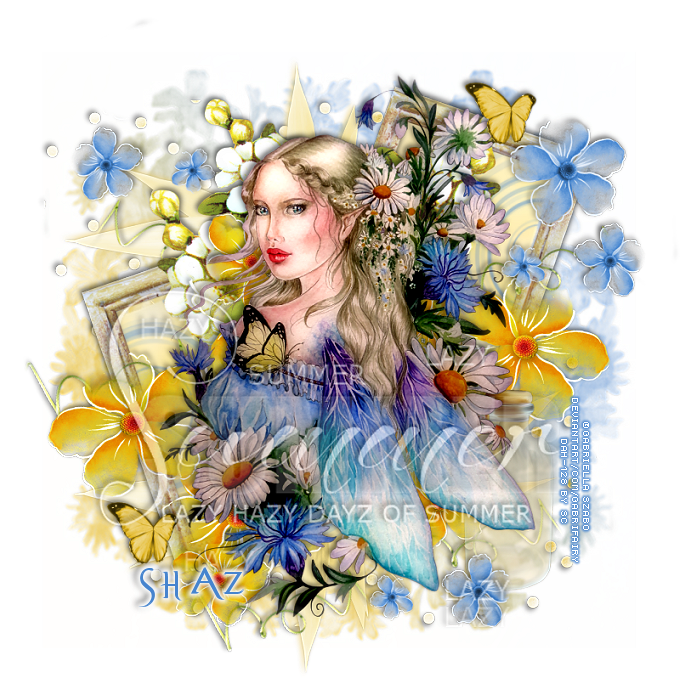
FTU Waiting for Summer


This tut was written July 7th, 2020 for those with a basic knowledge of psp.
I am using the awesome artwork of Gabriella Szabo
The tube is called "Waiting for the Summer"
You need a license to use this tube, do not use without a license.
You can find this tube at Digital Art Heaven store  HERE

I used PSPX...but any of them should work.
FTU kit No Blue without Yellow by Melissaz Creationz  HERE 
Check out the rest of the blog HERE
Mask of choice, I used Trese Mask 0459  HERE
Check out the rest of the blog HERE
Wordart by MizTeeques HERE
Check out the rest of the blog HERE
Filters
 xero-Bad Dream

Font of choice,  I used Evanescent

Drop shadow is  V-3 H-3 Black, 50, 8, use what you prefer.
Let's get started
*Remember to add your drop shadow as you go along*

Open a new image 800 x 800 or a size you prefer.
Paste paper 13, apply your mask, delete, merge group, resize smaller
to 85%.

Resize element 4 to 50%, paste at the upper right, duplicate, mirror, 
move down more on the left, click inside the frames, expand by 5, 
resize paper 1 to 75%, paste, invert, delete, select none.

Resize your tube to 80%, paste above the frames.
Apply the filter xero-Bad Dream

Paste element 6 below the tube and up on the right a little, duplicate, 
mirror, move below the first flower and down on the left.
Being on the top layer, paste element 2 at the upper right, duplicate, 
move down at the lower right below the yellow flowers, duplicate, 
mirror, move to the upper left, erase the large flower.

Paste element 5 above the mask layer at the upper left, duplicate,
flip, move down to the bottom.
Add a dark yellow drop shadow, I used #eac658.

Resize element 20 to 55%, paste on the mask at the upper left, duplicate,
flip, move to the lower right.
Resize element 3 to 50%, being back on the top layer, paste at to the lower
left, duplicate, move to the upper right.

Resize element 33 to 50%, free rotate to the right at 15 degrees, 
paste at the bottom below the yellow flower layer, erase the ends on each side,
duplicate, move over more. 
Duplicate a couple more times, move where you like.
Paste element 26 on the right below the tube, move the blue flowers at the bottom
to the top layer and erase the large blue one.

Paste the wordart on the top layer where you like, lower the opacity to 50%.

Add any other elements that you would like, make it your own.
Always readjust your mask and elements how you like them before you
 merge your tag, sharpen once.
Crop your tag to make sure no shadows or anything on the edges

 Then add your copyright and name.

That's it
Hope you enjoyed doing my tut.
Monday, July 6, 2020

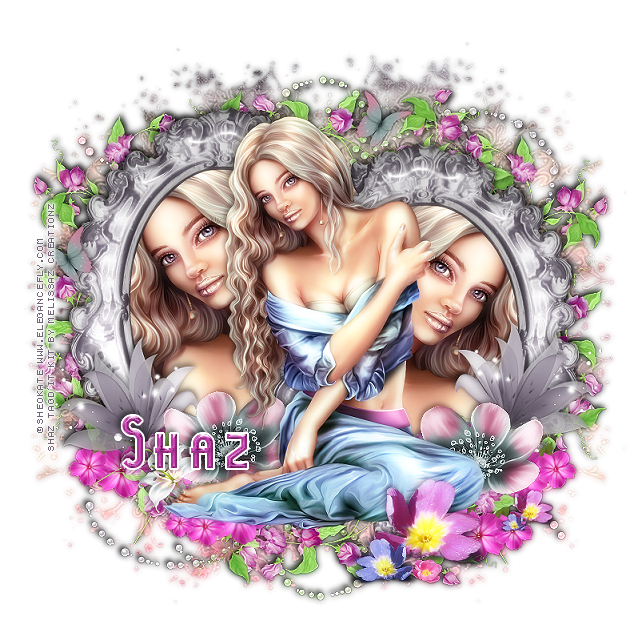
FTU Blossom Laura


This tut was written July 6th, 2020 for those with a basic knowledge of psp.
I am using the awesome artwork of Sheokate
The tube is called "Snail Laura"
You need a license to use this tube, do not use without a license.
You can find this tube at Elegancefly store  HERE

I used PSPX...but any of them should work.
FTU kit May Flowers by Melissaz Creationz  HERE 
Check out the rest of the blog HERE
Mask of choice, I used Trese Mask 0741  HERE
Check out the rest of the blog HERE
Filters
EyeCandy 4000-Glass
(Optional) xero-Soft Mood

Font of choice,  I used Lady Ice

Drop shadow is  V-2 H-0 Black, 50, 5, use what you prefer.
Let's get started
*Remember to add your drop shadow as you go along*

Open a new image 800 x 800 or a size you prefer.
Paste paper 4, apply your mask, delete, merge group, resize smaller
to 90%.

Paste element 2 the frame, apply Eye Candy 4000-Glass with these settings
Bevel width 30, Smoothness 75
30, 35, 50, 0, 50
Lighting 83, 57
100, 40, 0, 200
Highlight color white
Button 
Click inside with your magic wand, expand by 5, paste paper 9,  invert, delete,
keep selected, resize your tube to 50%, paste, delete, select none.
Merge the tube, frame and paper together, duplicate, mirror, move down
more on the right.

Resize your tube to 32%, paste above the frames, adjust the frames.

Resize element 33 to 75%, paste at the bottom below the frame layers,
duplicate, flip, mirror, adjust at the top.
Resize element 6 to 60%, paste at the bottom below the tube, duplicate,
free rotate to the left at 90 degrees, move to the right below the frame,
duplicate, mirror, duplicate, free rotate to the right at 90 degrees, move to 
the top.

Paste element 10 on the frame on the right, erase any stem below,
duplicate, mirror.
Paste element 19 on the right behind the tube, duplicate, mirror, adjust on
the left behind the tube.

Paste element 14 at the lower right above the tube, duplicate, resize to 
40%, move to the right more.

Resize element 27 to 40%, paste at the top below the tube layer, duplicate, 
mirror, move where you like.
Resize element 3 to 25%, mirror, paste at the lower left below the foot of the tube.

Resize element 17 to 75%, paste at the lower right below the flower, 
duplicate, move down and to the left a little, duplicate, mirror, 
duplicate once more, resize to 75%, move below the tube by the foot.

Add any other elements that you would like, make it your own.
Always readjust your mask and elements how you like them before you
 merge your tag, sharpen once.
Crop your tag to make sure no shadows or anything on the edges

(Optional)
Close off any white background if you used one, merge the tag, 
duplicate, go to Adjust, Blur, Gaussian blur, number on 4, change the 
blend mode to Screen.

Apply the filter Soft Mood twice, merge visible, sharpen.

 Then add your copyright and name.

That's it
Hope you enjoyed doing my tut.