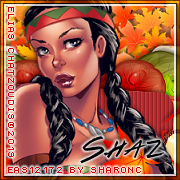
I am using the awesome artwork of Elias Chatzoudis
The tube is called "Gudahi"
I bought mine when he still had his store, it is closed now.
I bought mine when he still had his store, it is closed now.
You need a license to use this tube, do not use without a license.
You can find this tube at CDO store HERE
Font of choice, I used Colors of Autumn
Drop shadow is usually V-2 H-2 Black, 50, 5, use what you prefer.
Let's get started
*Remember to add your drop shadow as you go along*
Open your template, hold the shift key and letter d to duplicate,
close the original.
Go to Image, Canvas size and make it 800 x 800, I like room to work.
Select all, being on the bottom layer where the white layer is closed off,
paste into selection, select none.
Apply your mask, delete, merge group.
Merge layer 2 down with 1, select all, float, defloat, resize paper 3
to 75%, paste, adjust where you like, invert, delete, select none.
Delete the template layer on each one that you use.
Select layer 3, fill with a darker color from your tube, I used #602523,
add noise at 50%.
Resize element 22 to 45%, paste on layer 4 to the left, duplicate, mirror.
Move the lighter layer that is behind up a little more.
Leave layer 5 as is, it wont be showing.
Layer 6 and 7 free rotate to the left at 20 degrees, move up a little,
select layer 6, paste paper 2, invert, delete, keep selected, resize your
close up tube to 85%, paste, delete, select none.
Change the blend mode to Overlay or one you prefer.
Change the white frame to a color from your tube, I used #833325,
add noise at 50%.
Do the same with layers 9 and 10, only rotate to the right.
Layer 8, select a color and fill, then go to Effects, Texture Effects, Blinds
with these settings
5, 25, bottom box checked, color black.
Resize element 12 to 50%, paste on the mask layer to the right,
duplicate, mirror.
Paste your tube on the top layer centered.
Resize element 4 to 30%, paste behind the tube on the right, duplicate,
mirror.
Resize element 5 to 40%, paste at the bottom above the tube.
Resize element 24 to 20%, paste behind the tube on the left.
Resize element 19 to 25%, paste at the lower left above the tube.
Resize element 1 to 20%, paste at the bottom above the turkey plate layer.
Resize element 26 to 15%, paste at the lower right.
Resize element 15 to 15%, paste at the bottom by the pie.
Resize element 27 to 25%, paste at the bottom below the cup.
Resize element 25 to 25%, paste above the tube on the right, duplicate, mirror.
Resize element 6 to 25%, paste on the upper right above the tube,
duplicate, mirror, move below the tube.
Resize element 14 to 10%, paste at the lower left below the straw bundle.
Resize element 23 to 10%, paste at the lower left above the apple.
Resize element 9 to 6%, paste at the bottom by the cup.
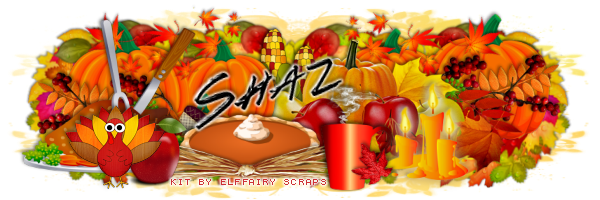
If you want to do the Signature tag do not merge yet.
Open a new layer 600 x 200
Take the elements one at a time, resize most to 70%, or smaller,
whatever looks good to you and place how you like.
Once happy with it, merge, add your name and copyright or kit credits.
Ava is 180 x 180, cope the tag, adjust how you like,
merge visible and frame of choice.
I used AAA Frames-Foto Frames
Add all credits.
Add any other elements that you would like, make it your own.
Always readjust your mask and elements how you like them before you
merge your tag.
merge your tag.
Crop your tag to make sure no shadows or anything on the edges, merge visible.
Then add your copyright and name.
That's it
Hope you enjoyed doing my tut.


No comments:
Post a Comment