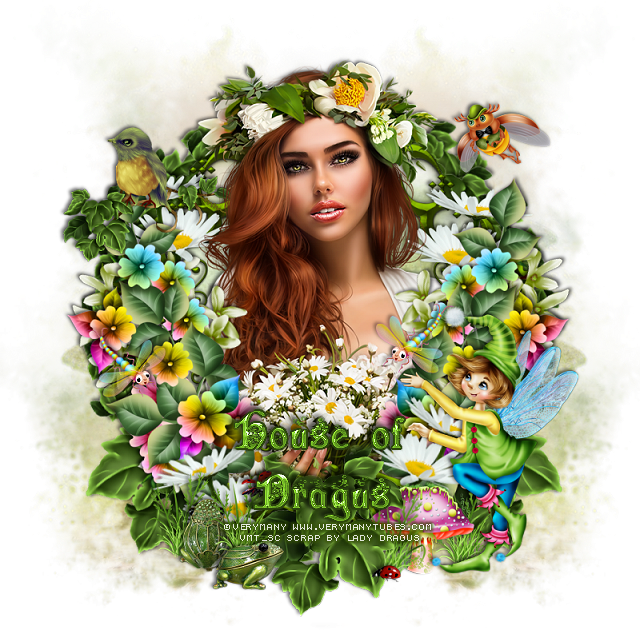
I am using the awesome kit "Mom's Flower Garden" by Lady Dragus
I am using the awesome artists ©Verymany
Tube is called Bride 3
Tube is called Bride 3
This kit is exclusive at ADU
You can find this kit at ADU Store HERE
You can find the matching Clusters to the kit HERE
You can find the tube at Verymany Store HERE
I used PSPX...but any of them should work.
Font of choice, I used Fairies Gone Wild
Drop shadow is usually V-2 H-2 Black, 50, 5, use what you prefer.
Let's get started
*Remember to add your drop shadow as you go along*
Open a new image 800 x 800
Paste paper 5, apply your mask, delete, select none, duplicate, merge down.
Duplicate the mask, mirror.
Resize frame 4 to 75%, paste, take your free hand tool, draw around
the frame, paste paper 5, invert, delete select none.
Resize element 14 to 25%, apply Mura Meister Copies-Encircle,
first number on 14, move below the paper layer of the frame.
Duplicate, free rotate to the right at 90 degrees.
Resize both circles larger to 105%.
Resize element 21 to 70%, paste on the frame on the left, erase the
stem, duplicate, mirror.
Resize element 35 to 40%, paste on the right below the flowers, duplicate, mirror,
duplicate, move to the bottom and on the top layer, free rotate to the
left at 15 degrees, erase the stems, duplicate, mirror.
Resize element 14 to 35%, paste at the bottom, duplicate, free rotate to the
left at 35 degrees, move to the right a little and below the paper layer
of the frame, duplicate, mirror.
Resize element 12 to 65%, free rotate to the left at 25 degrees, paste on
the frame on the left, duplicate, mirror, erase and stem showing
at the bottom.
Resize element 13 to 35%, paste at the upper left being on the top layer.
Resize your tube to 75%, paste below the frame, duplicate,
move to the top layer, erase the parts of the tube you don't want to keep.
Resize element 29 to 60%, mirror, paste at the lower right.
Resize element 22 to 15%, paste by the elf, duplicate, mirror.
Resize element 16 to 15%, paste at the upper right.
Resize element 18 to 20%, paste at the bottom below the elf.
Resize element 52 and 59 to 15%, paste at the lower left.
Resize element 41 to 20%, duplicate a couple of times and place at the
bottom where you like.
Resize element 46 and 47 to 15%, paste at the bottom on the leaves.
If you want to do a Signature tag and Avator, do not merge just yet.
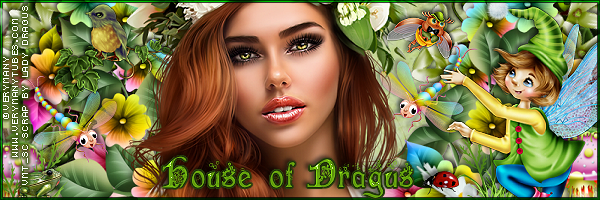
Signature tag
600 x 200
Close off the tube and elf, copy merge, paste on the signature tag, duplicate.
Being on the bottom one, go to Adjust, Blur, Motion Blur,
Strength 100, angle 85, then go back to the angle and change it too 275.
Go back to the top layer, then go back to your tag, copy your tube, place
how you like.
Open the elf, copy from the tag to the signature tag on the right, resize to
85%.
Copy and paste the mushroom behind the elf, resize to 75%, duplicate, mirror.
Copy the bee, resize to 75%, mirror, paste at the upper right.
Copy and paste the bird to the upper left, resize to 60%, move below the tube.
Paste any other elements you like, merge visible.
Add a frame of choice, I used AAA Frames-Foto Frame, width on 3,
and the Green and Black on the drop down list, and lowered the opacity to 75.
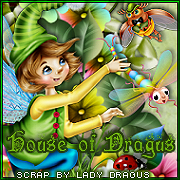
Avator
180 x 180 or size of choice.
Copy your signature tag, mirror, move until the elf shows, sharpen, merge
visible, add the same frame as before.
Add any other elements you would like, make it your own.
Always remember to adjust the elements and mask,
before merging to get them like you like.
before merging to get them like you like.
Once happy with your tag, close off any background, crop your tag to make
sure there are no stray edges, merge visible, resize first.
Add your copyrights and name.
That's it
That's it
Hope you enjoyed doing my tut.


No comments:
Post a Comment